

1 New project
Let’s launch the IDEA StatiCa Connection application (download the newest version). Create a new project by selecting the template closest to the required design. Select the desired steel grade (S355) and the design code (EN). You can also fill in the name and description of the project.
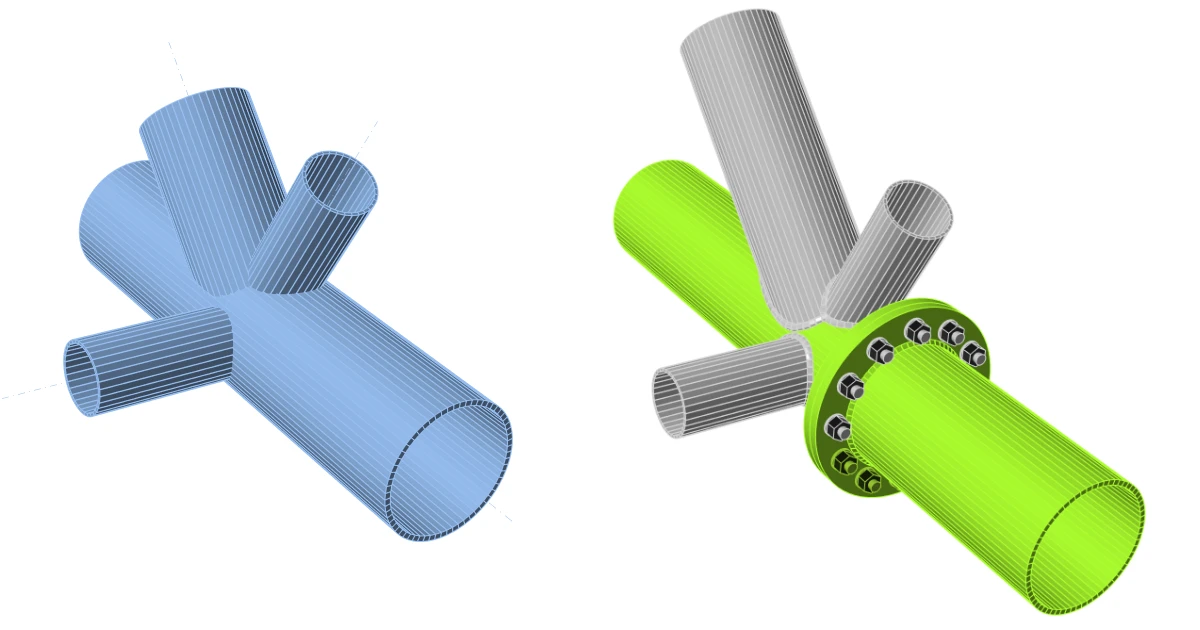
As there is no suitable template directly, we will use the empty project with predefined geometry only. Therefore, press the Create blank design button.
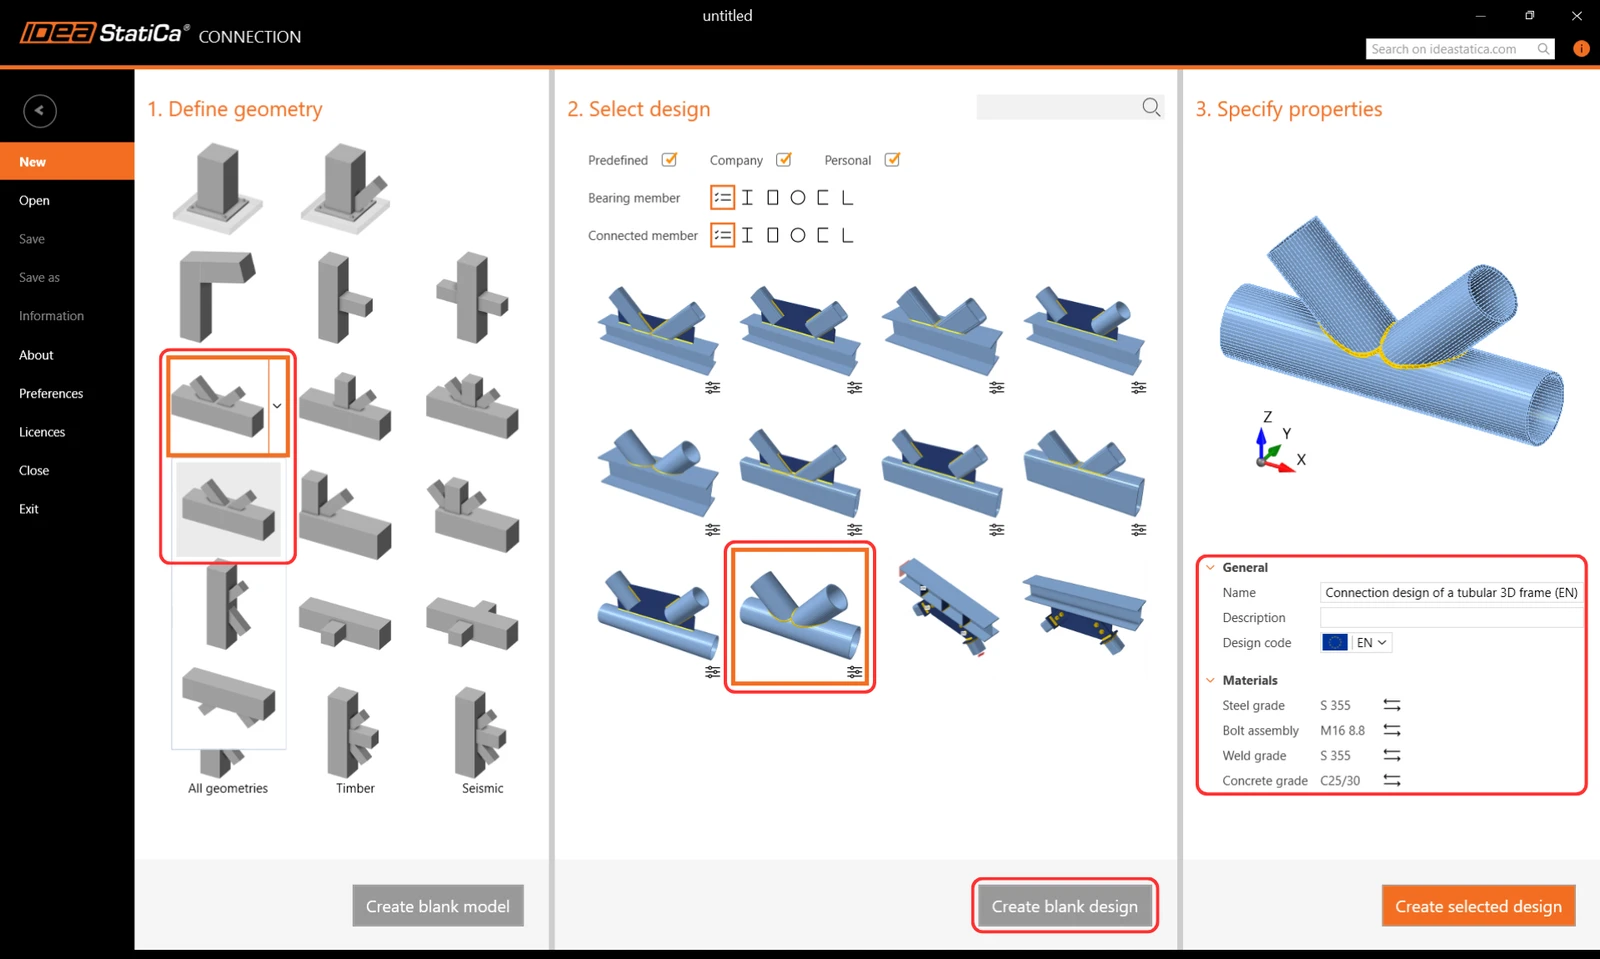
2 Geometry
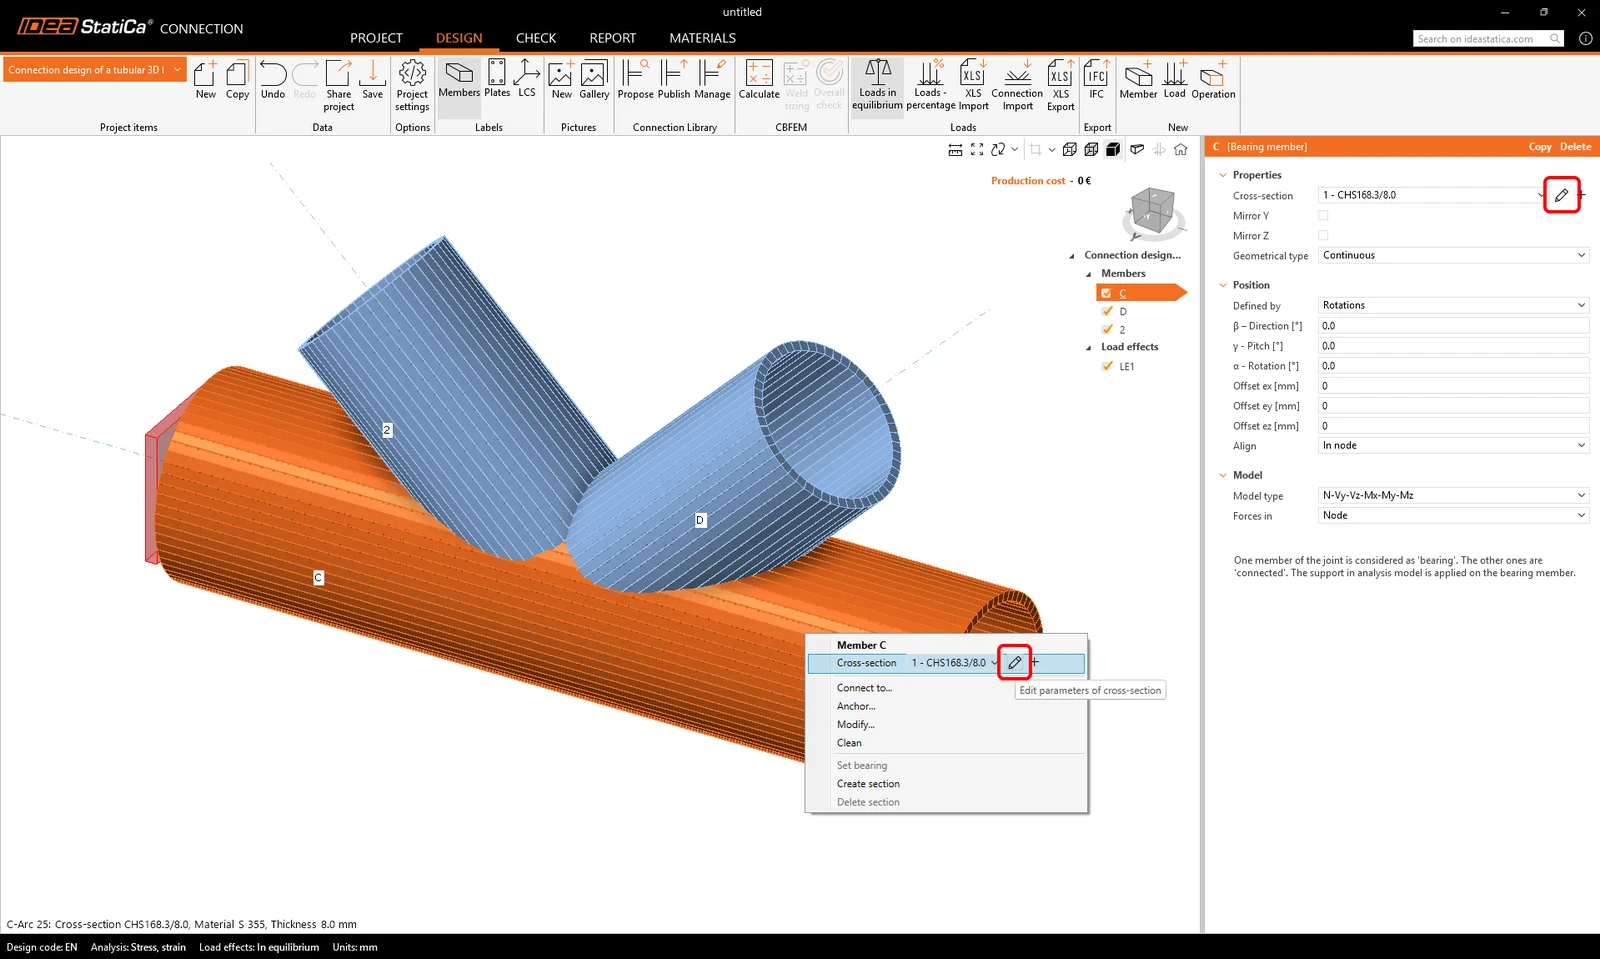
Start with the modification of the joint geometry. Right-click on the continuous beam in the 3D scene (or using the button in the list of properties) opens the context menu with all available actions for the beams. Use the pen button to edit the existing cross-section.
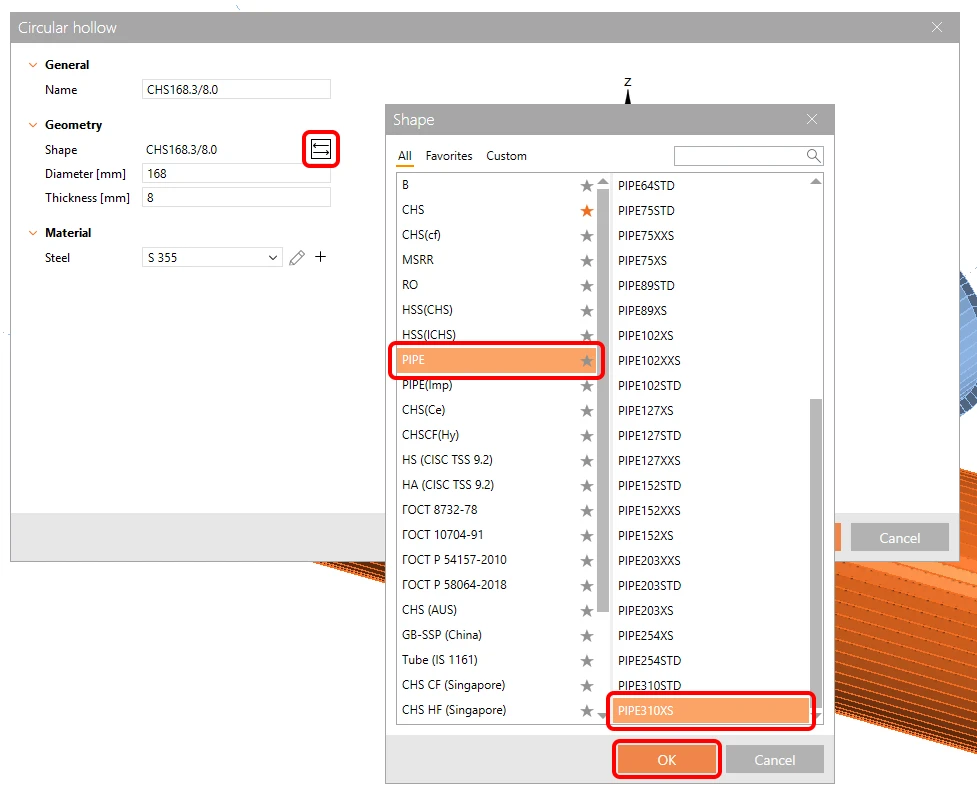
Open the library and select the PIPE310XS cross-section. Confirm with OK.
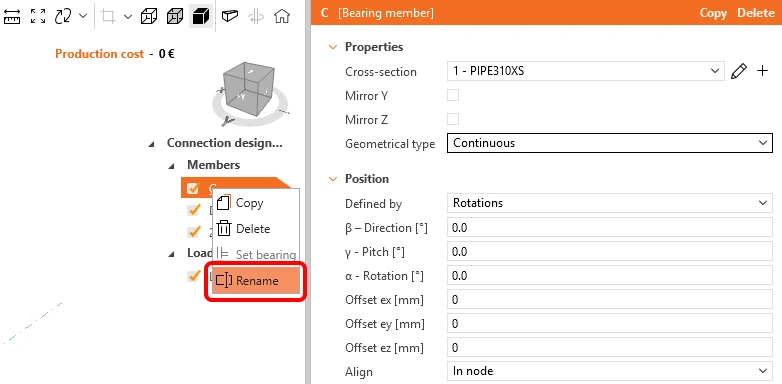
Change the member's name to C1 using the right-mouse button.
And change the geometrical type of C1 member from continuous to ended.
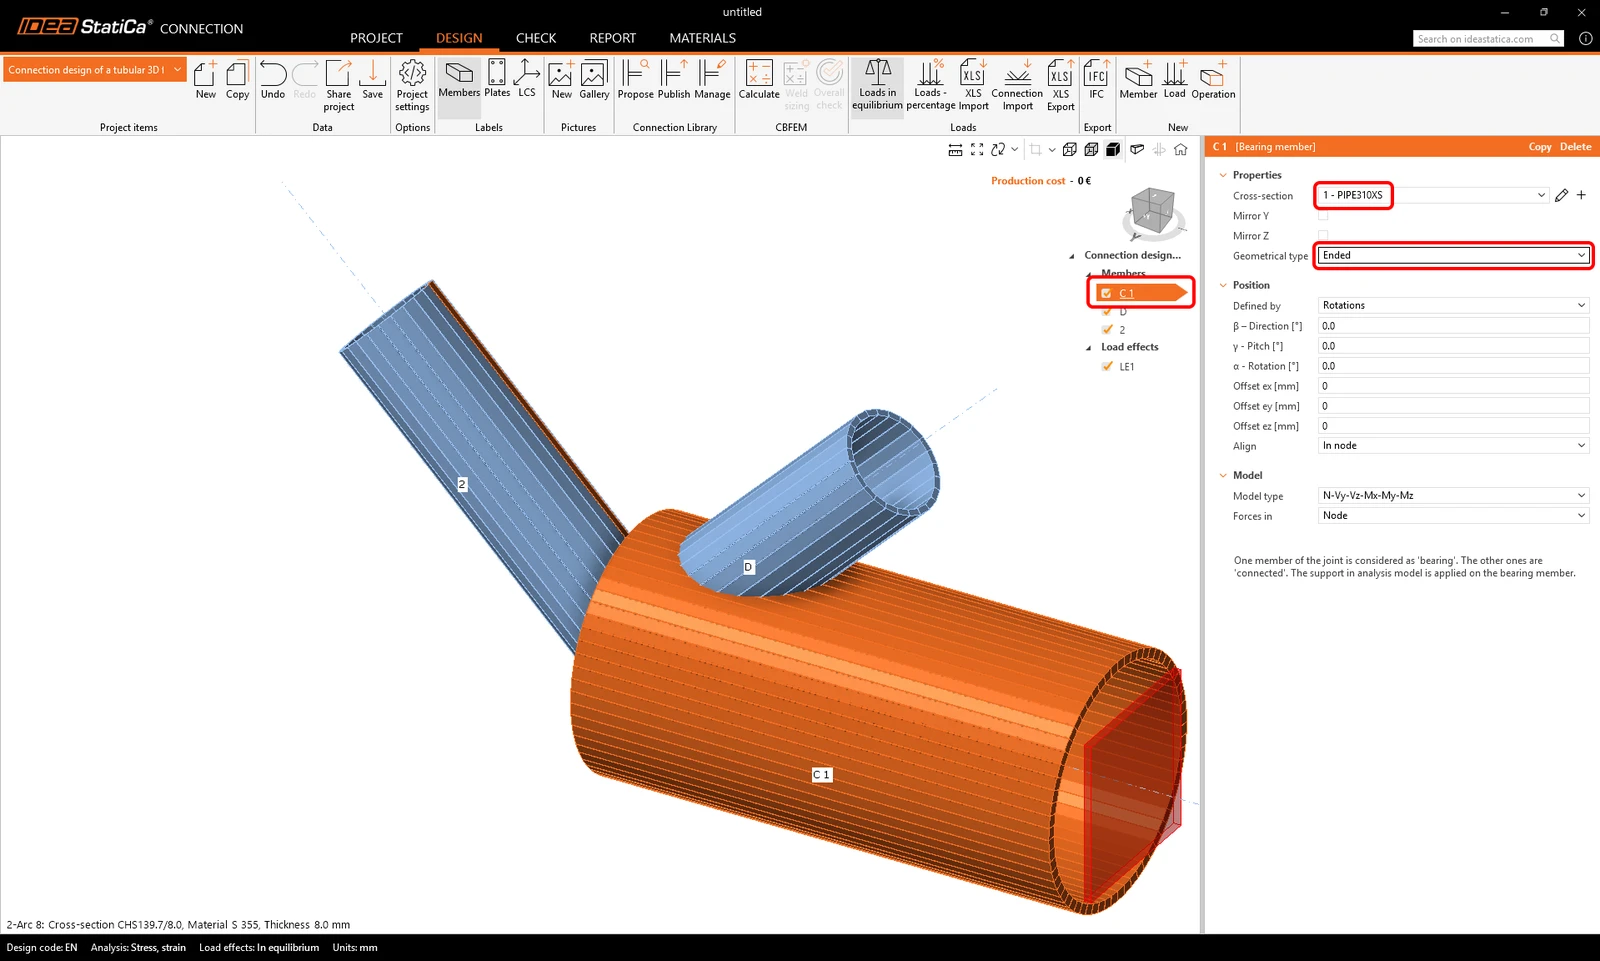
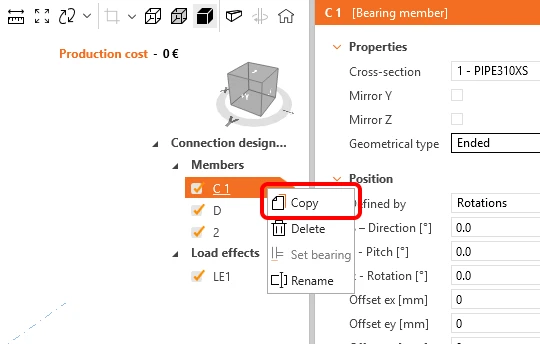
Take advantage of the prepared member and copy it: Click the right-mouse button at the C1 item on the list of the entities and select Copy command.
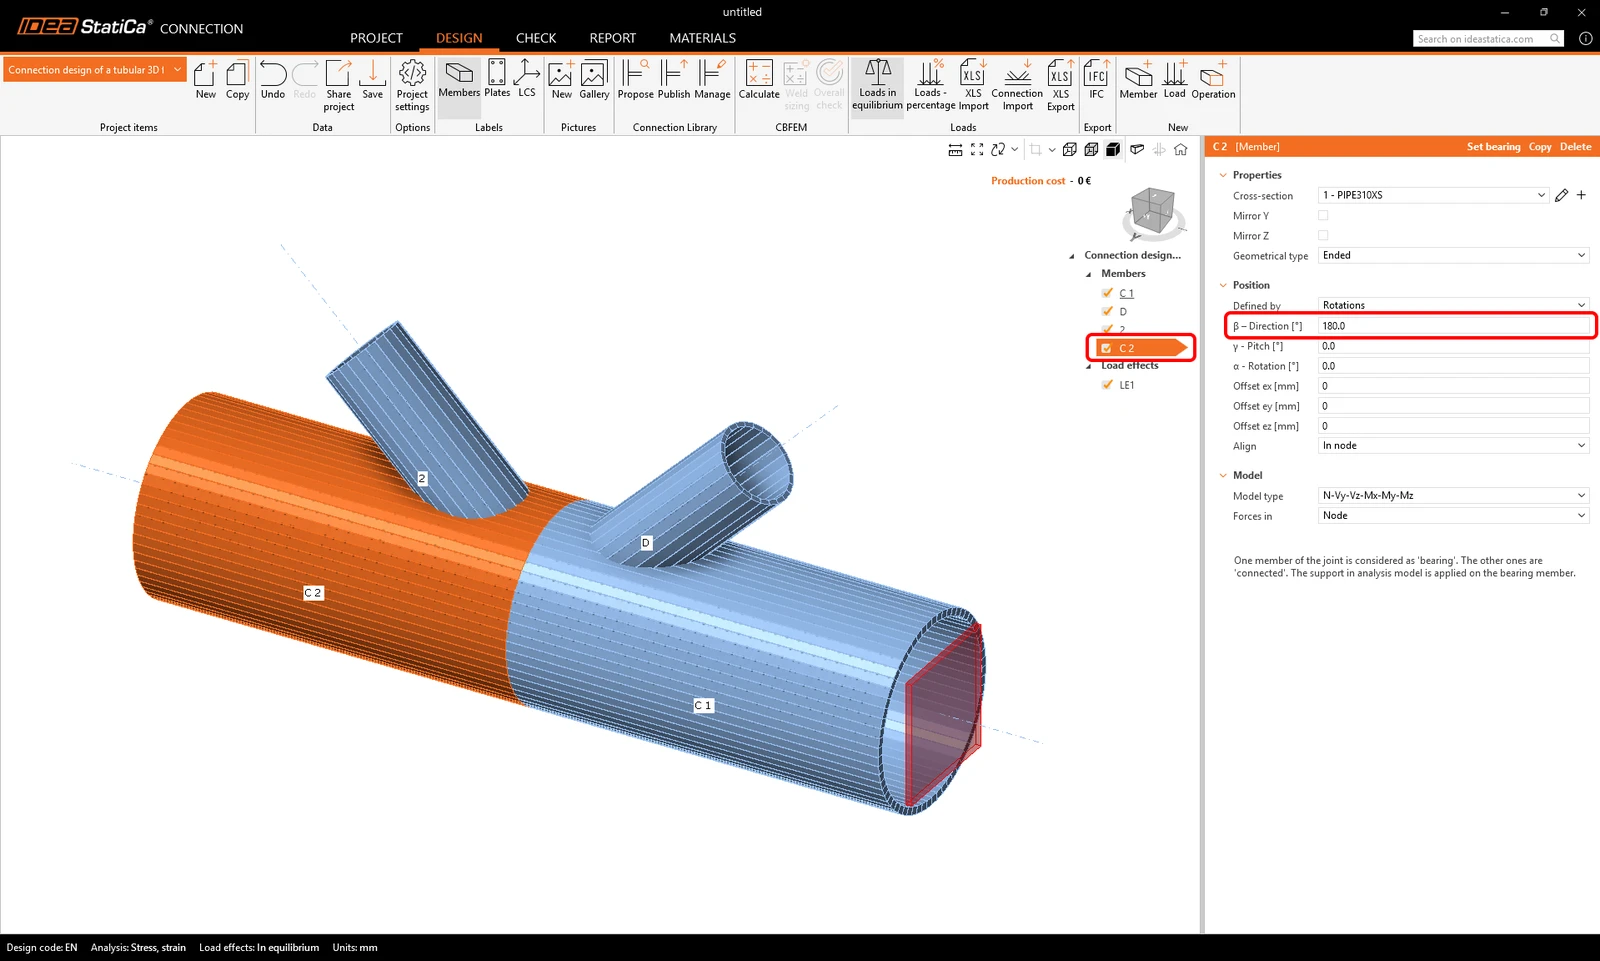
Rename the newly added member to C2 and set its direction (beta) to 180°.
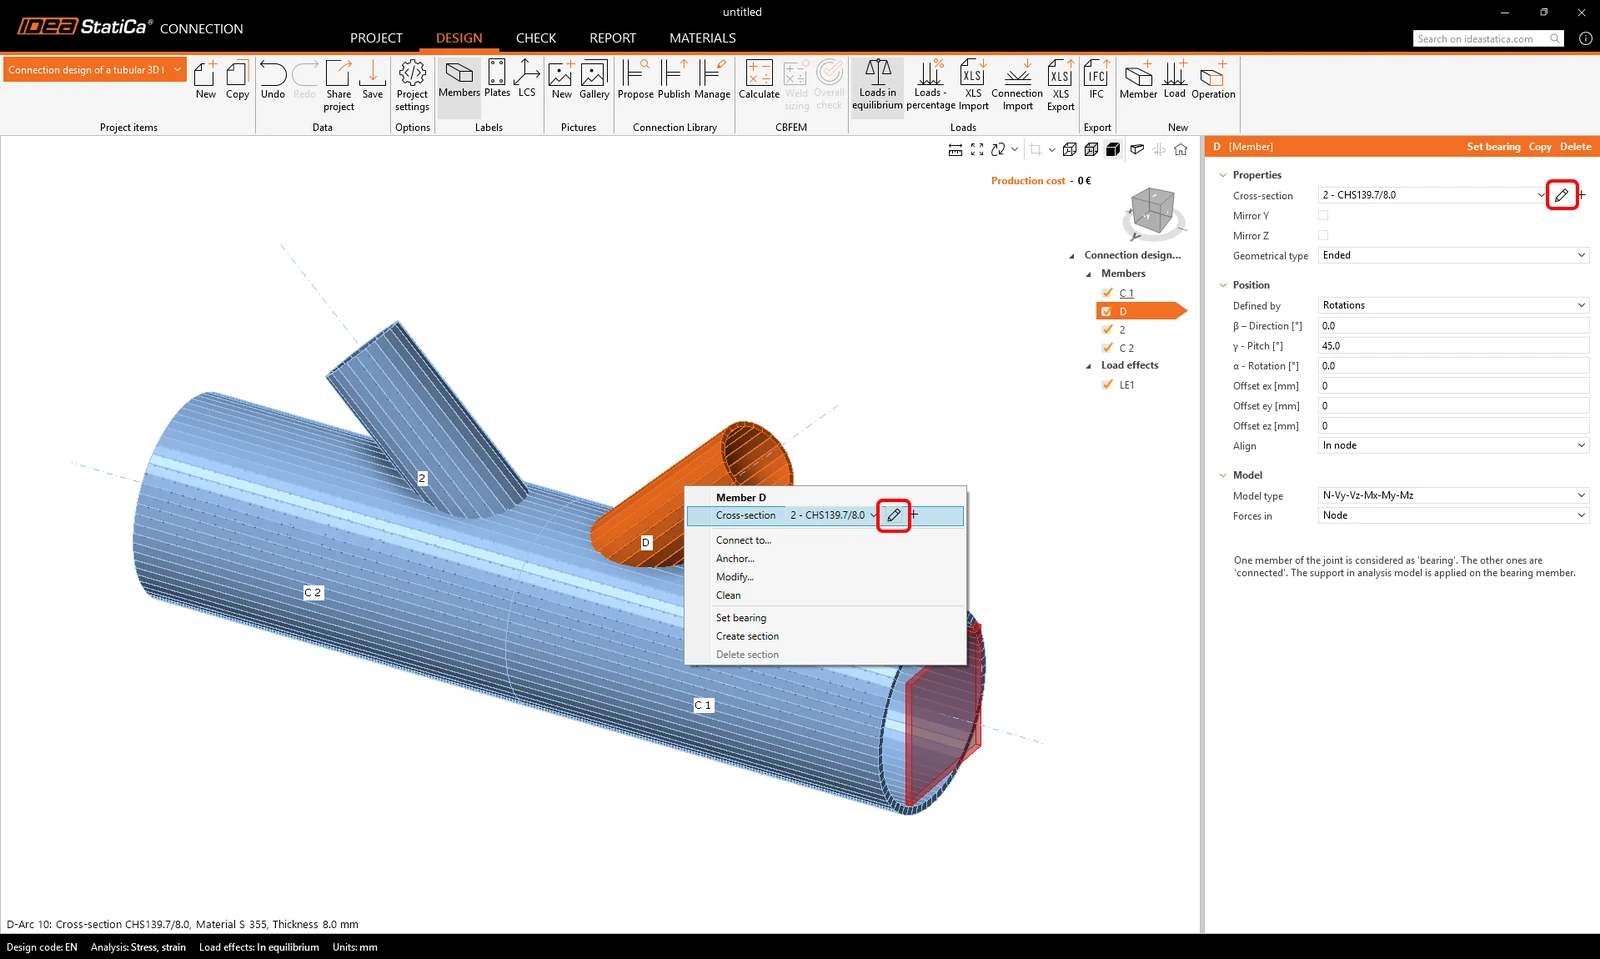
Proceed with the change of cross-section on the diagonals.
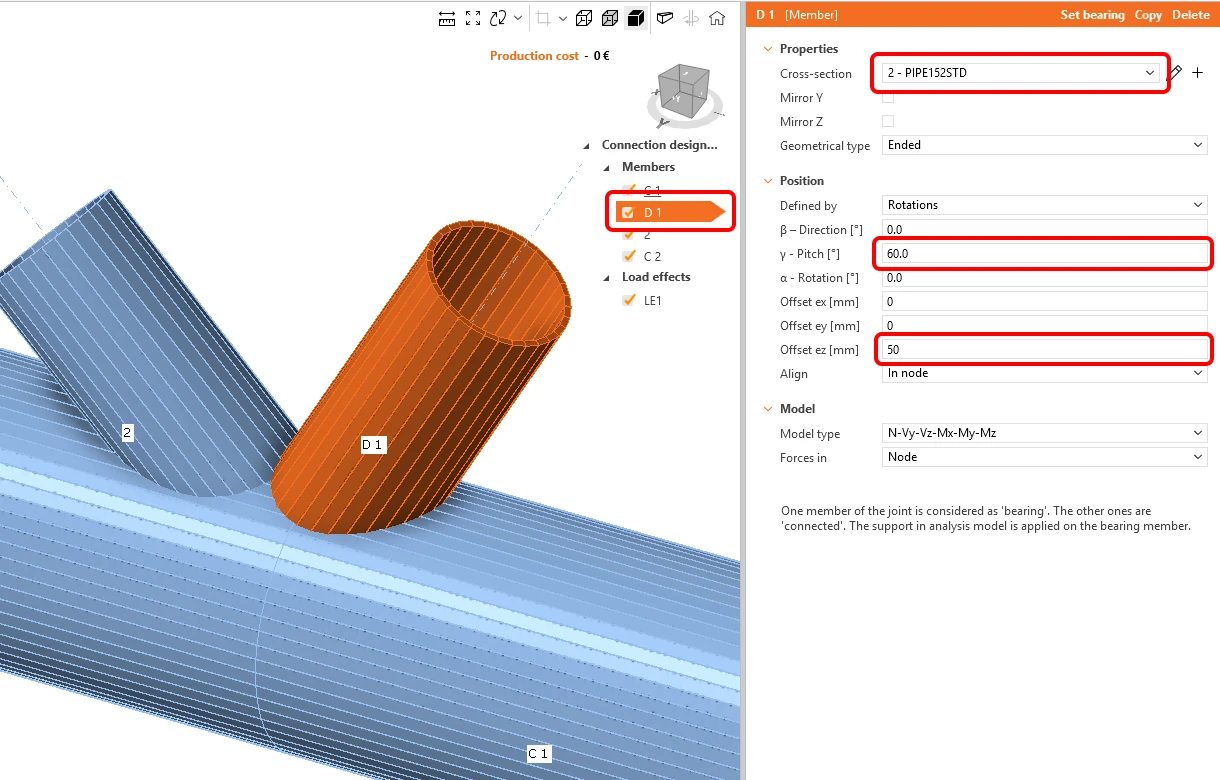
Click the right-mouse button on the member D in the 3D window and choose pen to change the cross-section size. Select the PIPE 152STD cross-section.
Rename the member to D1 and change its properties as shown in the picture below.
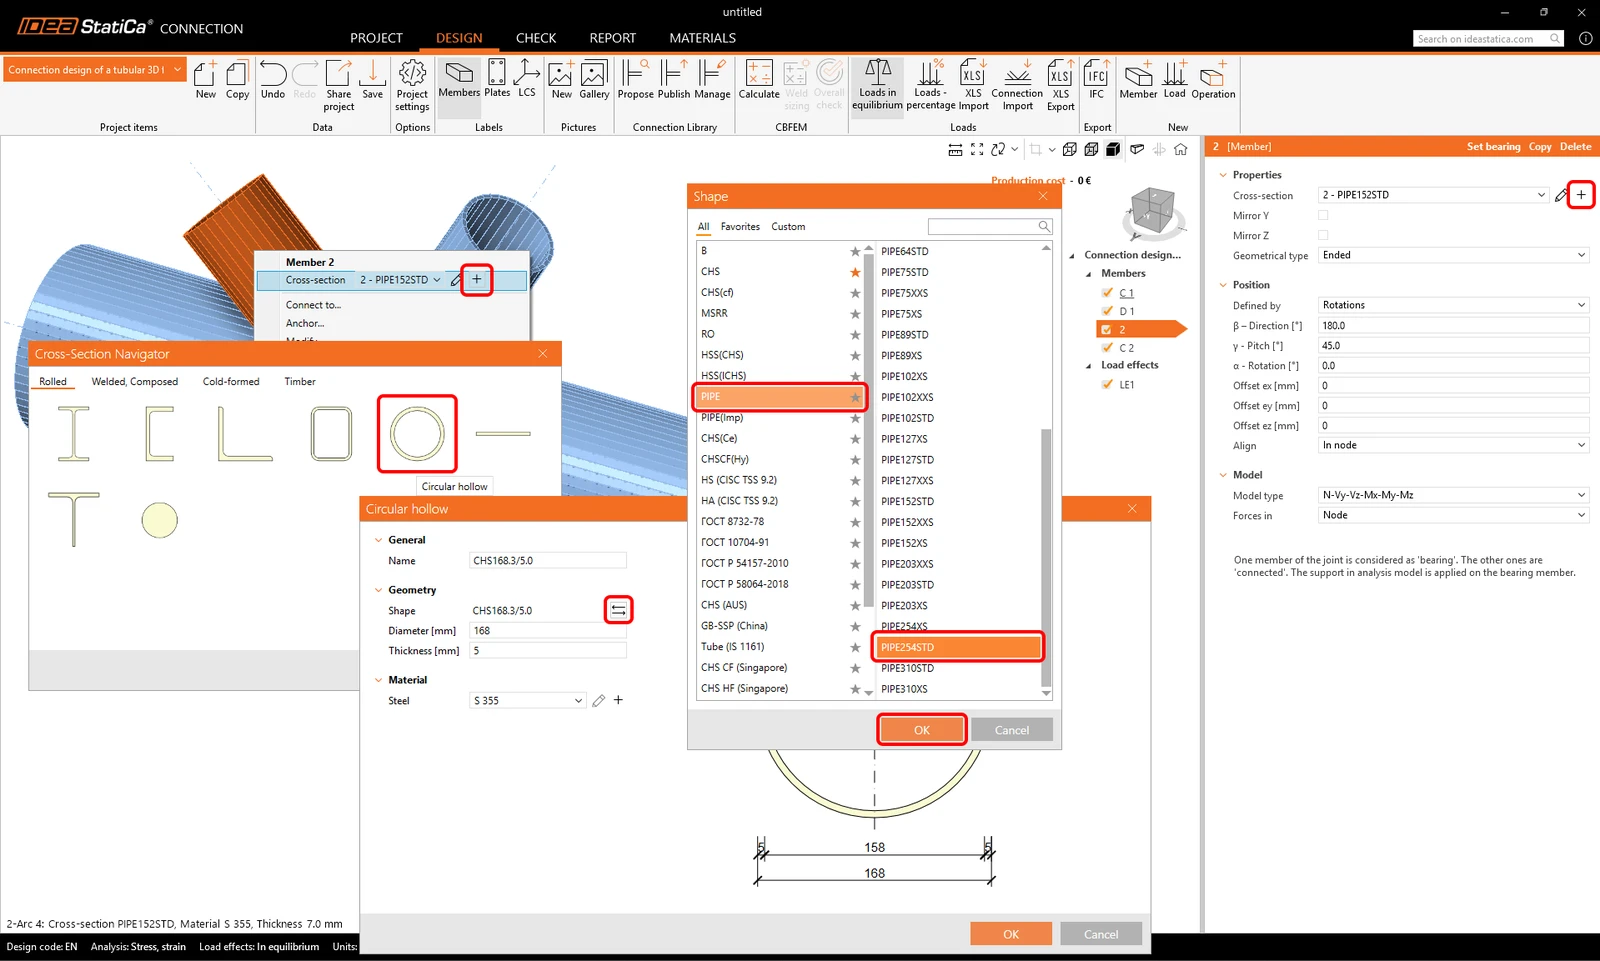
Proceed to the second diagonal member. Use the plus button to define a new cross-section and choose PIPE 254STD from the library.
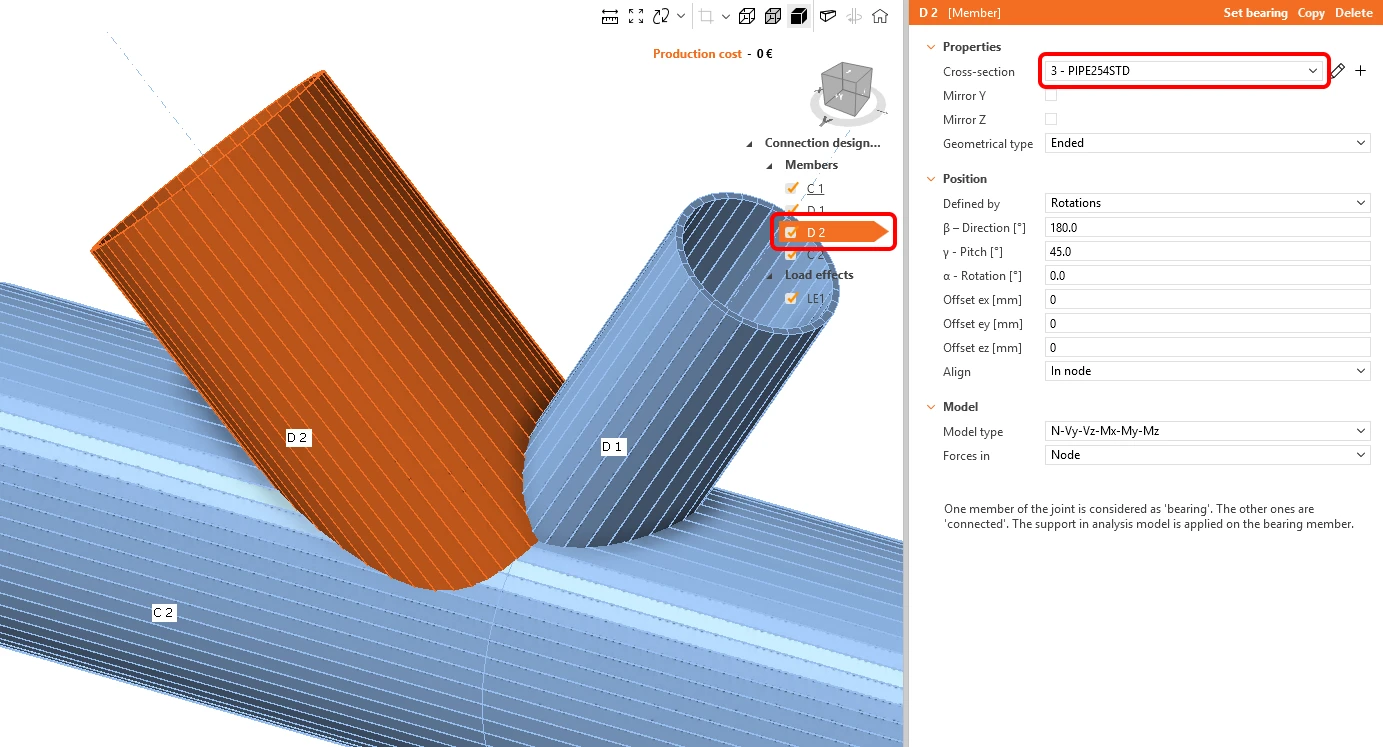
Change the member name to D2.
Now add another member – you can do it using the new Member button from the top ribbon.
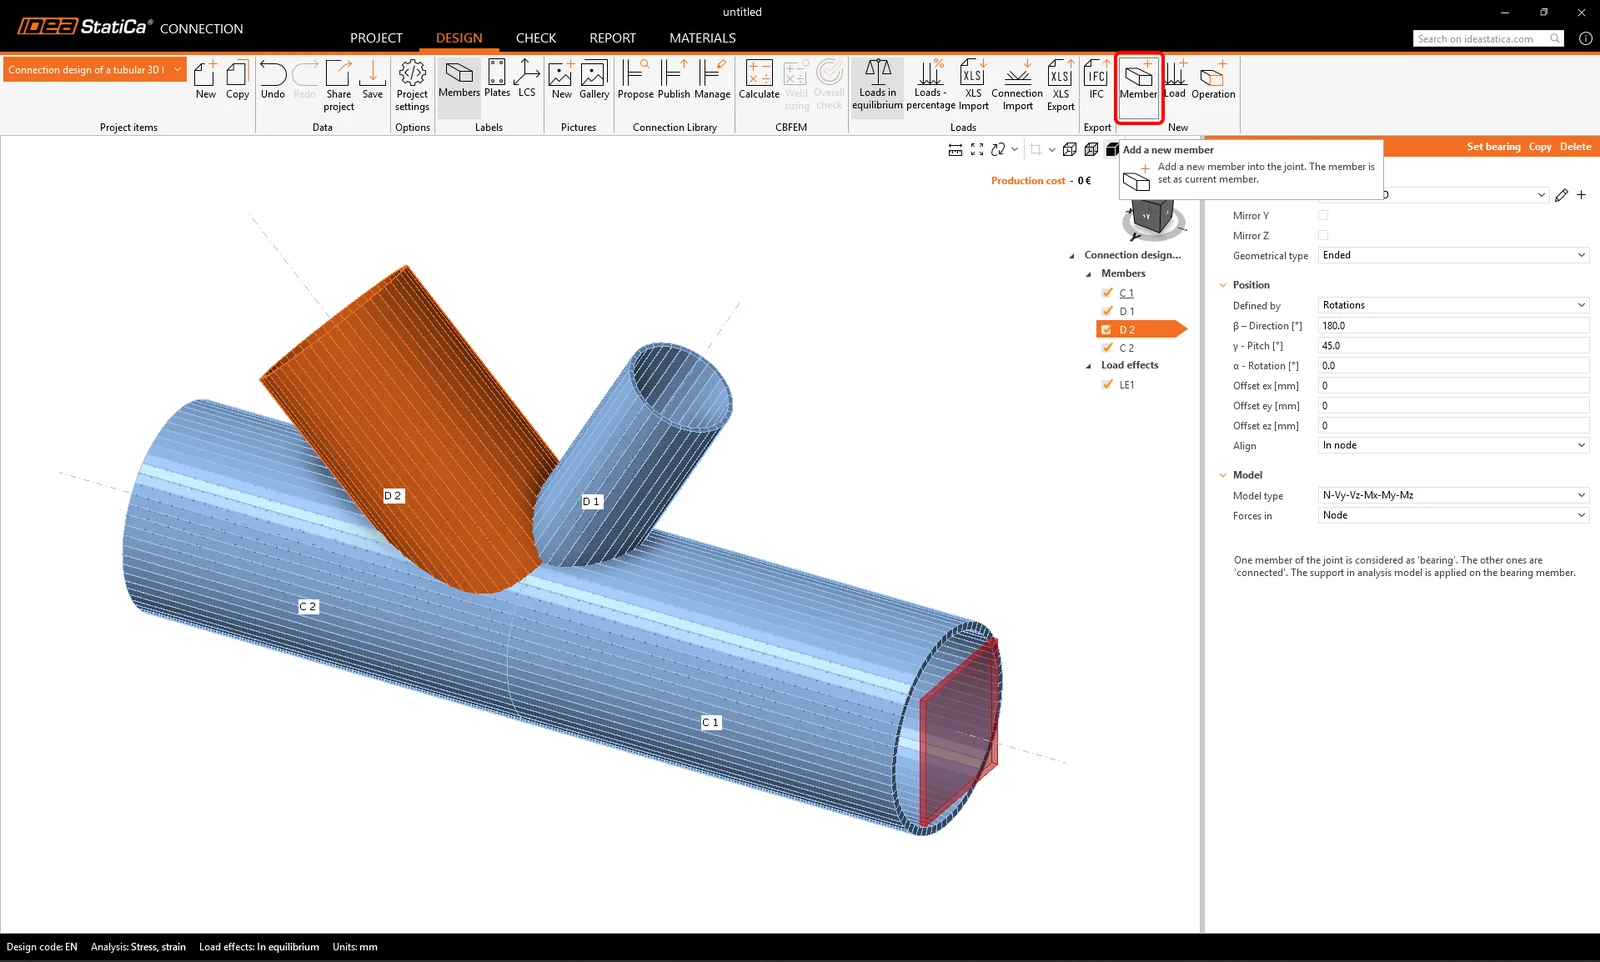
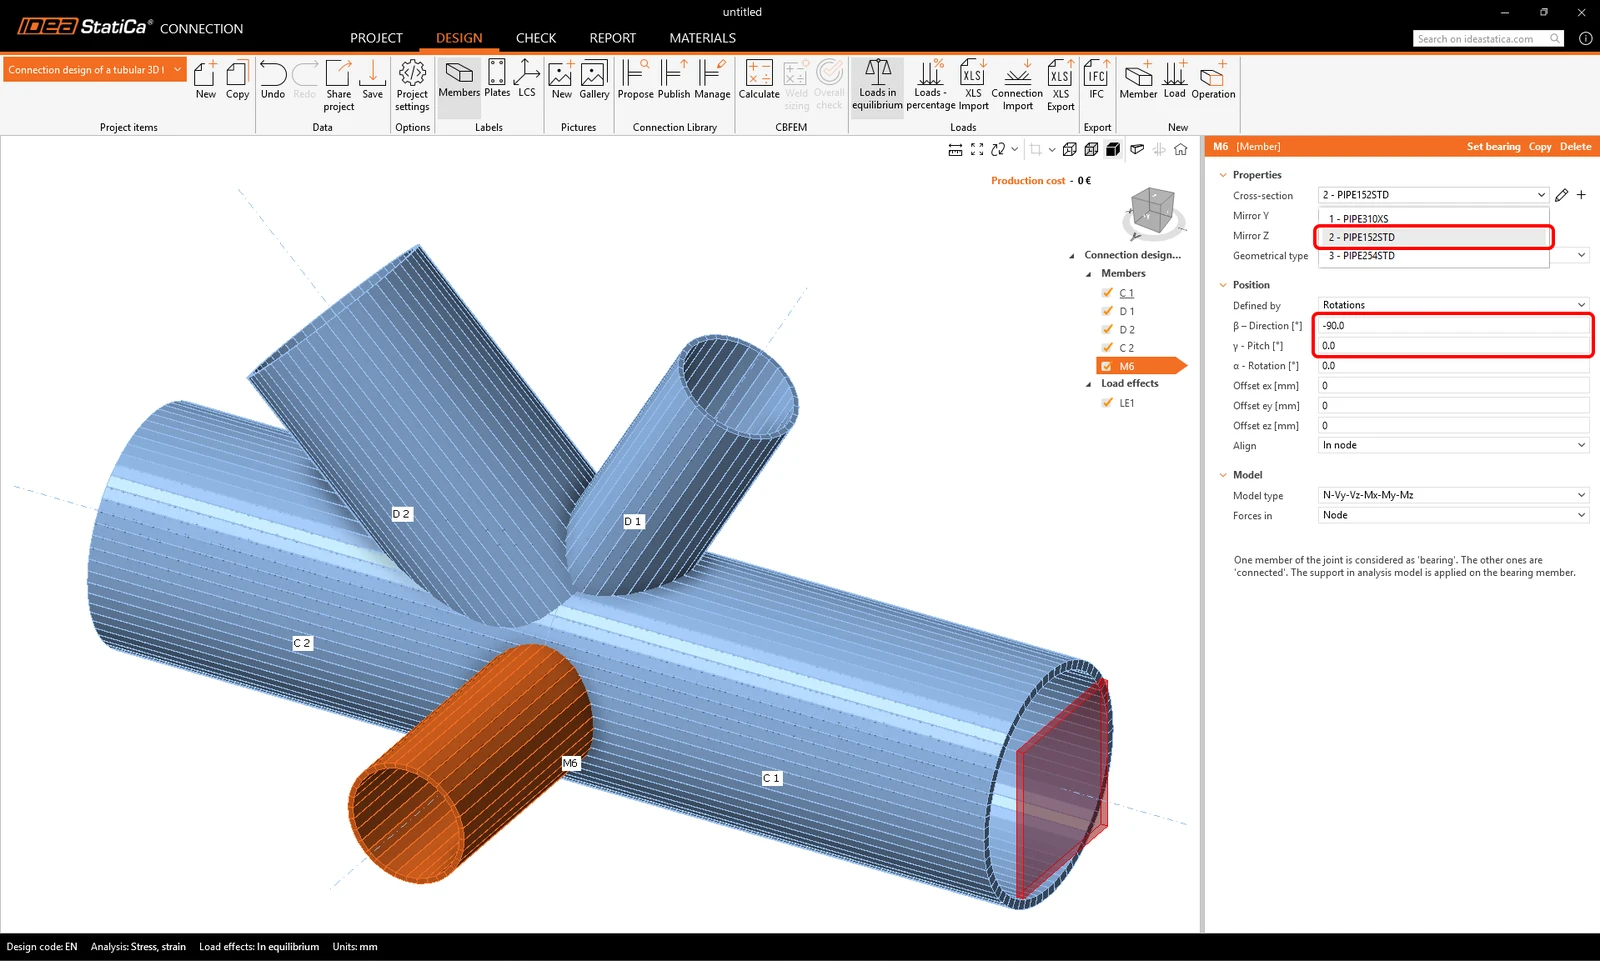
Now you can change the properties of the new M6 member: cross-section: PIPE 152STD, direction beta = -90 °, pitch gamma = 0.
3 Load effects
Continue with the Load effects. One load effect was automatically added. You need to input all internal forces into the table. The Loads in equilibrium option is automatically turned on. You can either type in each value manually or copy/paste the whole tab of internal forces from an Excel file.
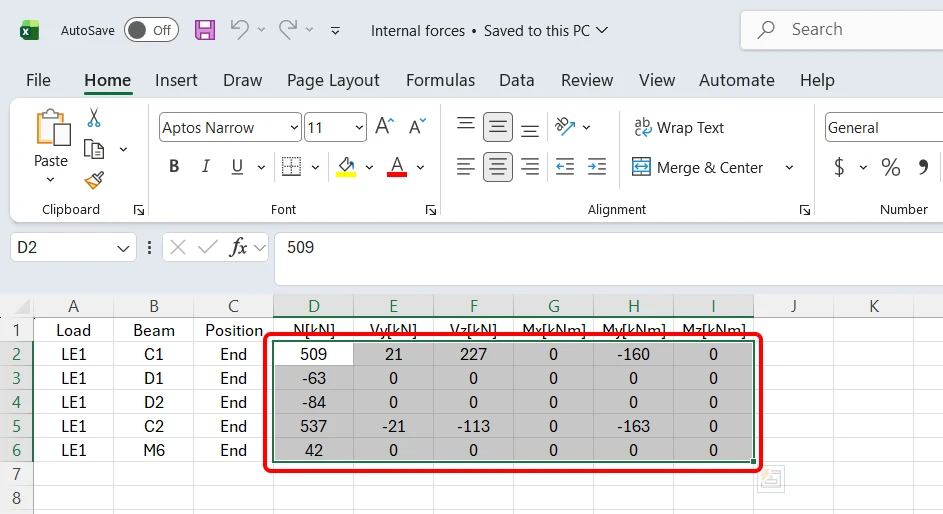
Open the Excel file Internal forces.xlsx, select the whole range of internal force values in the tab, and copy them.
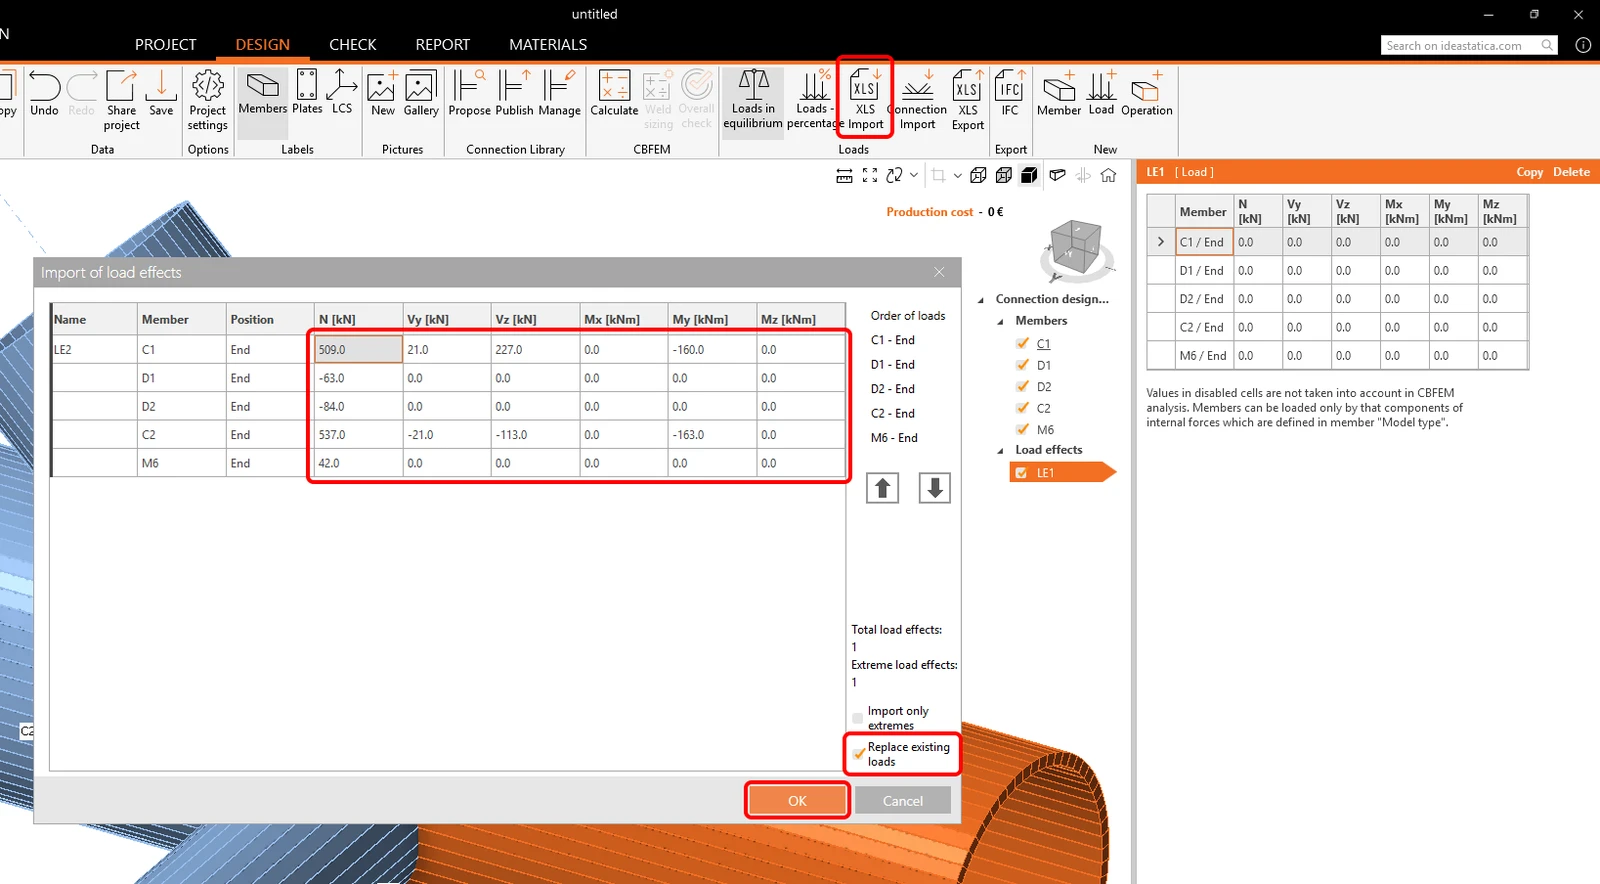
Paste the values using the XLS Import button into the cell in the first row and the column N [kN]. Check the Replace existing loads box.
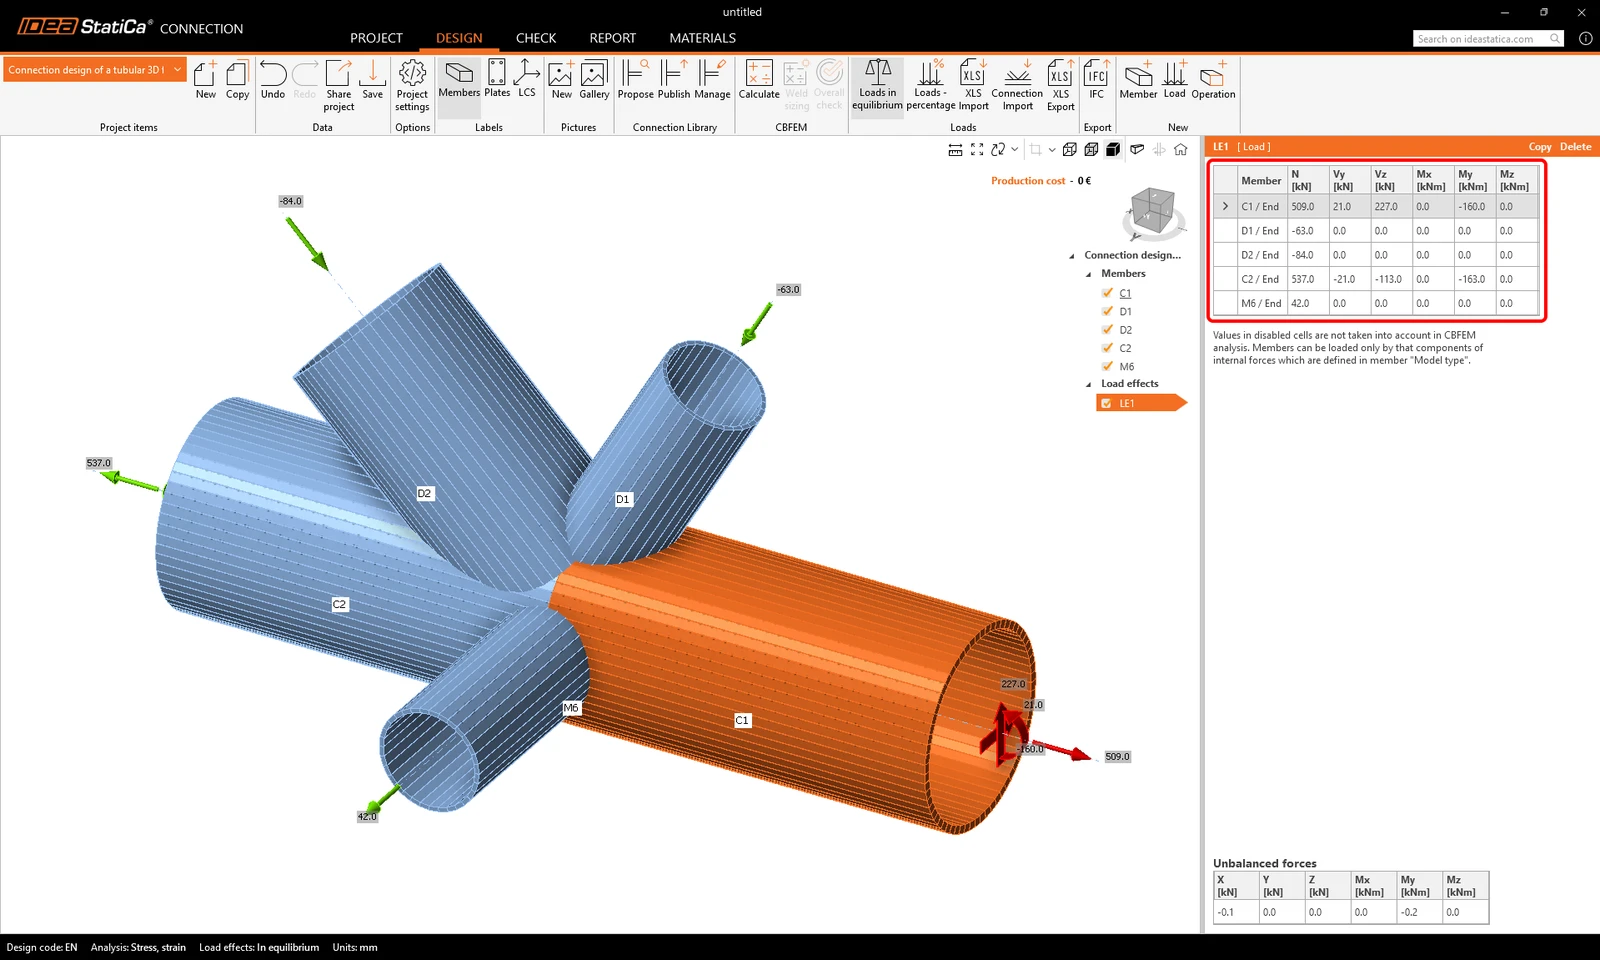
The forces were applied to the model, and it is ready to be designed.
4 Design
We will combine the template from the Connection Library with additional manufacturing operations.
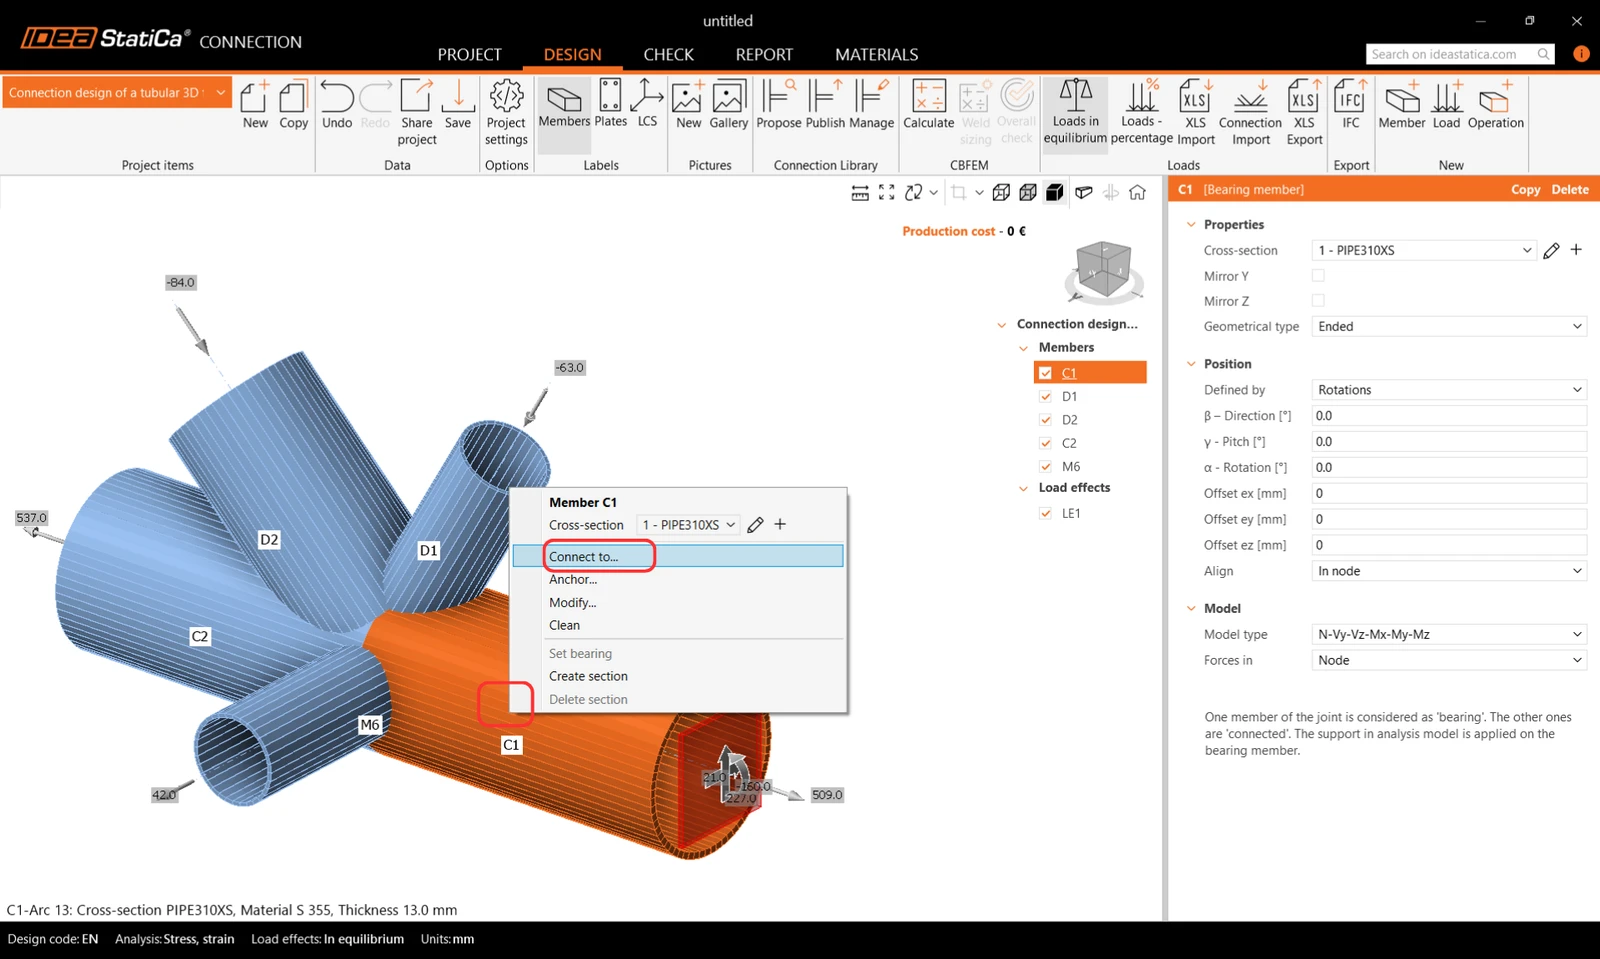
Start with the right-mouse click on the member C1 in the 3D scene. Choose the Connect to command from the context menu.
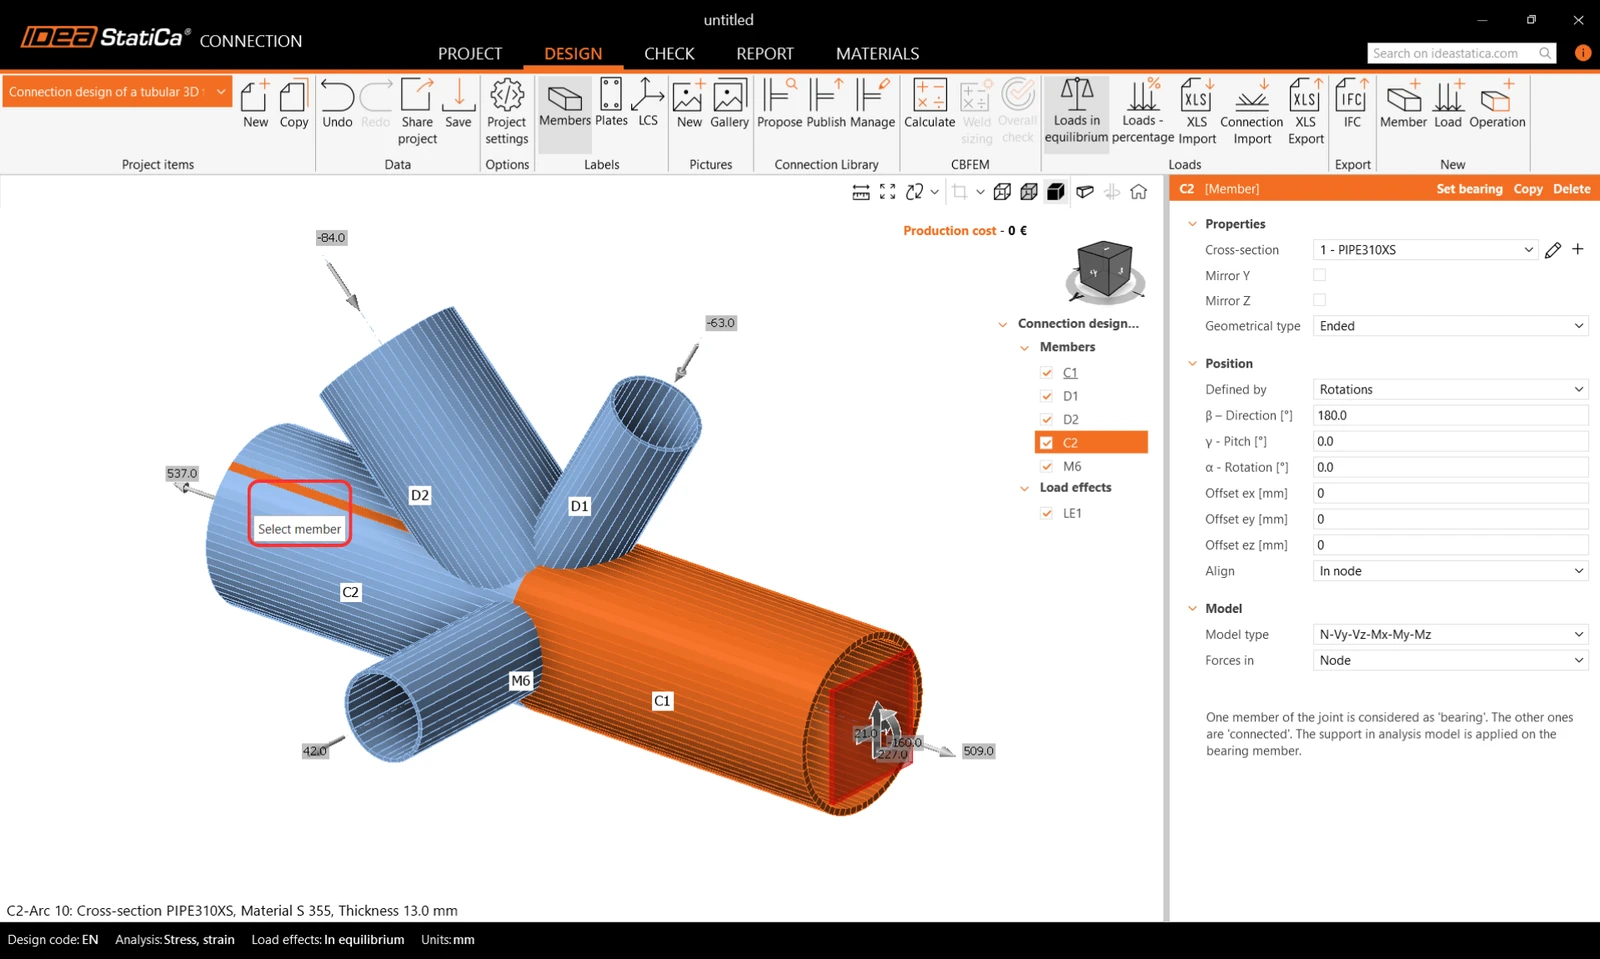
Now choose the second member to connect to (member C2).
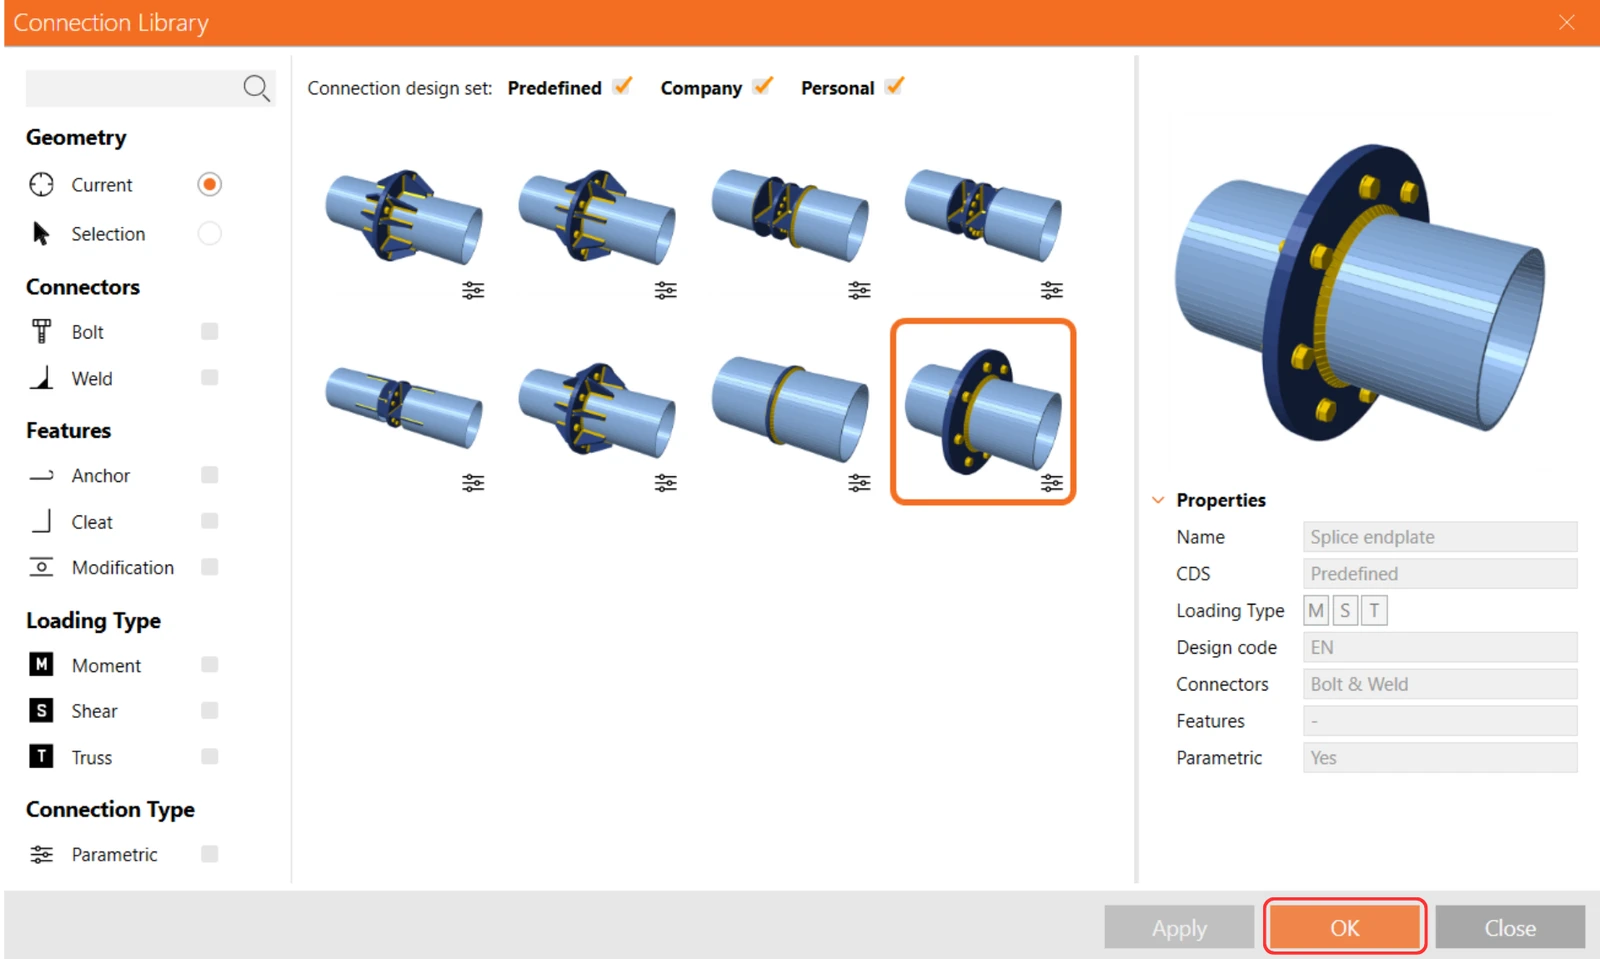
The Connection Library opens with suitable templates to choose. Select the parametric template as below:
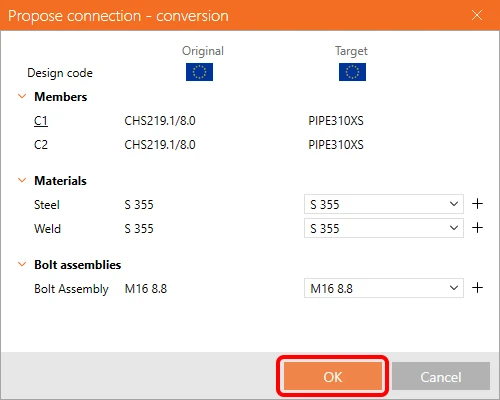
Confirm the material in the conversion table.
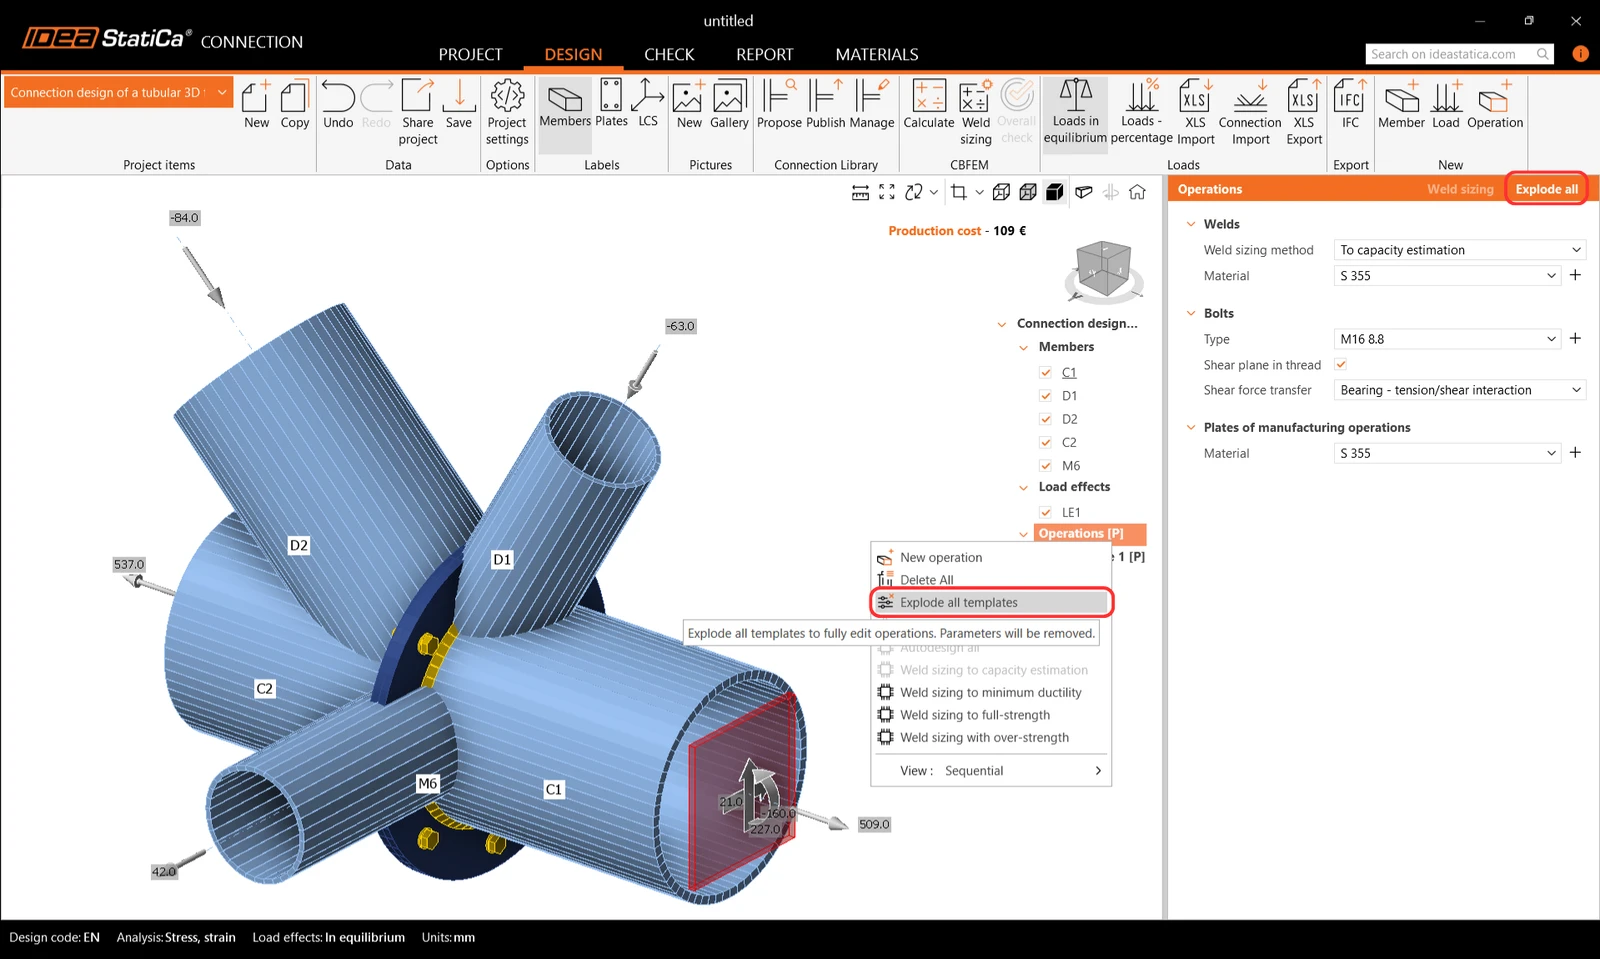
The template was applied, and you can see the end plate PP1. As we need to adjust more parameters than the parametric template allows, we will explode the template.
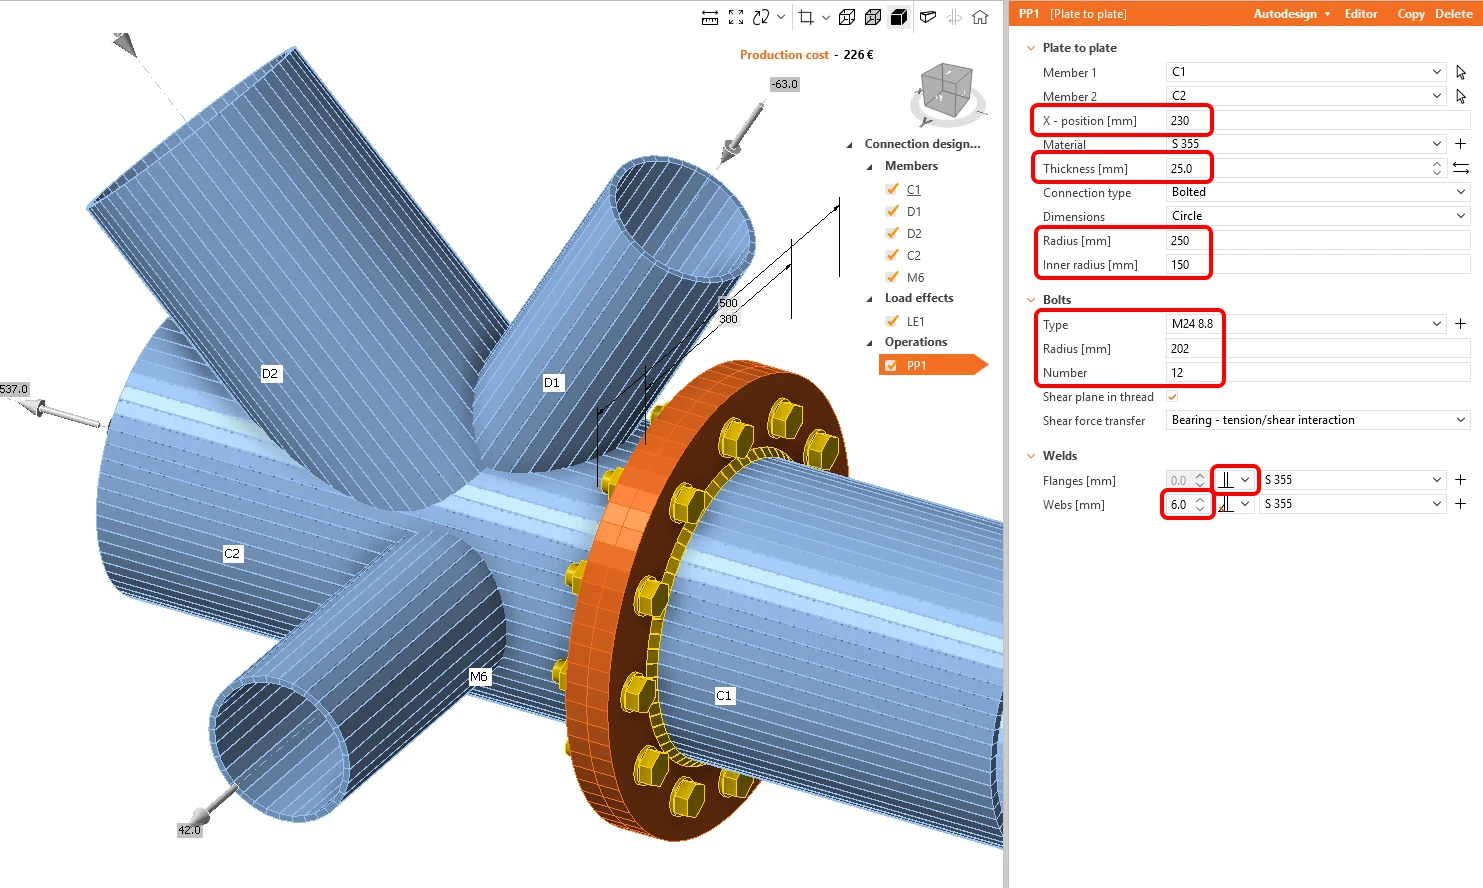
Define the properties of the PP1 manufacturing operation as in the figure below.
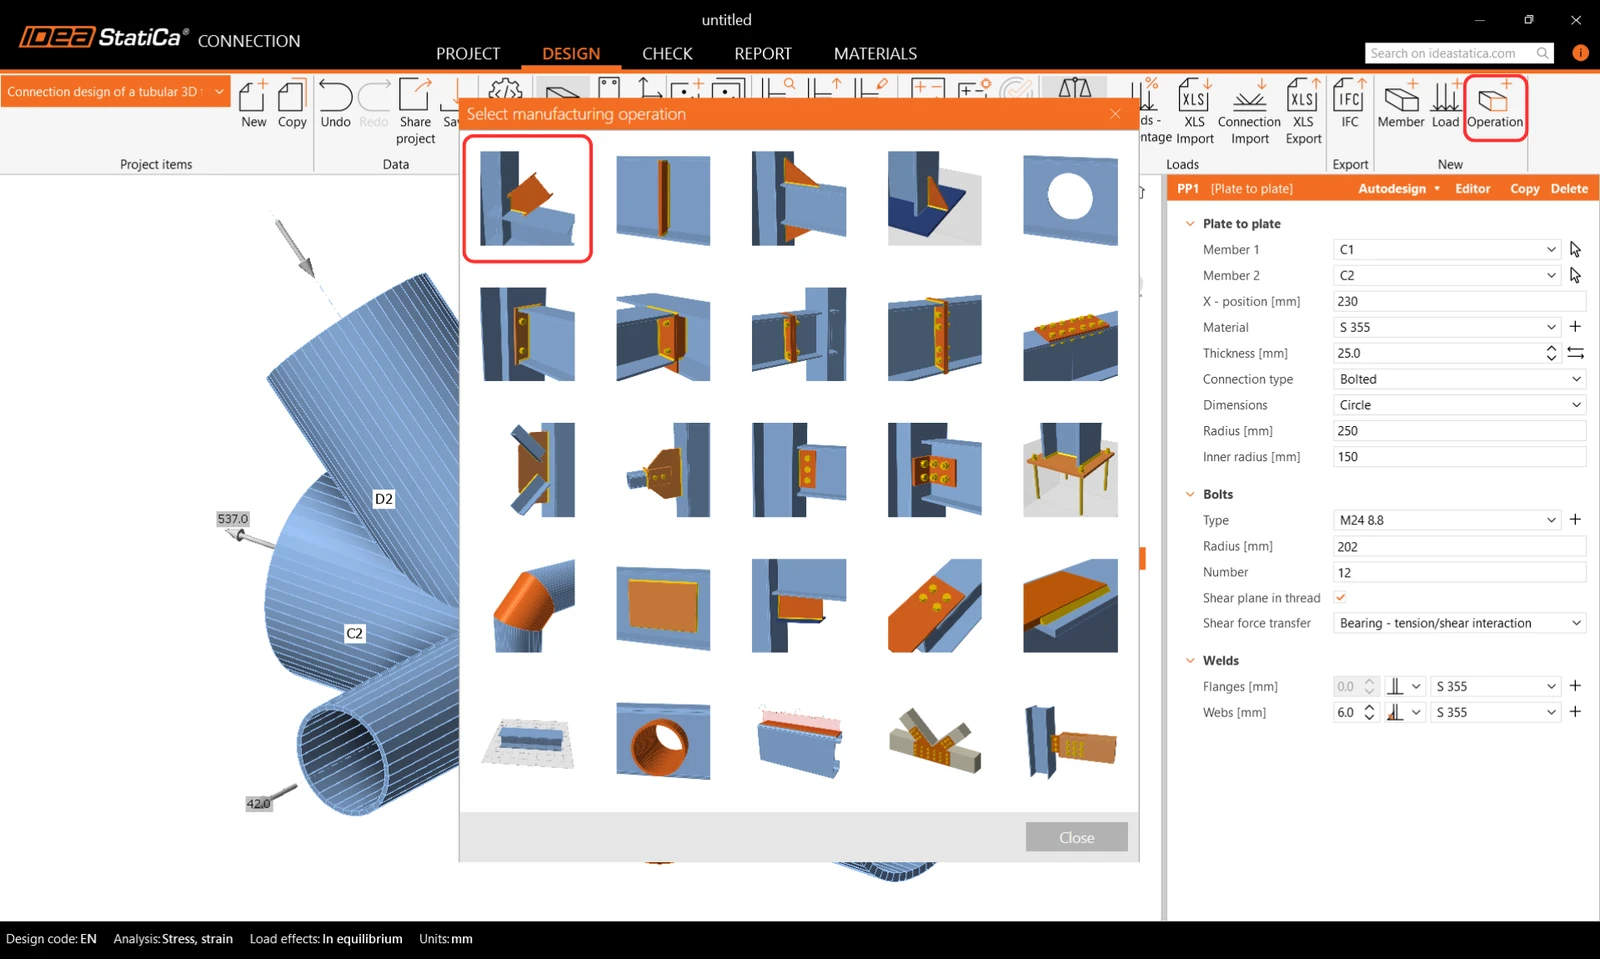
Connect the other members by the Cut from the Operation library in the top ribbon.
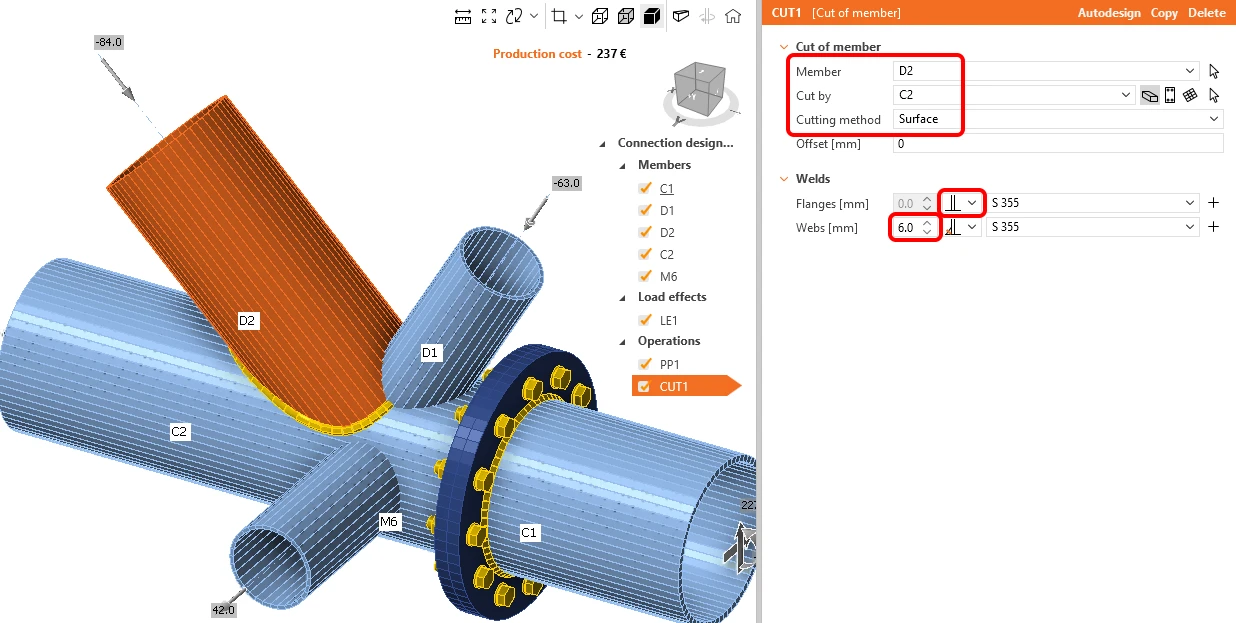
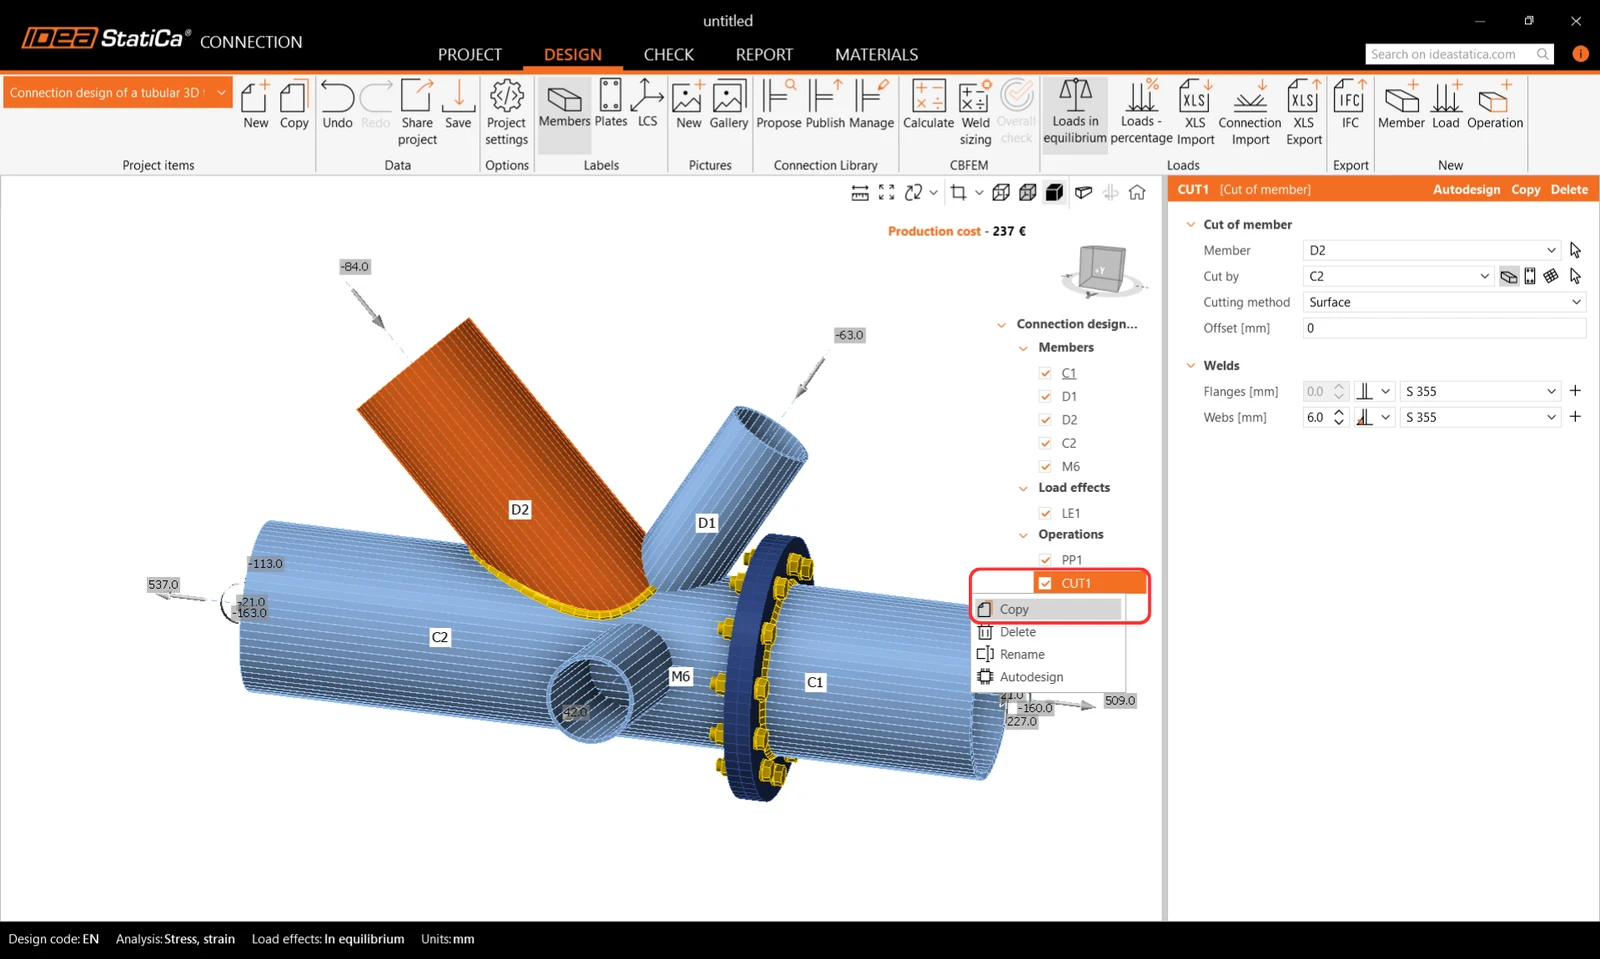
Change the properties of the CUT1 operation. Follow the figure below:
Now you can take advantage of the already defined operation and create a copy of it by right-mouse-button click and choosing the Copy command.
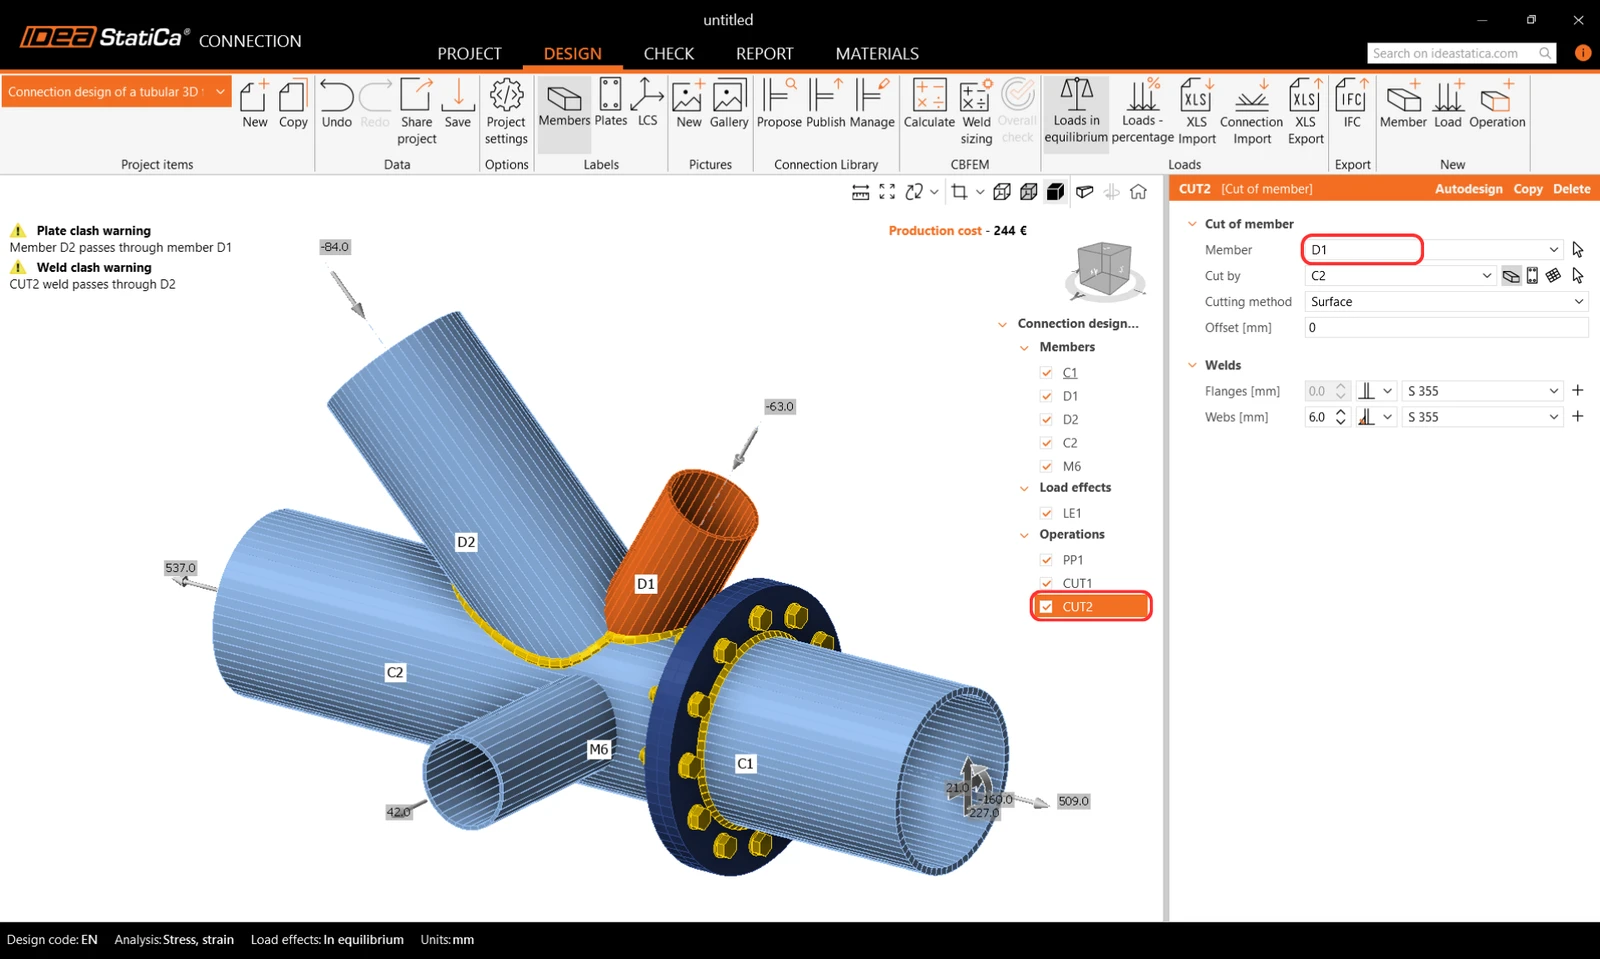
Change the properties of the CUT2 operation following the figure below:
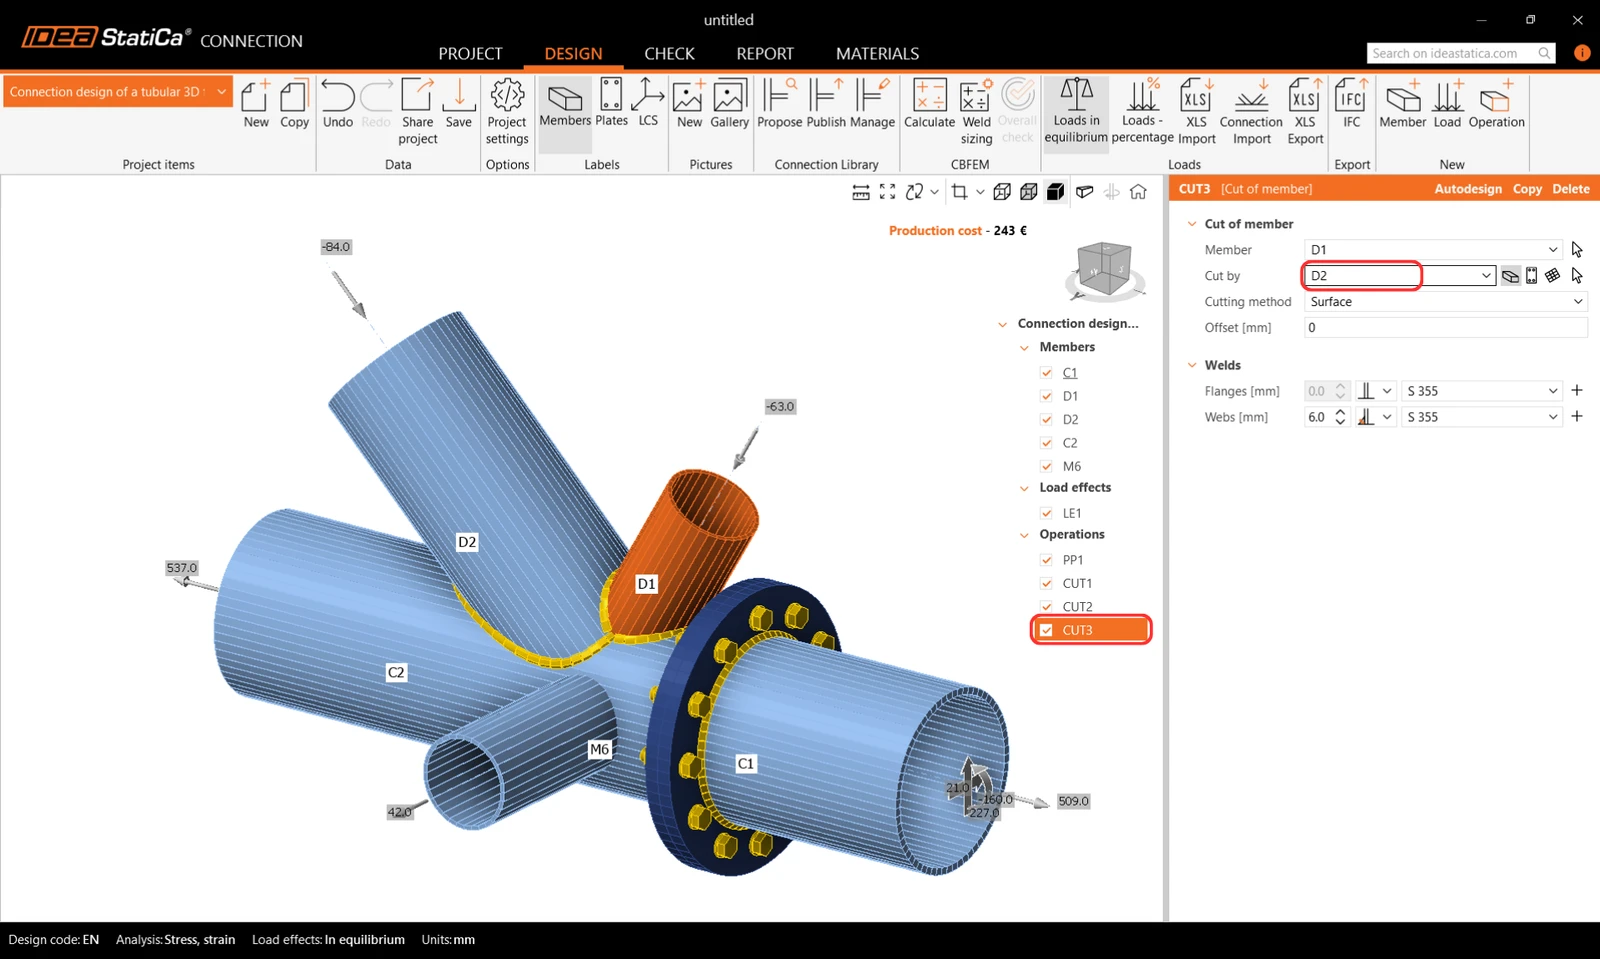
Copy the CUT2 manufacturing operation and change the properties of the CUT3 following the figure:
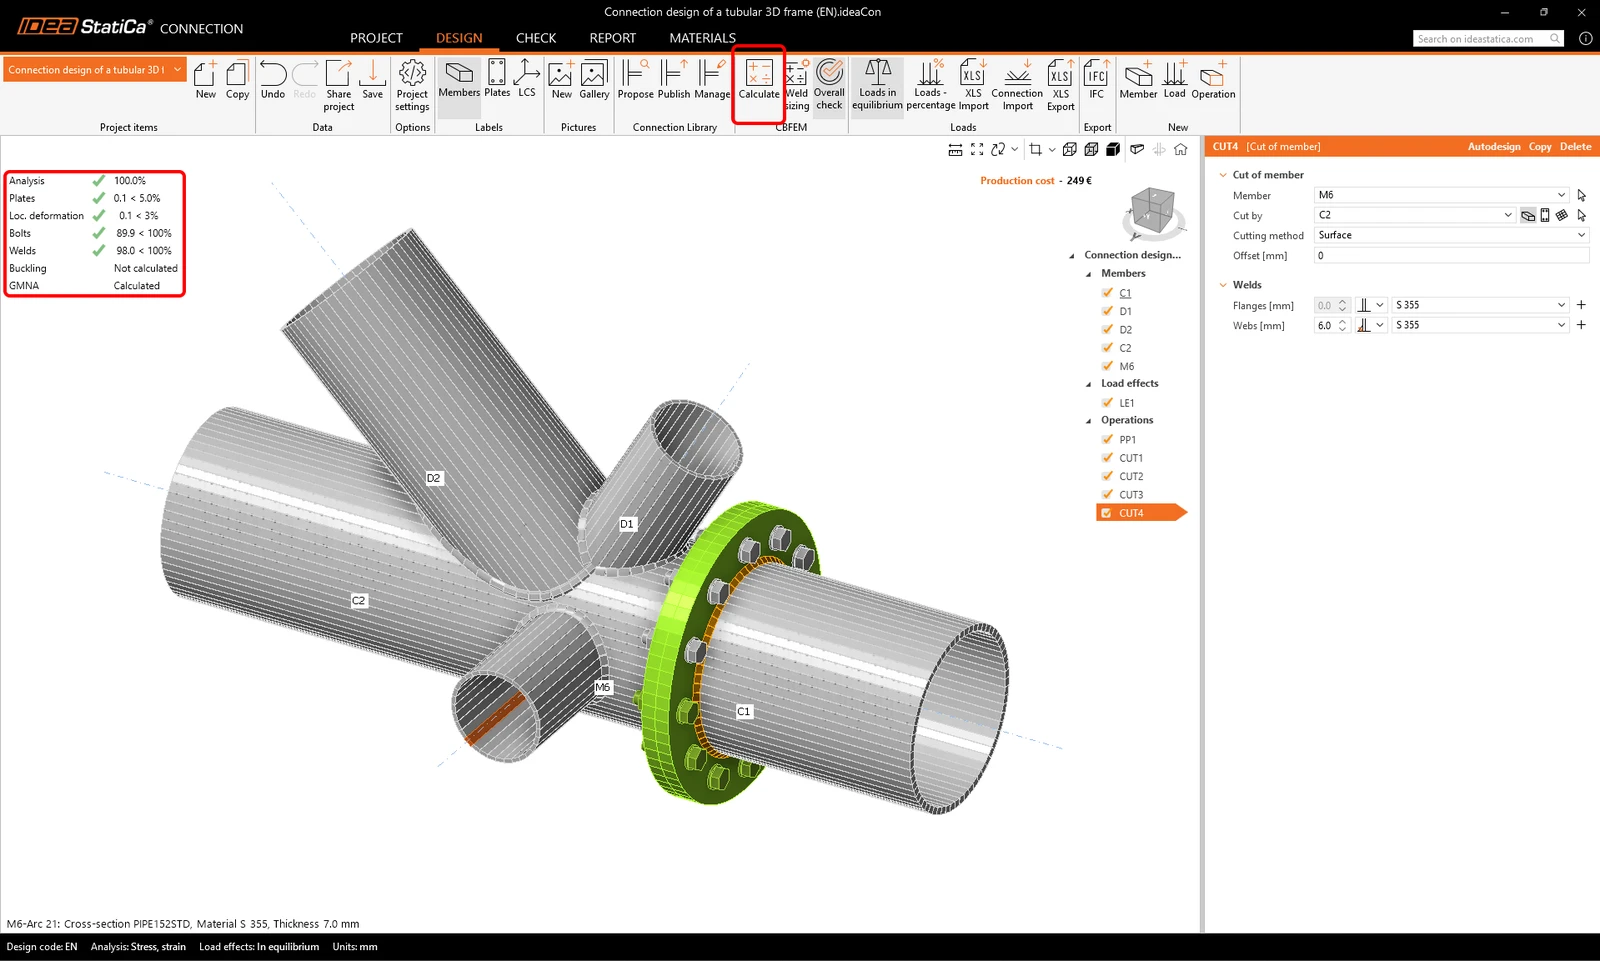
The last step in the design of the joint is to copy the CUT3. Change the properties of the CUT4 following the figure below:
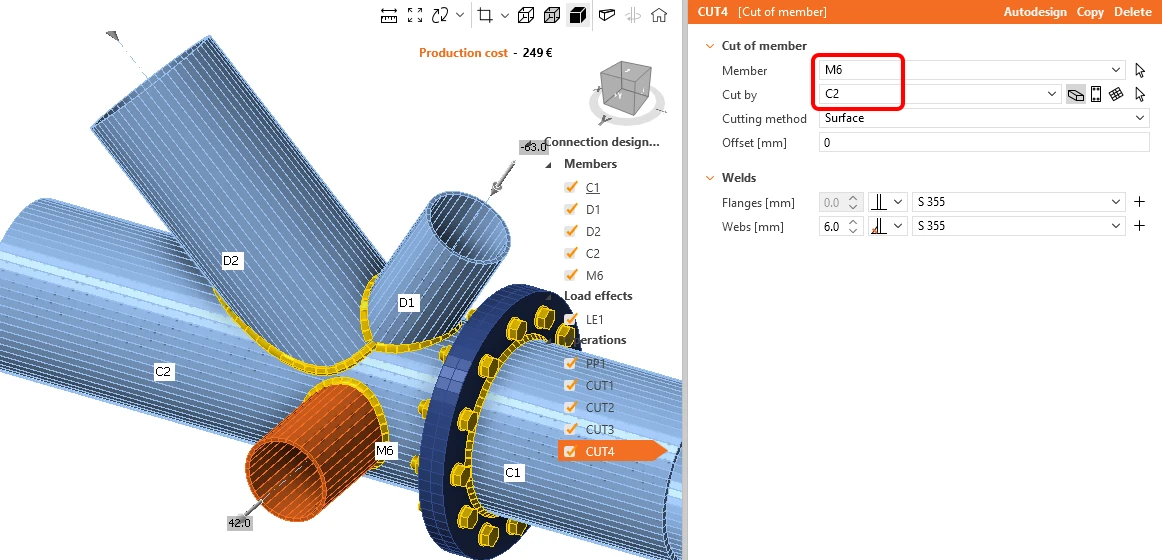
The model is complete and ready to be calculated.
5 Calculation and Check
Start the analysis by clicking Calculate in the ribbon. The analysis model is automatically generated, the calculation based on CBFEM is performed, and we can see the Overall check displayed together with the basic values of check results.
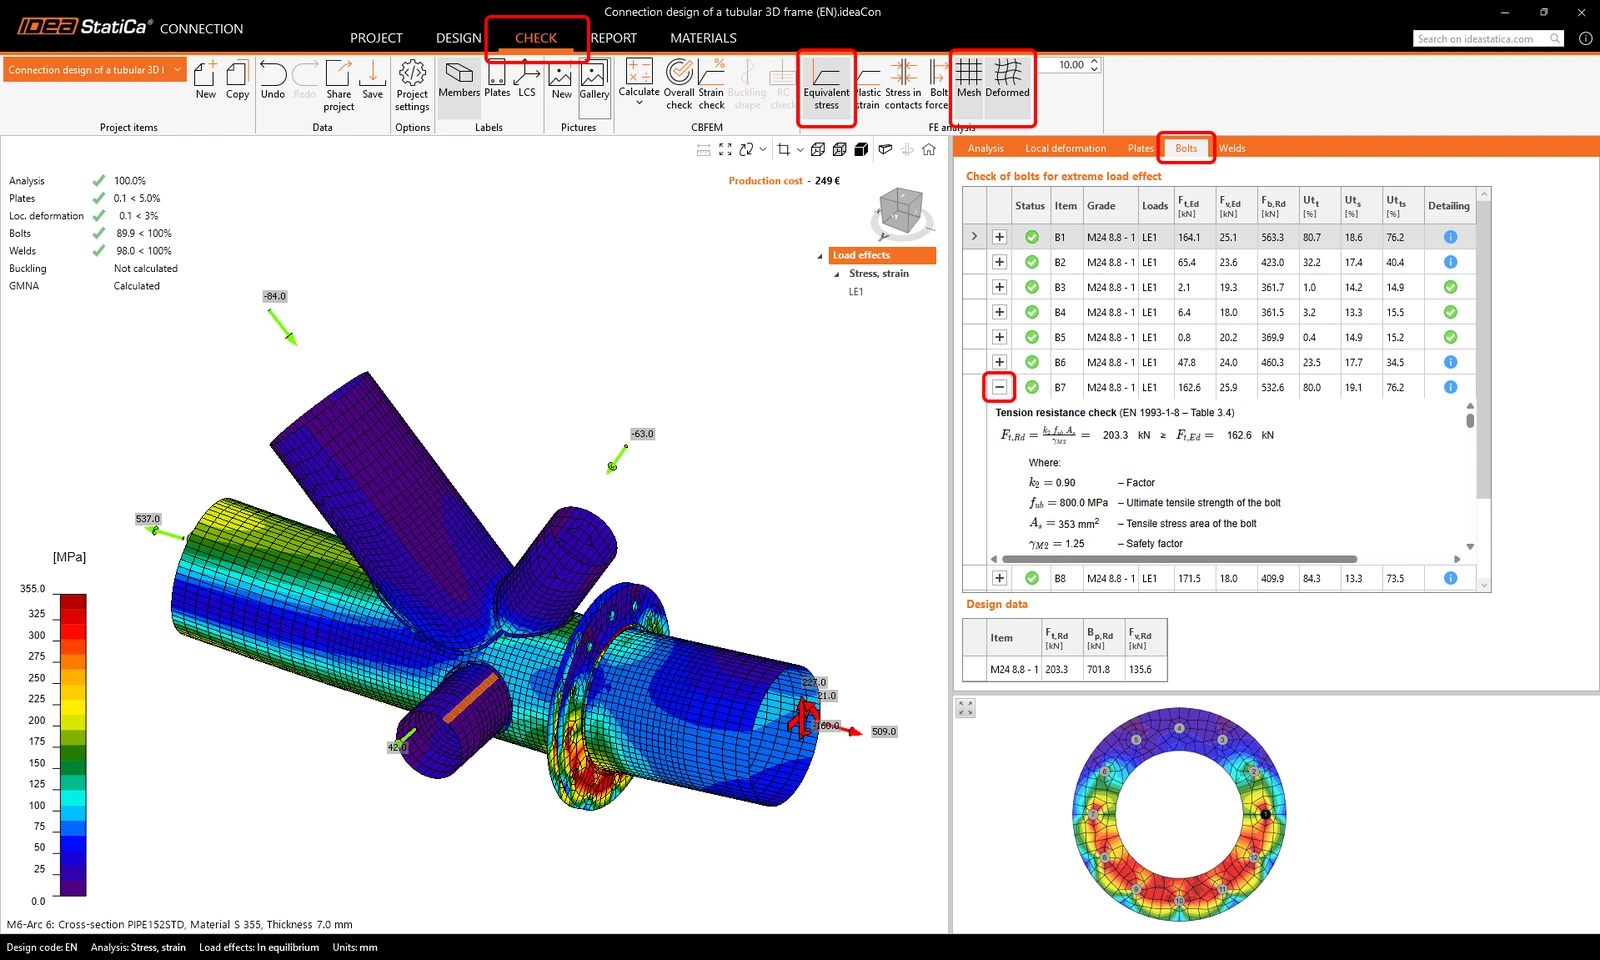
Choose the Check tab and turn on the Equivalent stress, Mesh, and Deformed model view. You can browse the detailed results, e.g., for Bolts as well; to see the detailed results, e.g., for the bolt B7, expand the line.
6 Report
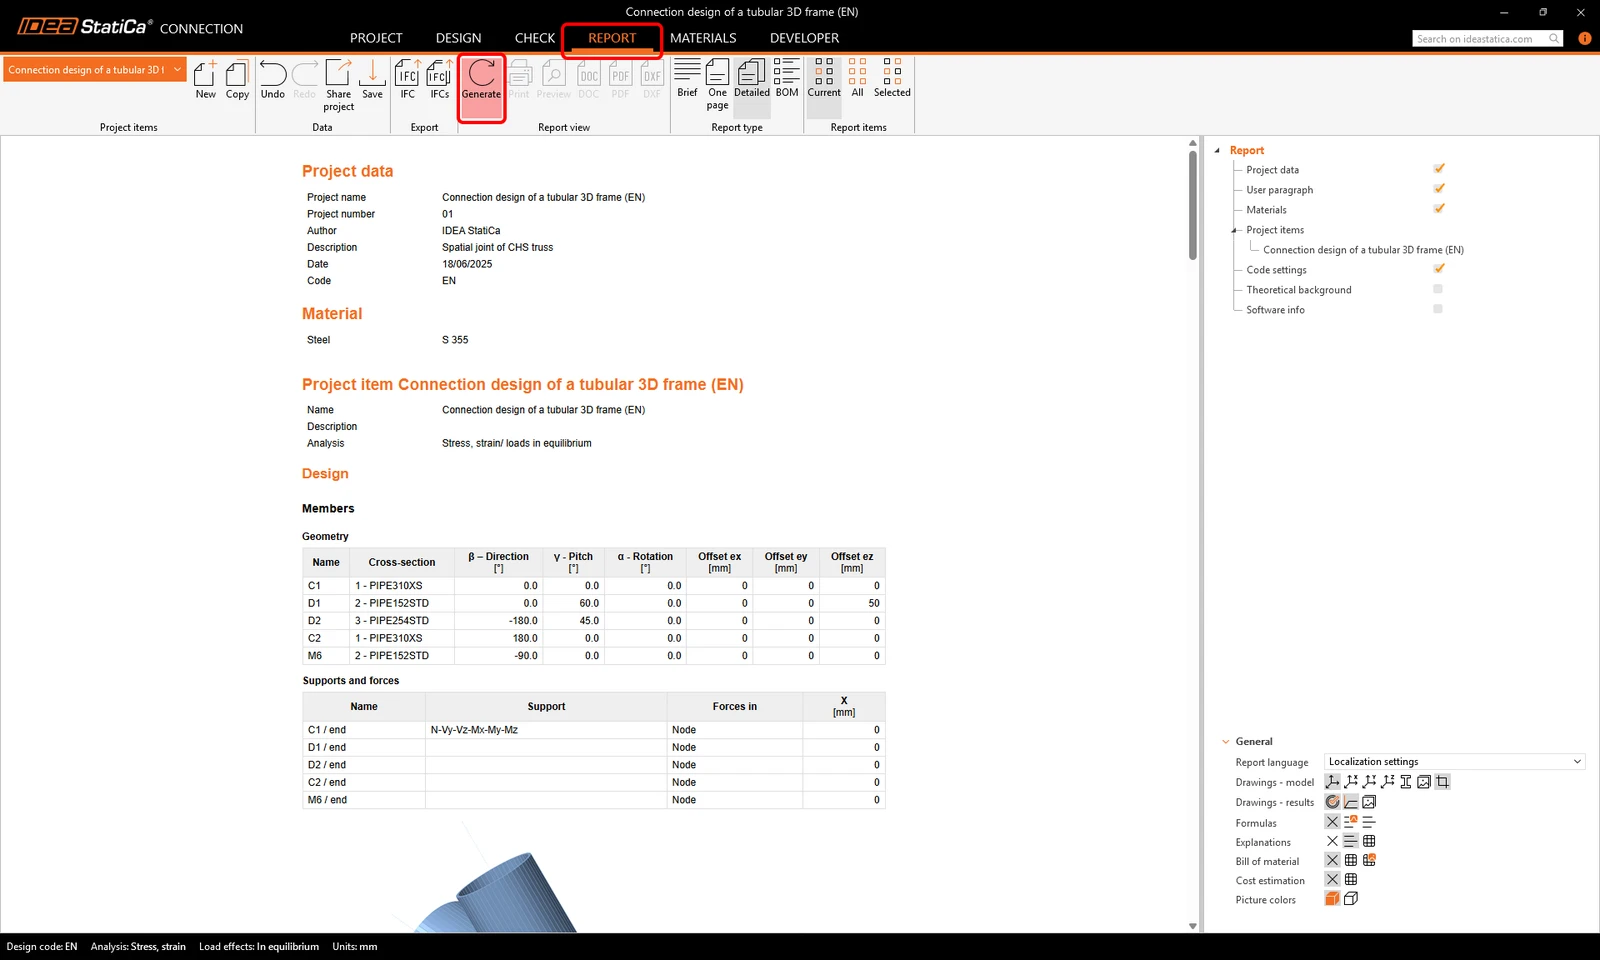
At last, go to the tab Report and press Generate. IDEA StatiCa offers a fully customizable report to print out or save in an editable format.
You have designed, optimized, and code-checked a structural steel joint according to Eurocode (EN).
Want to improve your skills? Visit our Campus
Learn how to use IDEA StatiCa effectively with our self-paced e-learning courses
Start learning
- Steel
- Connection
- AISC (USA)
- Overall check
- EN (Eurocode)
Knowledge base