

This tutorial is using Rhino 8. If you work with IDEA StatiCa version up to 24.1.3, see this tutorial.
Grasshopper - Plugin Installation
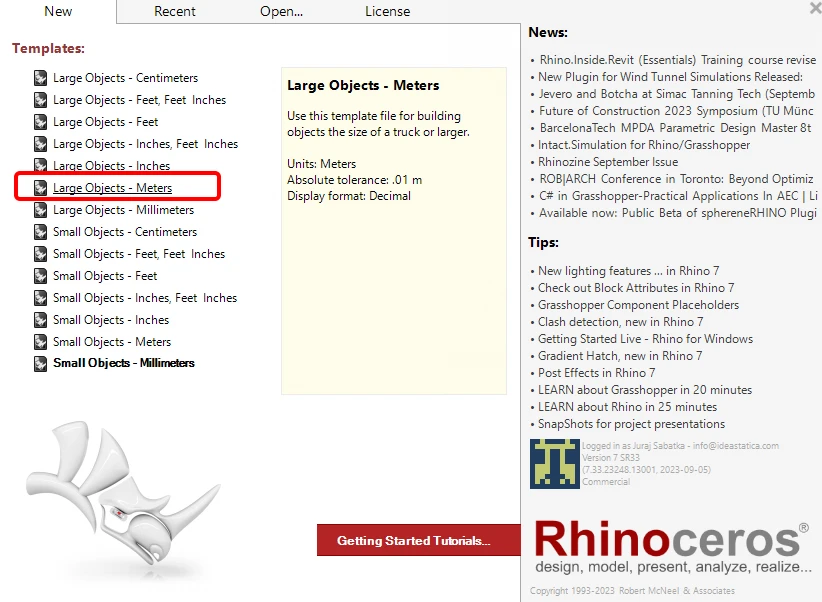
You can get a trial version of Rhino3d and Grasshopper from the Rhino3d website. Run Rhinoceros and select the template with Meters:
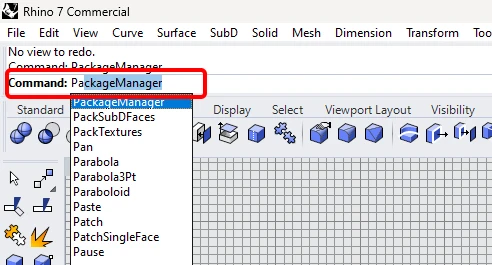
In the Command line, please enter "Package Manager":
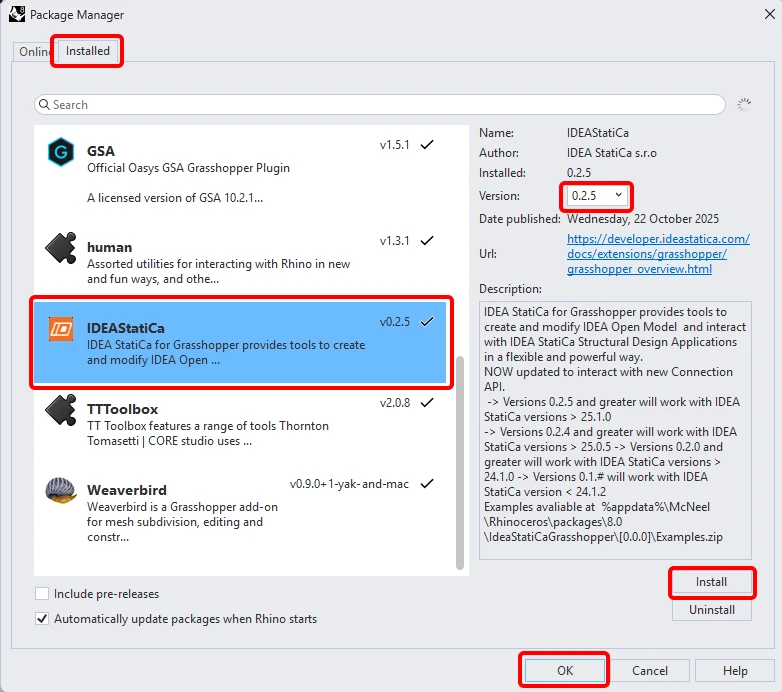
A new window appears; select IDEAStatiCa and click Install. The plugin will be downloaded and installed. To become active, a restart of Rhinoceros is necessary.
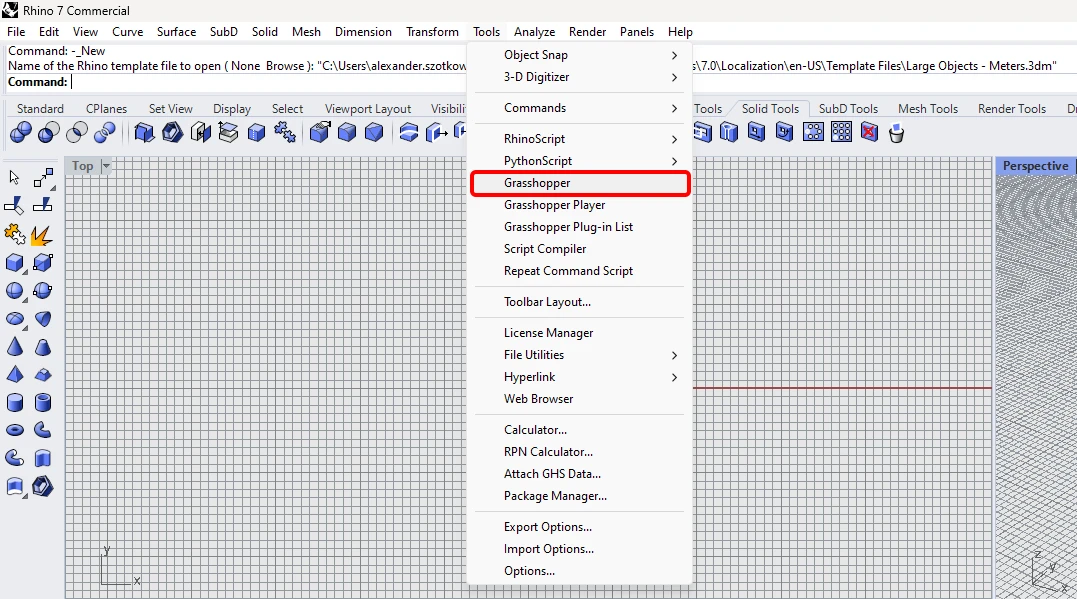
To start Grasshopper with the IDEA StatiCa plugin, select Tools / Grasshopper in the Rhihoceros tab.
As you can see, the plugin is already incorporated.

Learn about the components and commands in the IDEA StatiCa plugin for Grasshopper in the article Description of Grasshopper plugin components.
Colibri plugin
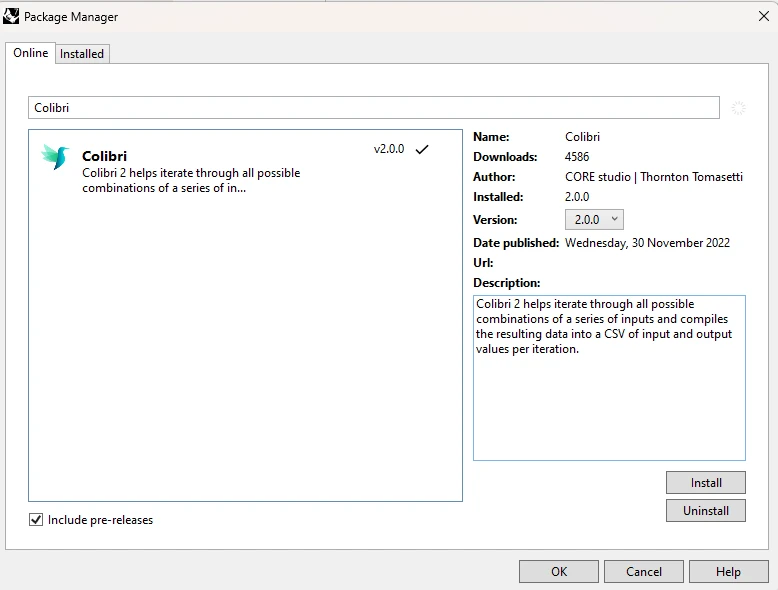
As Grasshopper can not work with loops, you have to install another plugin - COLIBRI, which you will use in this tutorial.
IDEA StatiCa Connection – End Plate joint with parameters
For this tutorial, we will need a connection with some parameters. Please open the attached file.
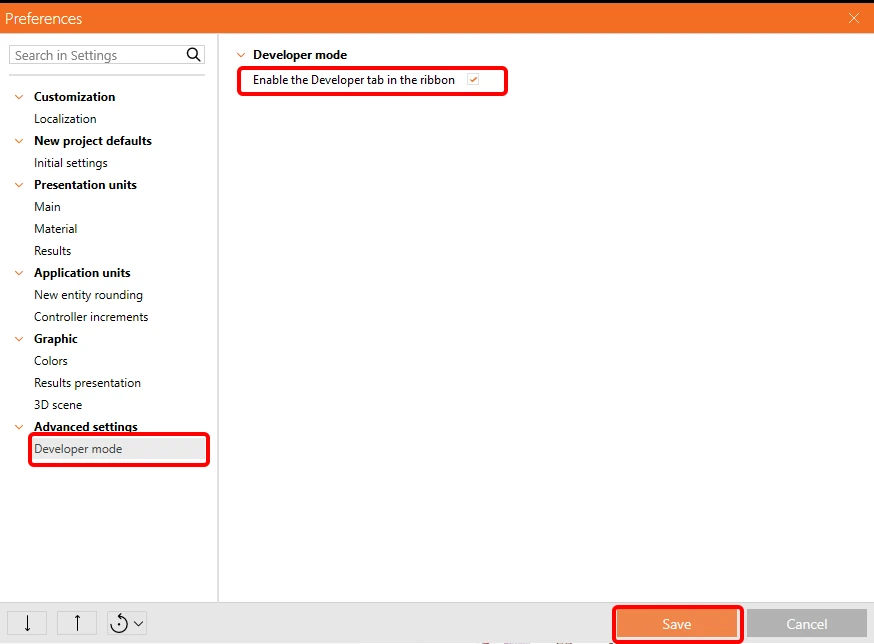
To be able to work with parameters, it is necessary to enable the Developer tab in Preferences / Advance Settings:
This connection includes two parameters - Bolts and Endplate.

If you are not familiar with parameters please see following tutorials:
Parametric design in IDEA StatiCa Connection - Basics (01)
Parametric design in IDEA StatiCa Connection - Advanced (02)
Grasshopper - Import the *ideaCon file and modify the parameters
Create a new document, select the tab Params in the upper ribbon, and place the component File Path on the Canvas.
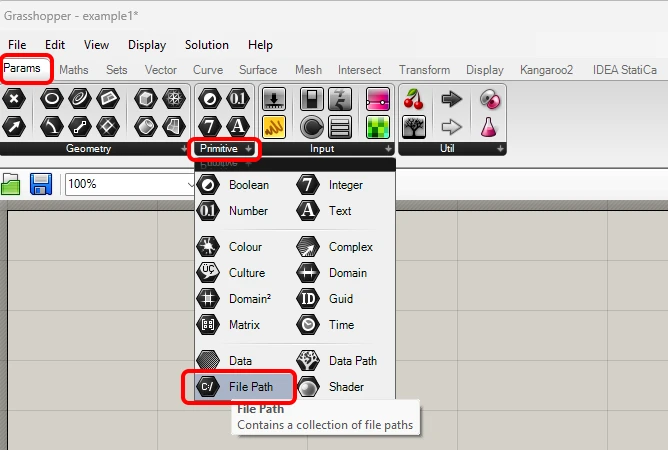
Right-click on the component and select the file Example2.ideaCon we saved before.
Note: If you open the attached file, you must change this path accordingly.
Since version 24.1.4, IDEA StatiCa has come with a new API, described here.
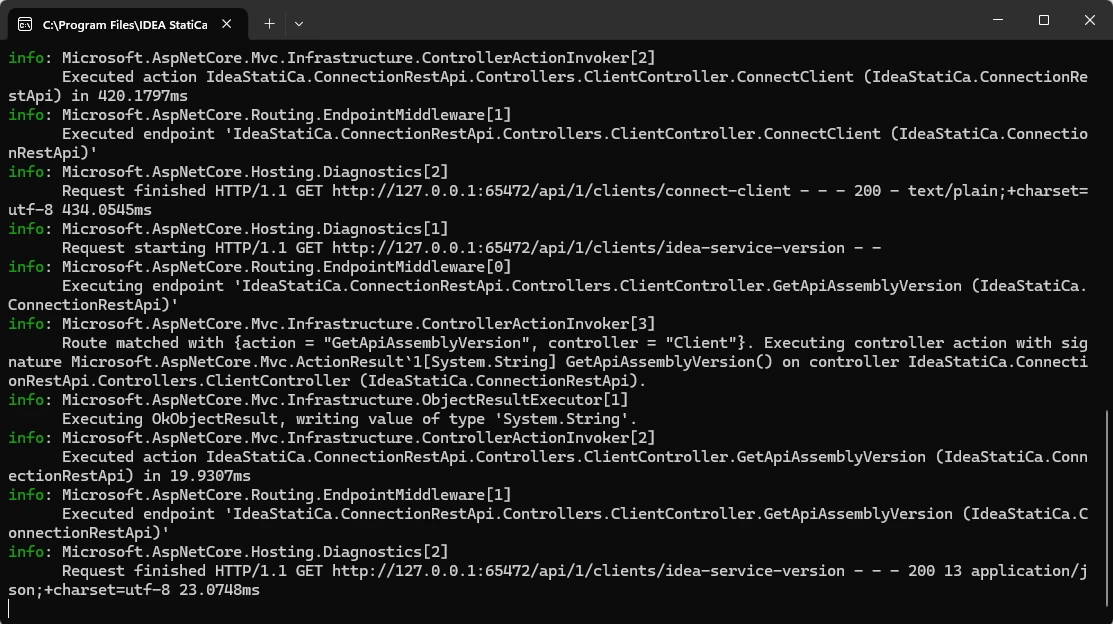
To run Grasshopper scripts, you must add a component called Connection Service Runner to every file. This component can be found in IDEA StatiCa / App Common.
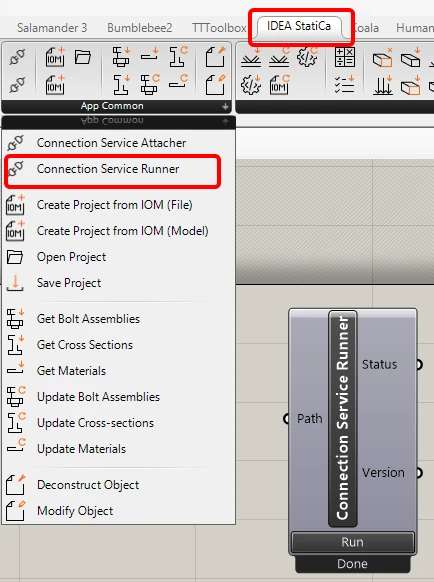
When running this component, you should see the following window appear.
Now, add the following components to the canvas and connect them as displayed in the picture.
Import File:
IDEA StatiCa / App common / Open Project
IDEA StatiCa / Connection / Get Connection
View Parameters:
IDEA StatiCa / Connection / Get Parameters
Here, you can add the components Params / Input / Panel to see the values of our parameters.
Modify Parameters:
IDEA StatiCa / App common / Modify Object (1)
IDEA StatiCa / App common / Modify Object (2)
IDEA StatiCa / Connection / Update parameters
Calculation and Results:
IDEA StatiCa / Connection / Calculate Project
Here, again, you can add components Params / Input / Panel to see the values of the results.
For components
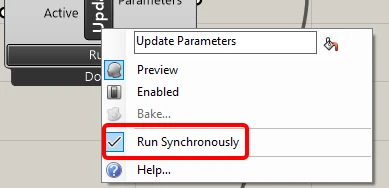
IDEA StatiCa / Connection / Calculate Project and IDEA StatiCa / Connection / Update parameters
It is essential to verify the 'Run Synchronously' parameter.
Colibri Components to iterate combinations of parameters:
TTTollbox / Colibri Inputs
TTTollbox / Colibri Outputs
TTTollbox / Colibri Aggregator
For the Input, the first Value list contains 3 values (0.010, 0.015, 0.020) for the thickness of the End plate.
The second one contains three values (M12 8.8, M14 8.8, M16 8.8) for the bolt diameter.
The results are stored in the data.csv file. By default, it is stored in c:\Colibri; here, you should set the path to C:/IDEA. Please make sure you have authorized access.
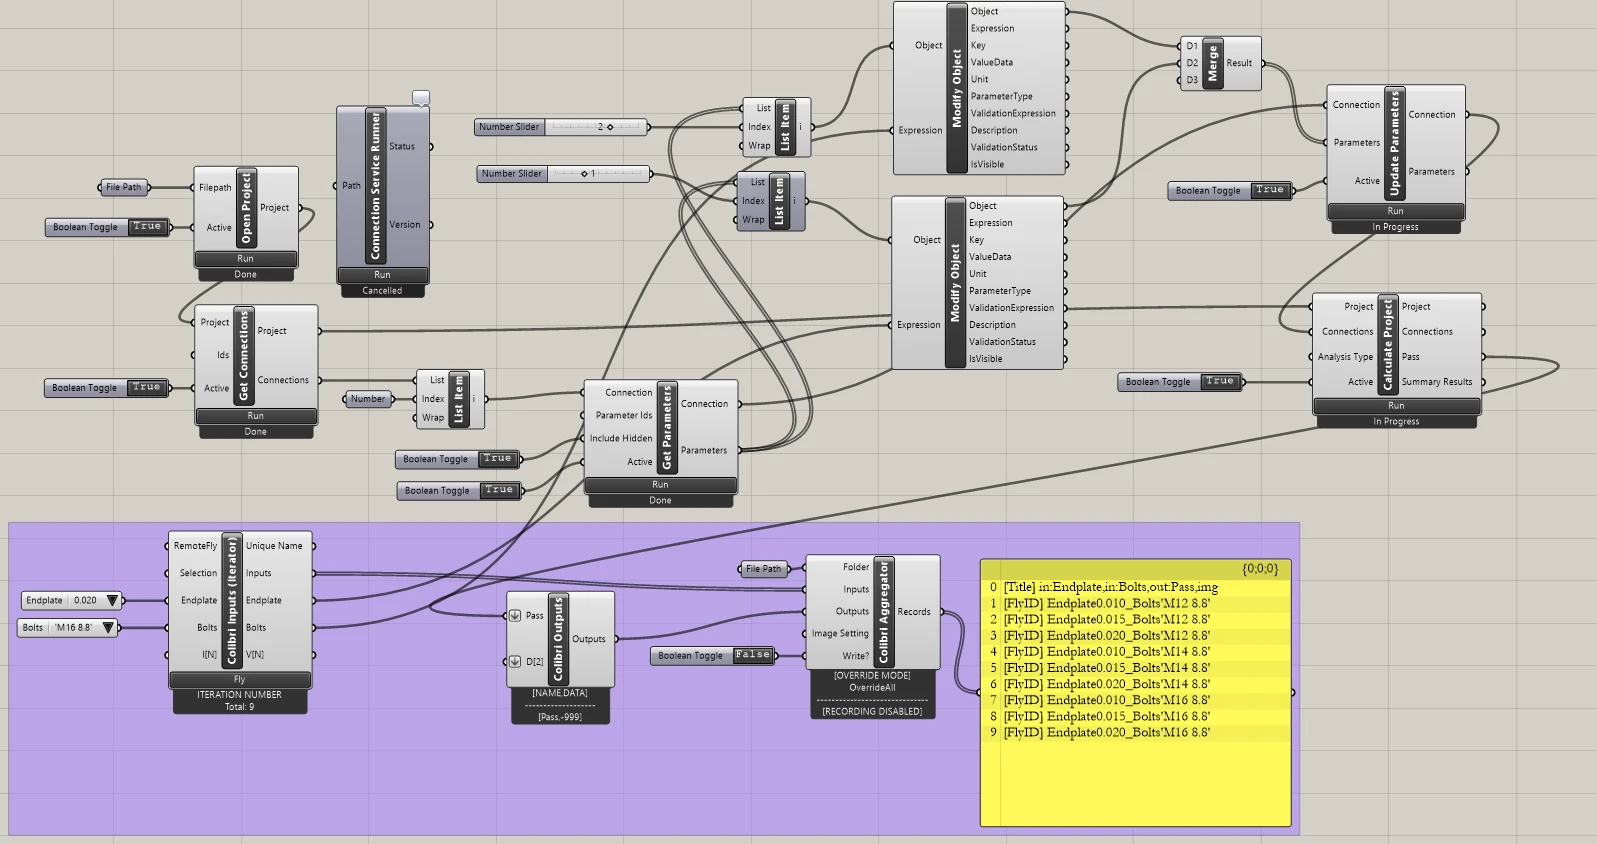
Click the Colibri Inputs / Fly button to go through the whole iteration. After a while, the CSV file is created.
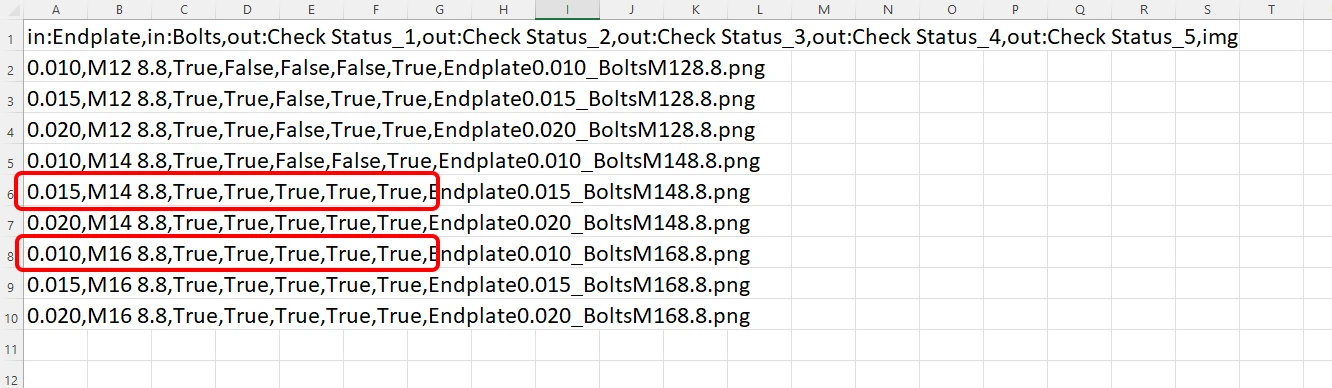
The straightforward results with True / False can be seen when opening it.
Interpretation of the results
For this specific connection, you will have satisfying results using either
- Bolts M16 8.8 with Endplate thickness of 10 mm
or
- Bolts M14 8.8 with Endplate thickness of 15 mm
More complex examples can be found on your PC in the directory
“%appdata%\McNeel\Rhinoceros\packages\8.0\IDEAStatiCa\0.2.5\Examples0.2.5.zip”