Idea Statica
  • Steel
  • Concrete
  • BIM & Workflows
  • Support & Learning
  • Pricing
  • Company
  • Steel overview
  • Connection design
  • Member design
  • Parametric design
  • Steel case studies
  • Concrete overview
  • Walls and D-regions
  • Anchoring design
  • Concrete case studies
  • BIM Overview
  • Supported integrations
  • Checkbot
  • Viewer
  • APIs
  • Support Center
  • E-learning & certification
  • Blog
  • Downloads & Licensing
  • Plans
  • Free community tool
  • Enterprise customers
  • Students & educators
  • How much will you save?
  • About us
  • Contact
  • Research & development
  • Authorized resellers
  • Meet our customers
  • Career
  • Steel
    Steel overviewConnection designMember designParametric designSteel case studies
  • Concrete
    Concrete overviewWalls and D-regionsAnchoring designConcrete case studies
  • BIM & Workflows
    BIM OverviewSupported integrationsCheckbotViewerAPIs
  • Support & Learning
    Support CenterE-learning & certificationBlogDownloads & Licensing
  • Pricing
    PlansFree community toolEnterprise customersStudents & educatorsHow much will you save?
  • Company
    About usContactResearch & developmentAuthorized resellersMeet our customersCareer
14-Day Trial
14-Day Trial
  • Steel
  • Concrete
  • BIM & Workflows
  • Support & Learning
  • Pricing
  • Company

Subscribe to our newsletter

Company

  • About us
  • Partners
  • Careers
  • Patent

Resources

  • Customer projects
  • Case studies
  • Connection Library
  • Verification books

Legal

  • EULA
  • Privacy policy
  • California Privacy
  • TOS Viewer
  • Licensing

Help

  • Contact
  • Quote request
  • Resellers
  • Downloads
FacebookInstagramLinkedInYouTube

© IDEA StatiCa 2009-2026

Trusted and used worldwide by engineers, fabricators & consultants.

Support CenterTutorialsBolted plate to plate connection design (EN)
Bolted plate to plate connection design (EN)
Connection designSteelTutorialsConnectionEN (Eurocode)

Bolted plate to plate connection design (EN)

This article is also available in
ENCZDEESFRITPTNLHUROKRPLTHTRVIZH

By following this step-by-step tutorial, you will learn how to design and code-check a structural steel joint using IDEA StatiCa Connection.

1 New project

Let’s launch the IDEA StatiCa Connection application (download the newest version).

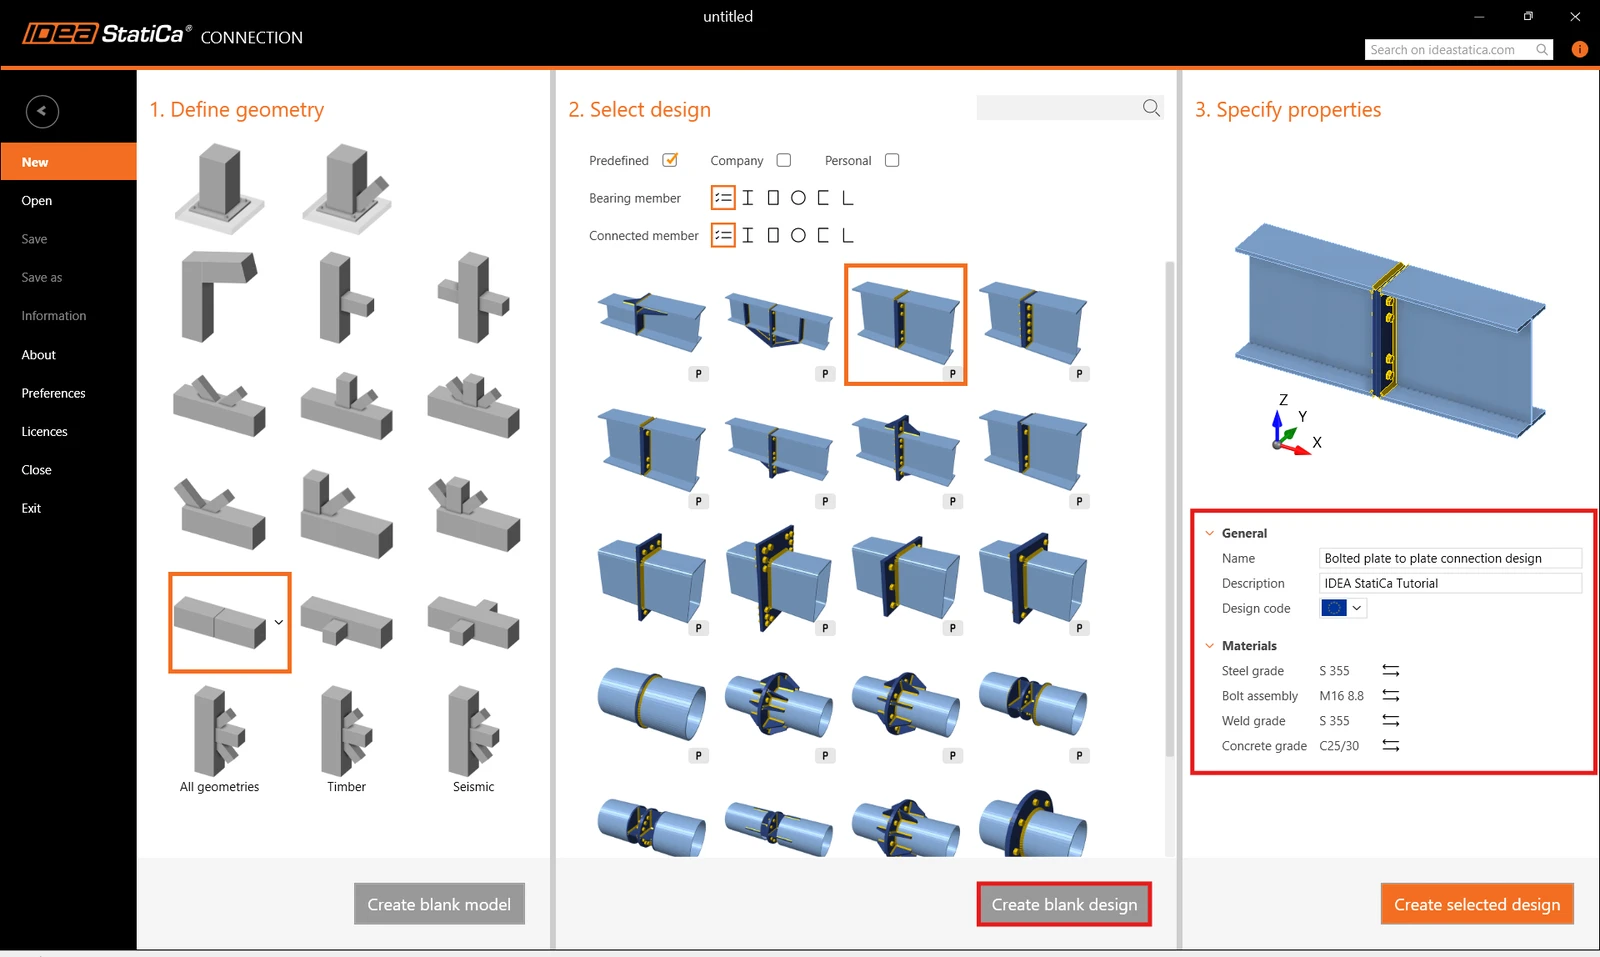
Create a new project by selecting the desired geometry. Fill in the name and choose Eurocode as the design code and the steel grade as S355. Then create blank design.
2 Geometry

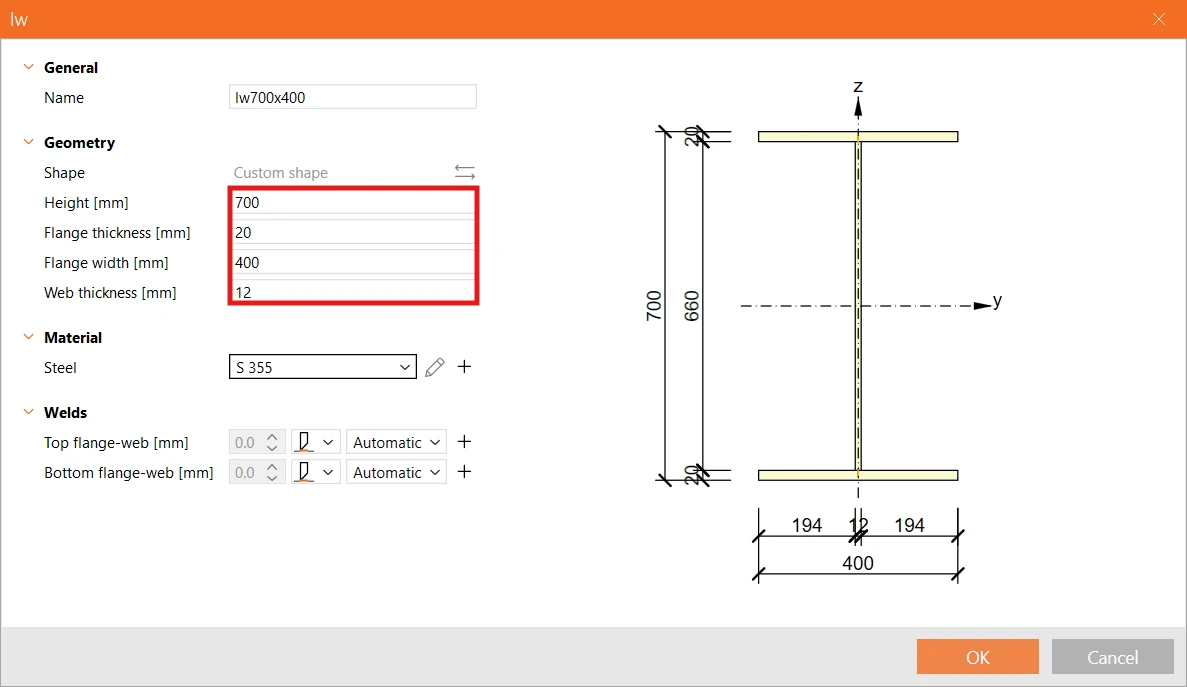
Two beams were automatically added. Change the cross-section of member B1 to a welded I section and define the cross-section dimensions (height, flange thickness, and width and thickness of the web).
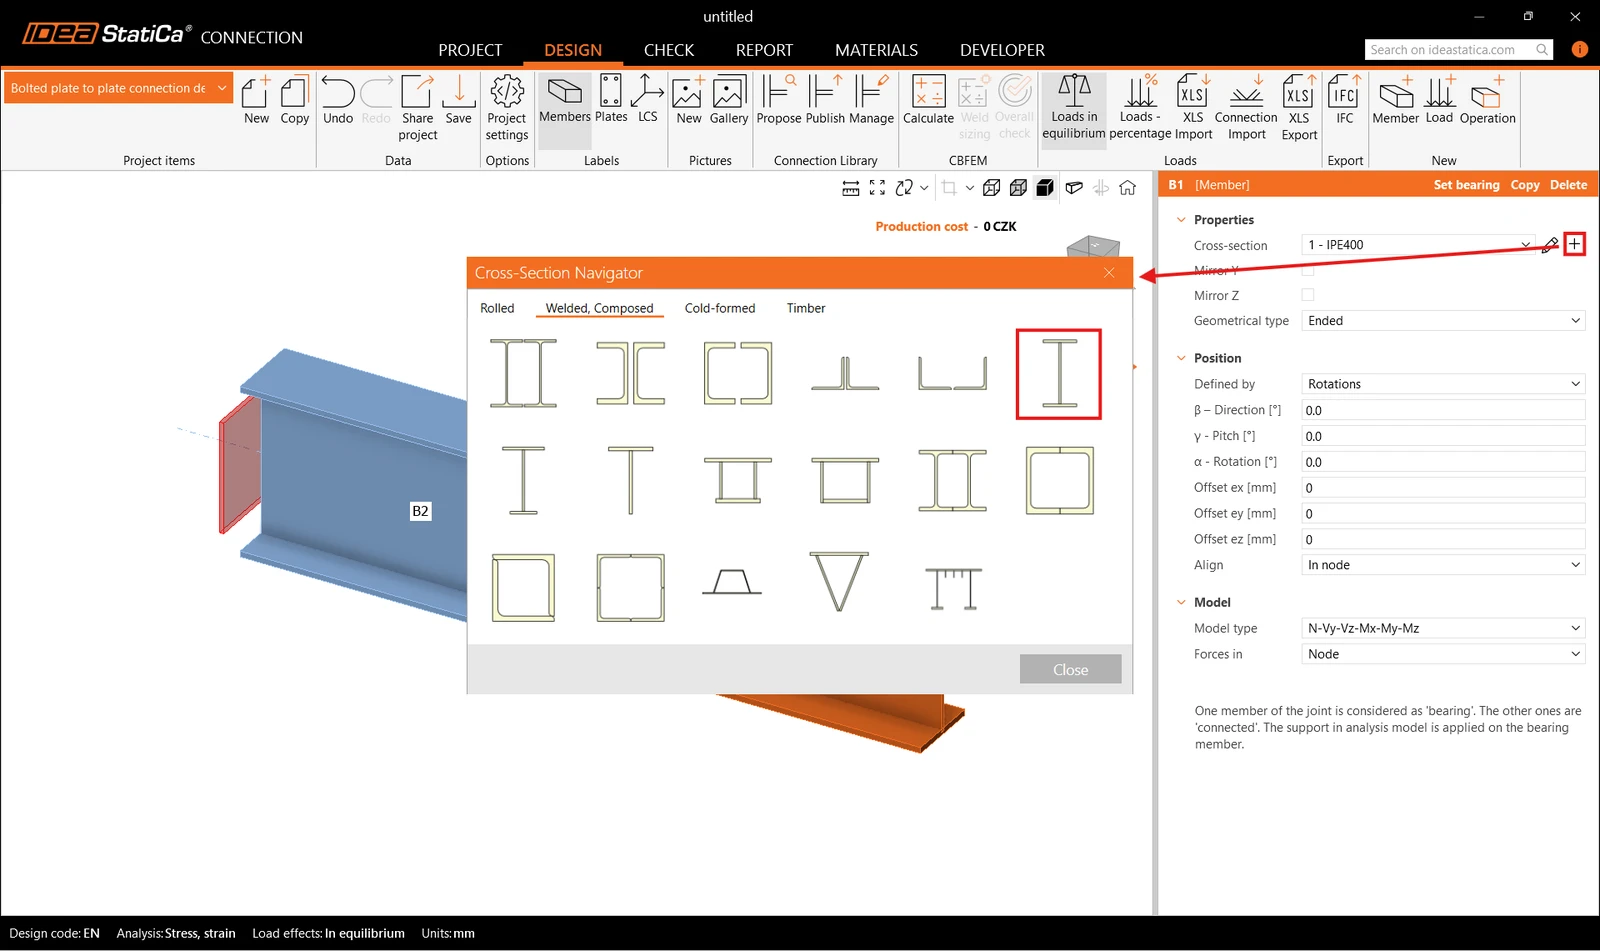
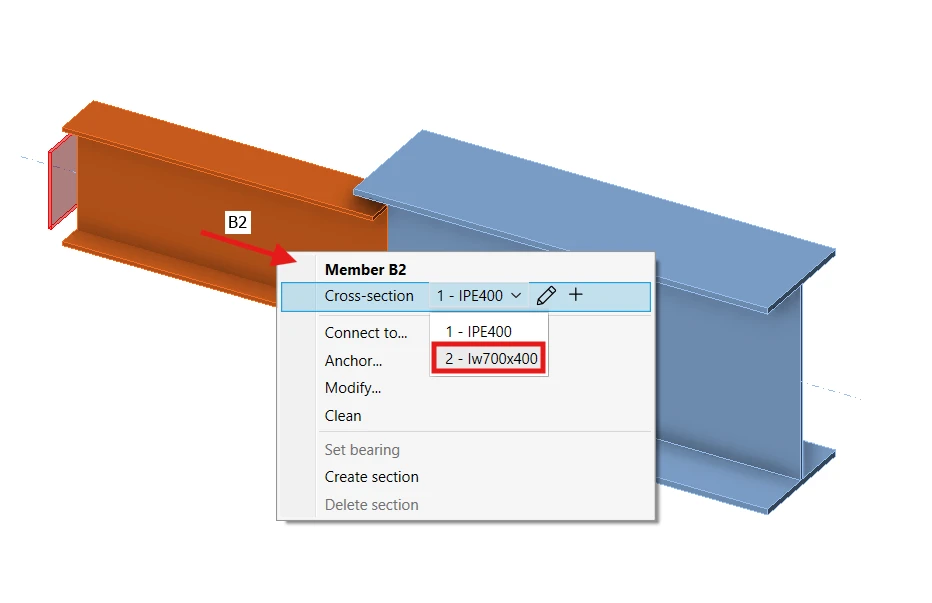
Assign the same cross-section to member B2. You can use the right-click menu in the 3D scene or the drop-down menu in the parameters tab.
3 Load effects

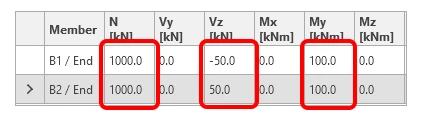
One load effect was automatically generated. Input the values of internal forces in the table for both members.
Design of bolted plate to plate connection (EN)

4 Design

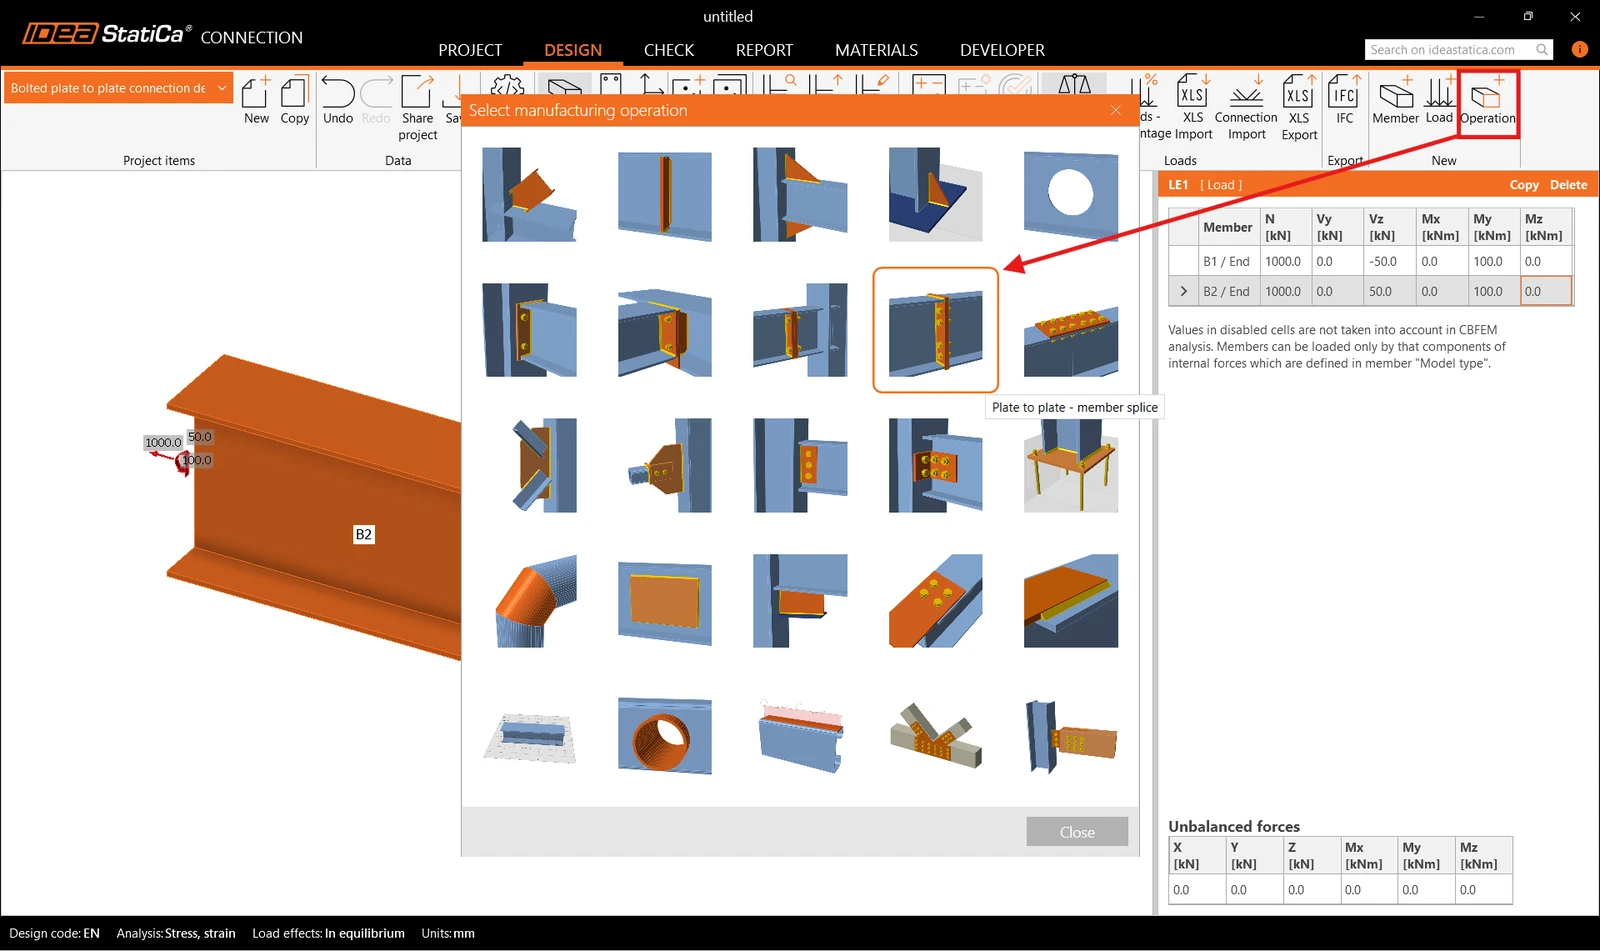
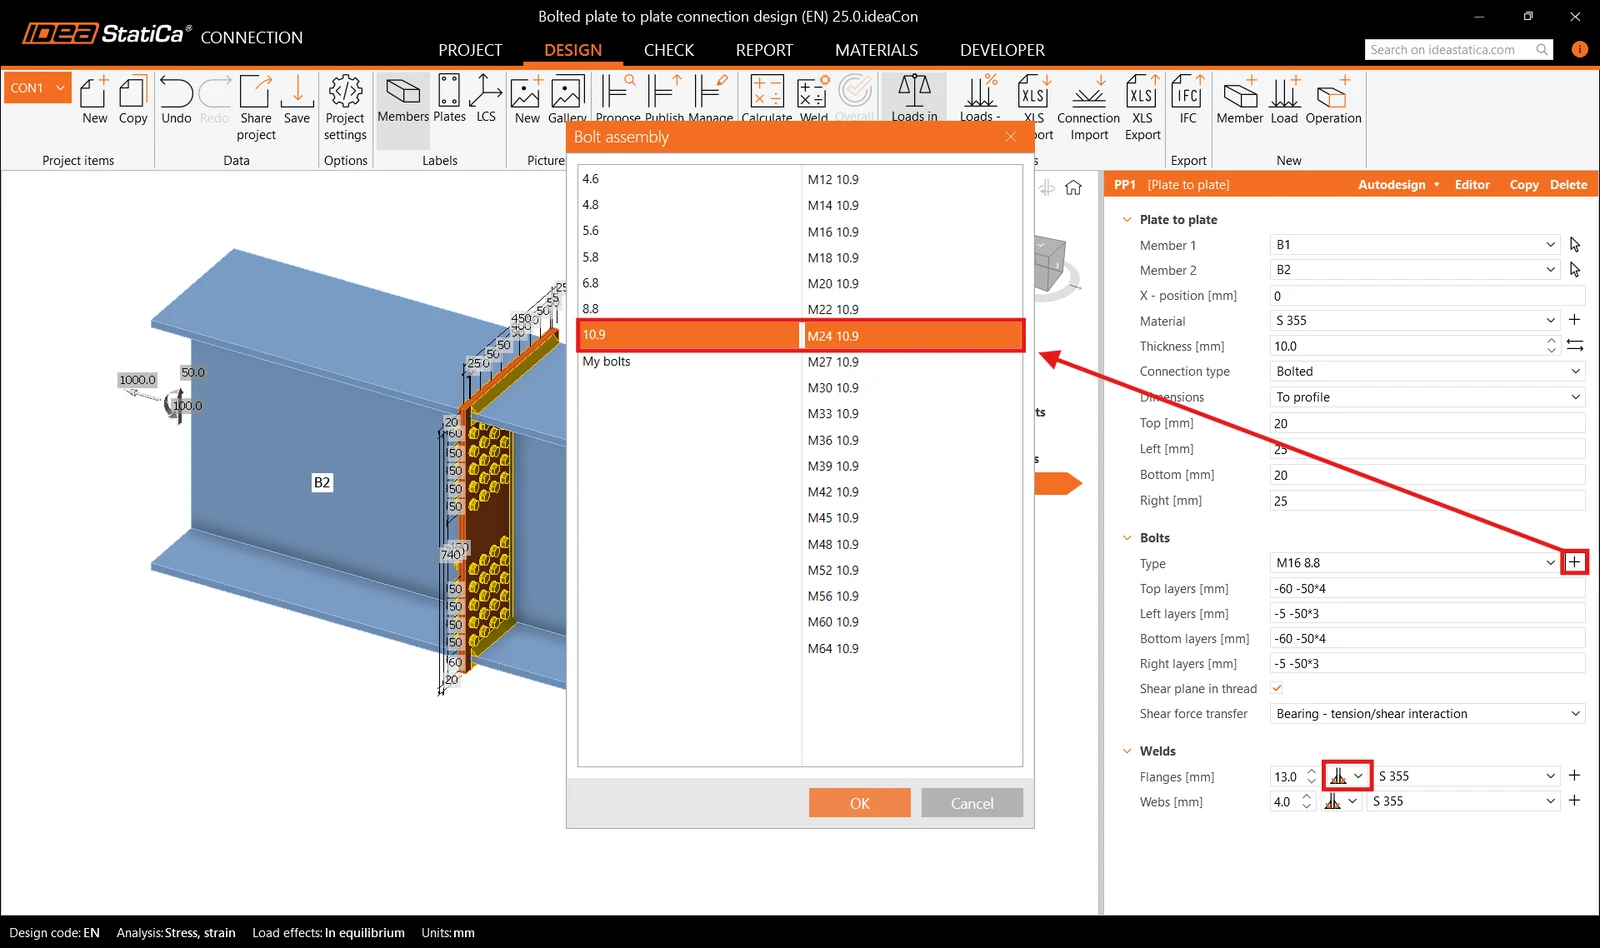
First add the manufacturing operation Plate to plate - member splice. Modify the thickness and dimensions of the plate. Adjust the bolt type to M24 10.9.
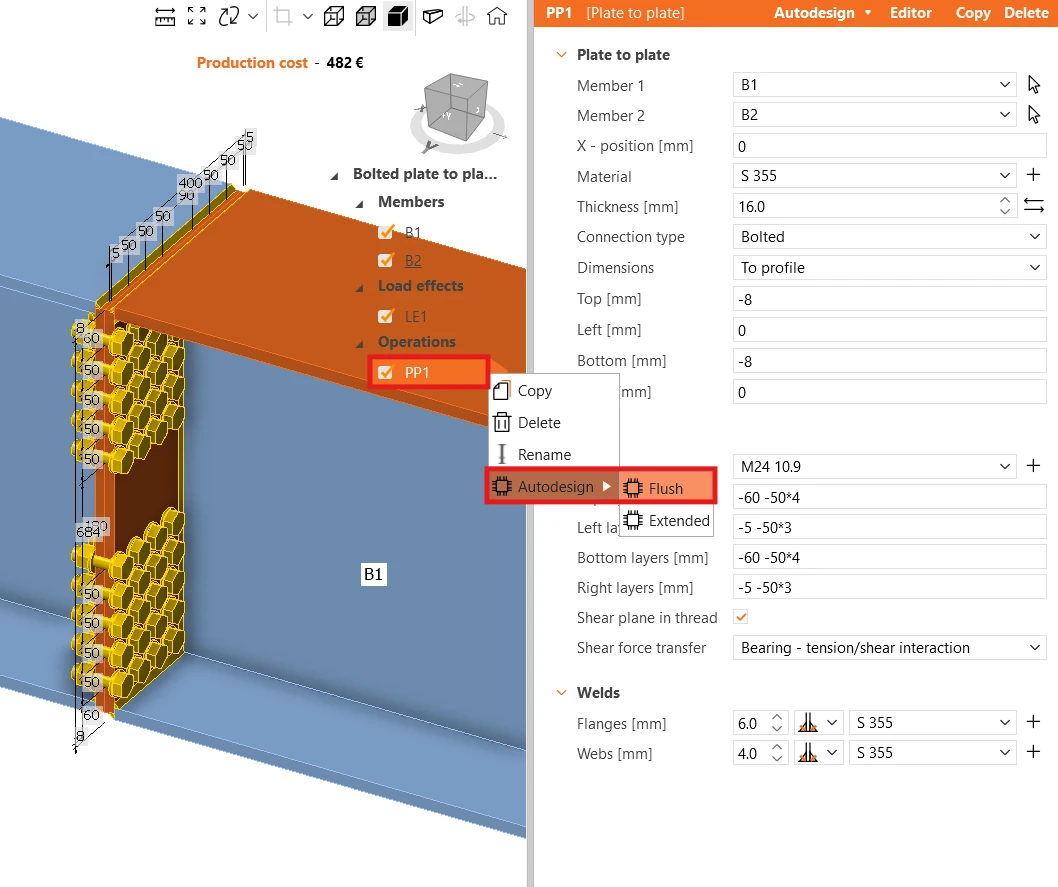
Then right-click on the operation PP1 and navigate to Autodesign and Flush to create a suggested initial connection design.
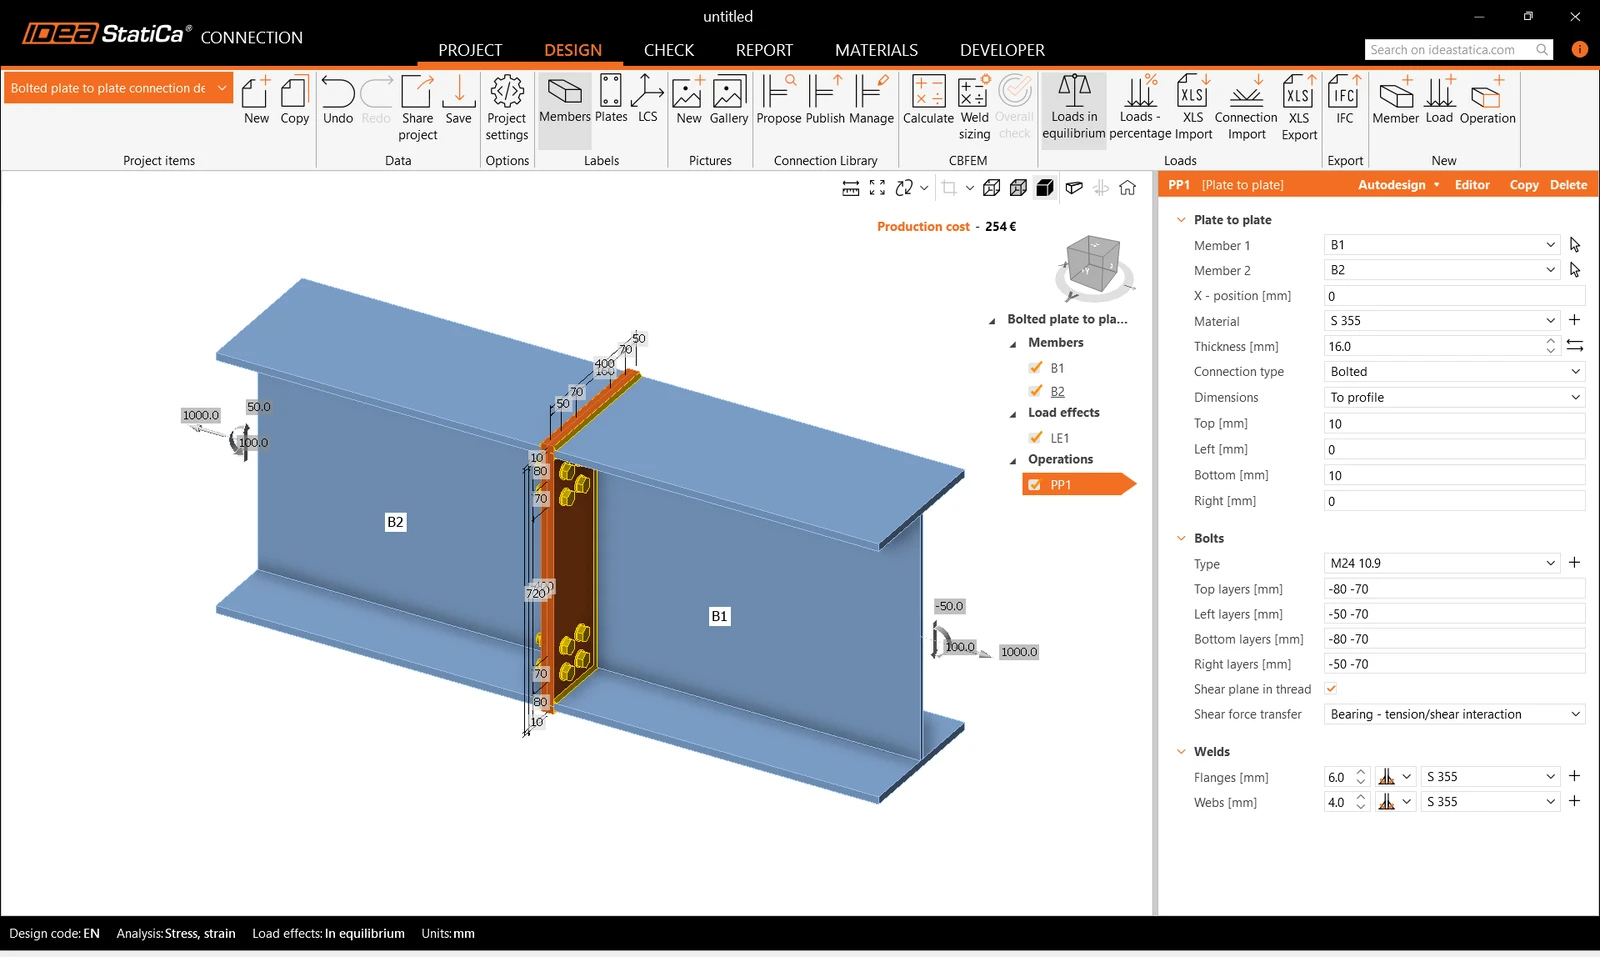
5 Check

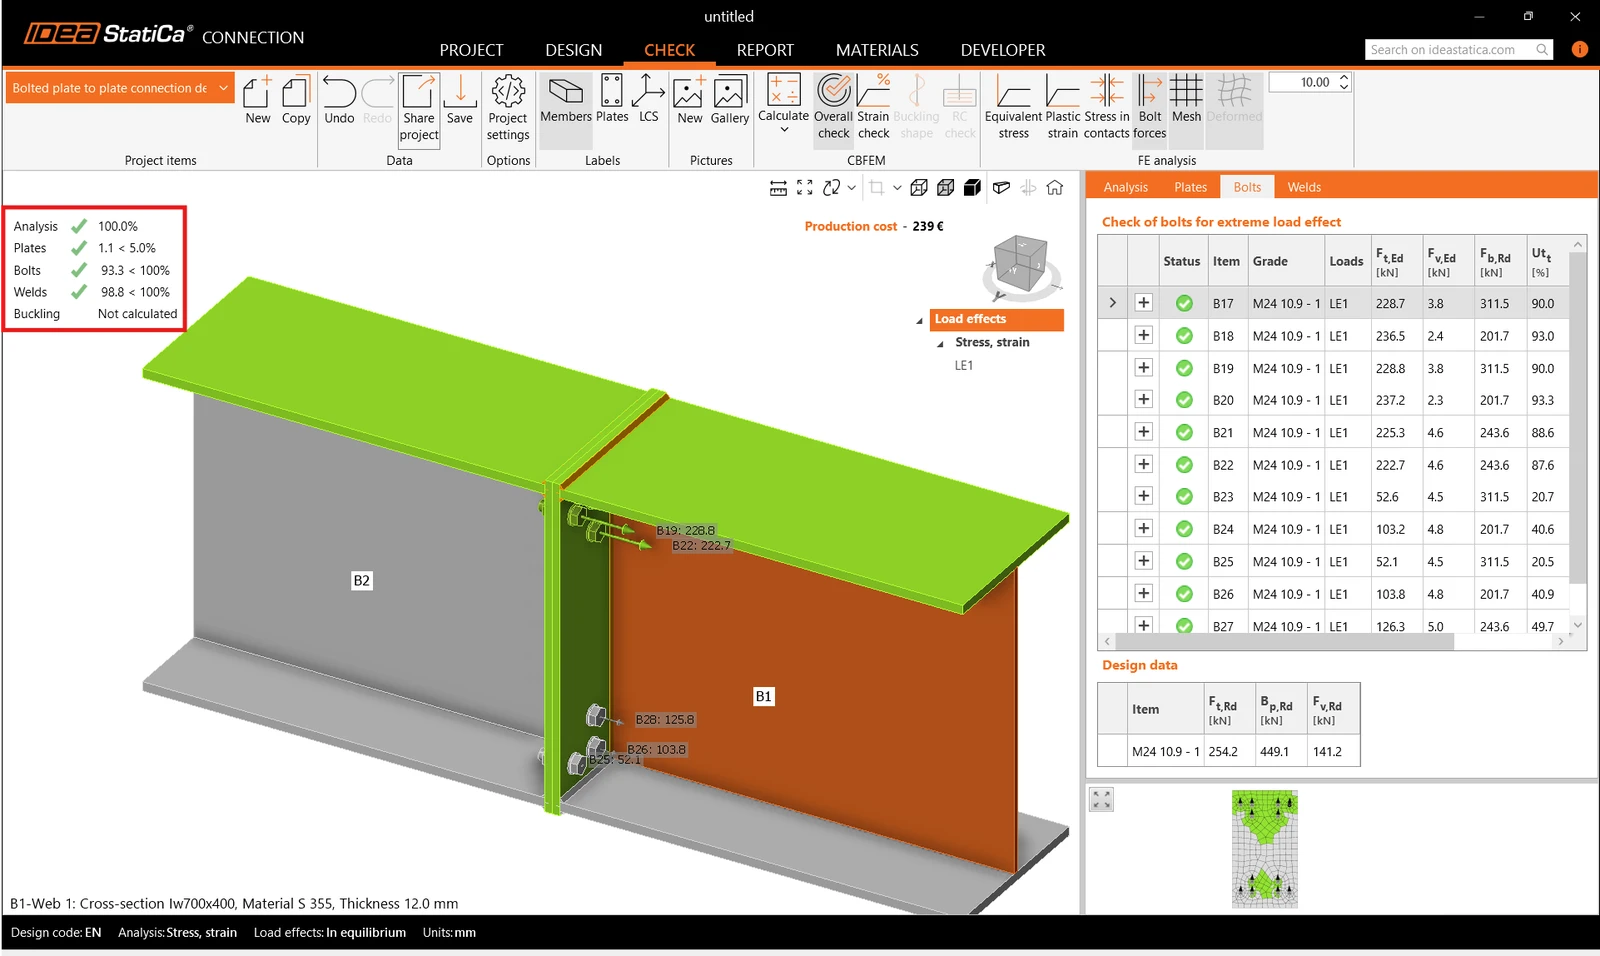
Start the analysis based on CBFEM by clicking Calculate in the ribbon. The analysis model is automatically generated, the calculation is performed and you can directly see the overall check results in the top-left corner of the scene.
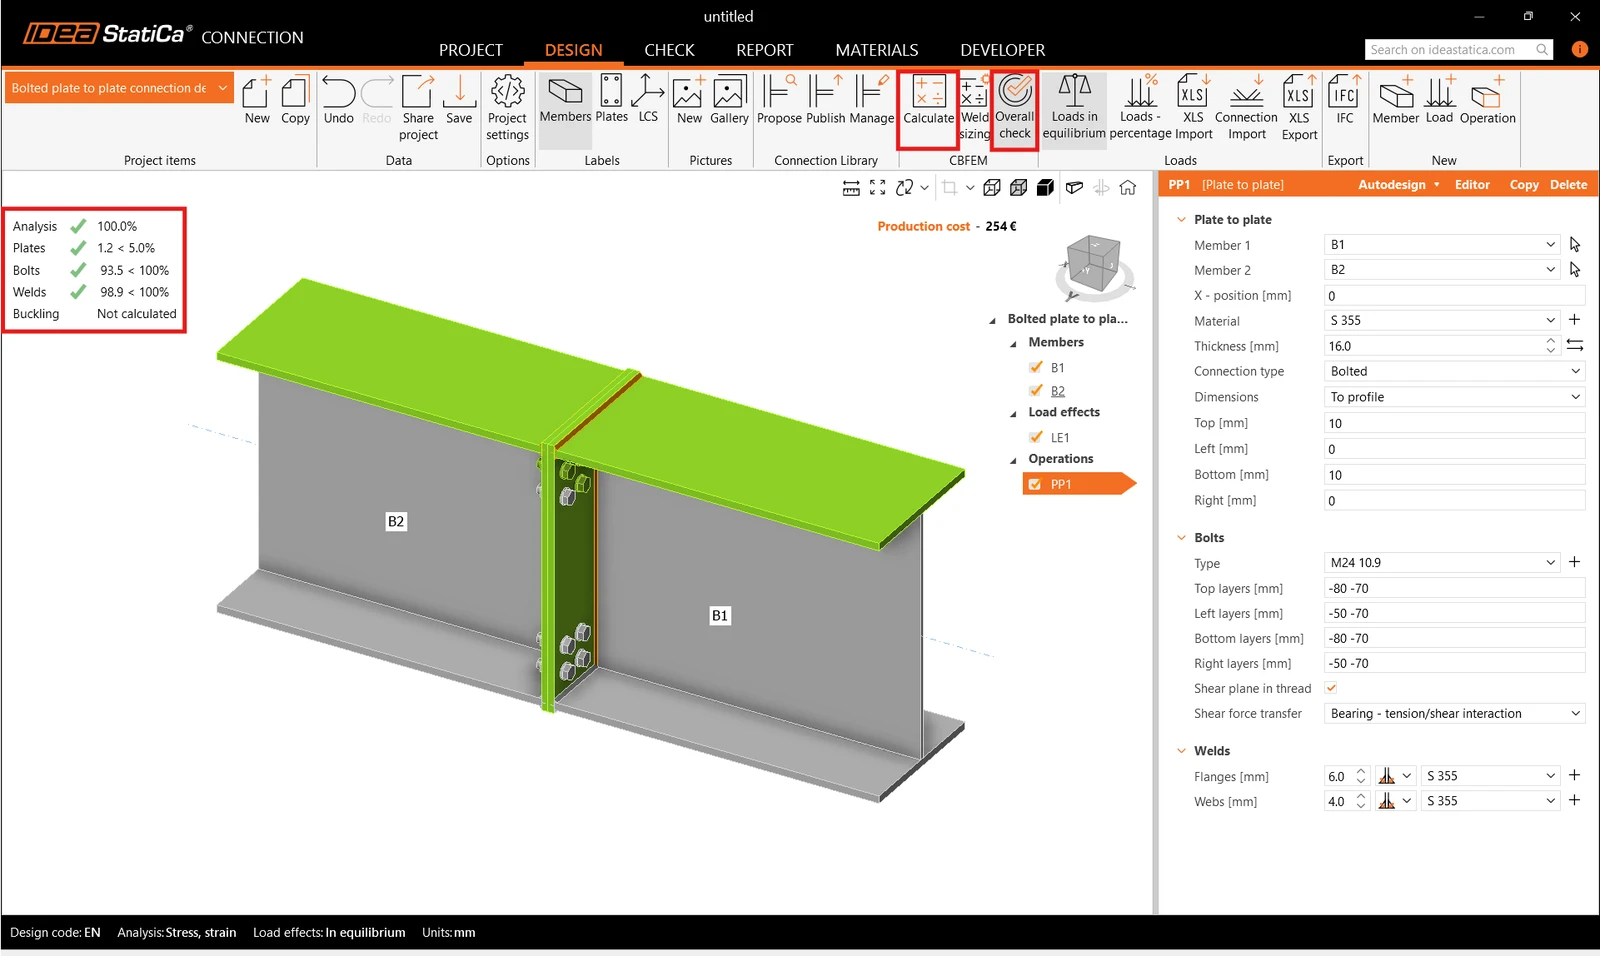
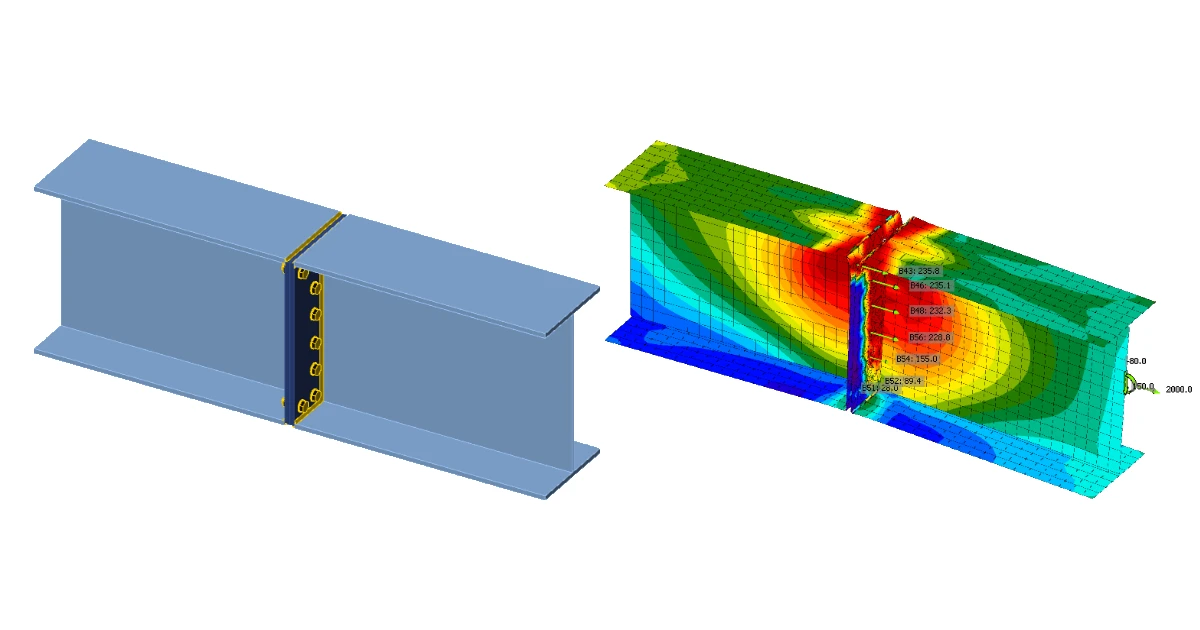
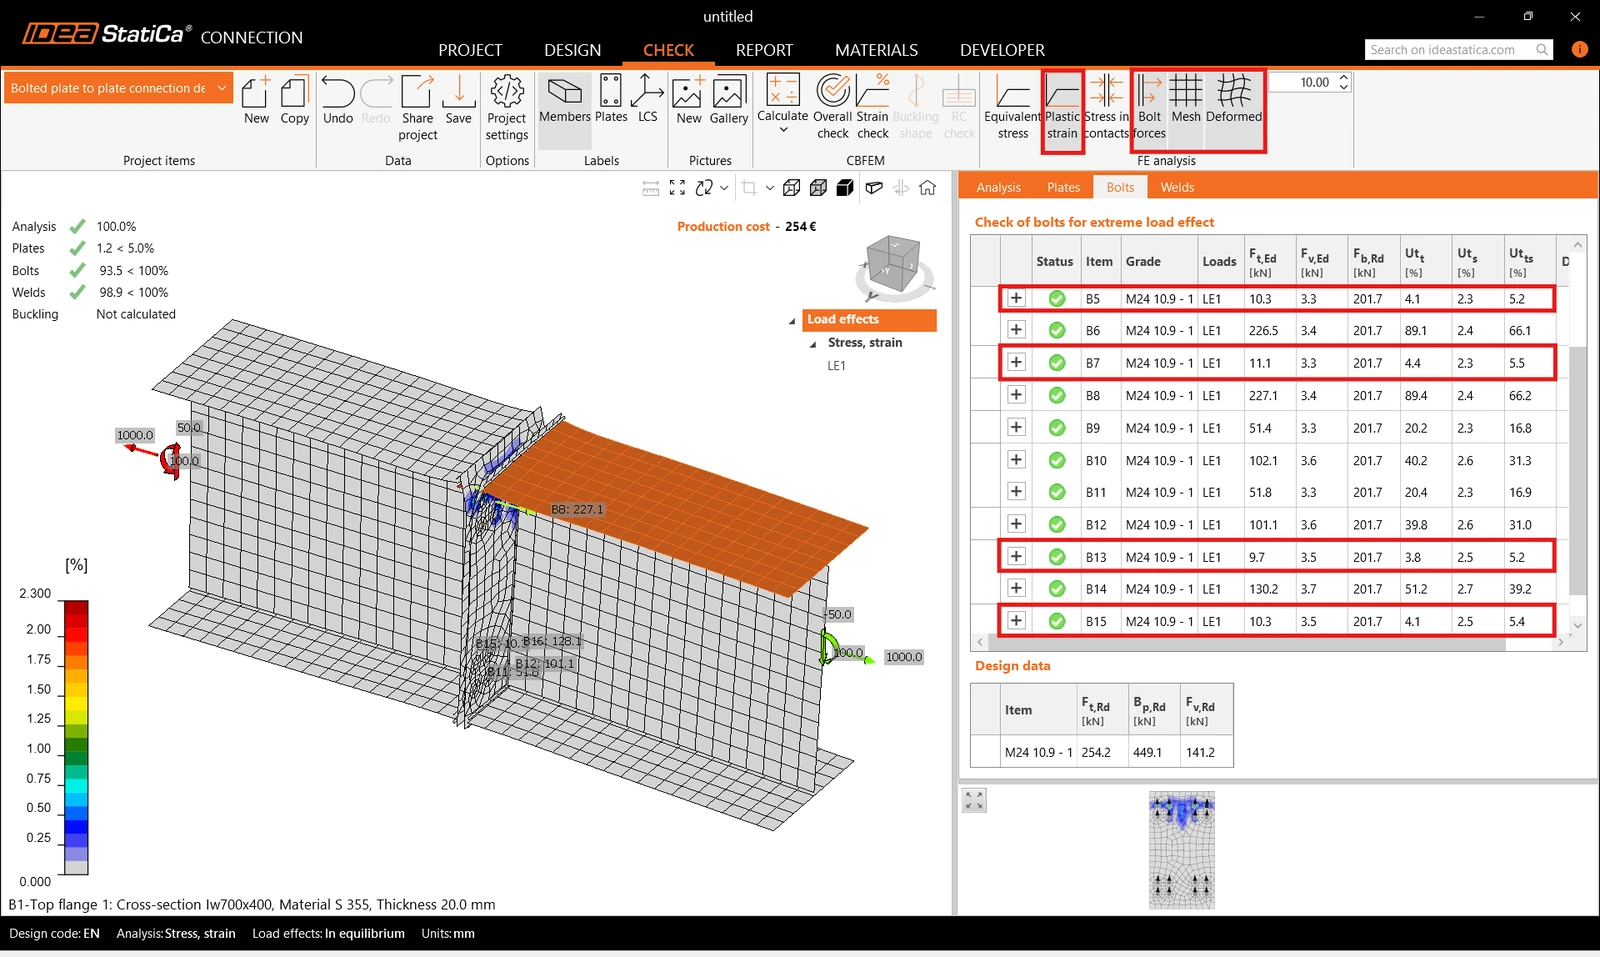
More detailed results can be displayed in the Check tab. Activate the Plastic strain, Bolt forces, Mesh, and Deformed shape in the ribbon to get a full picture of what is happening in the model.

Individual results can be checked in the appropriate tables. E.g., open the Bolts tab to see the utilization of each bolt. You can see that some bolts are almost unused and may be removed to optimize the design.
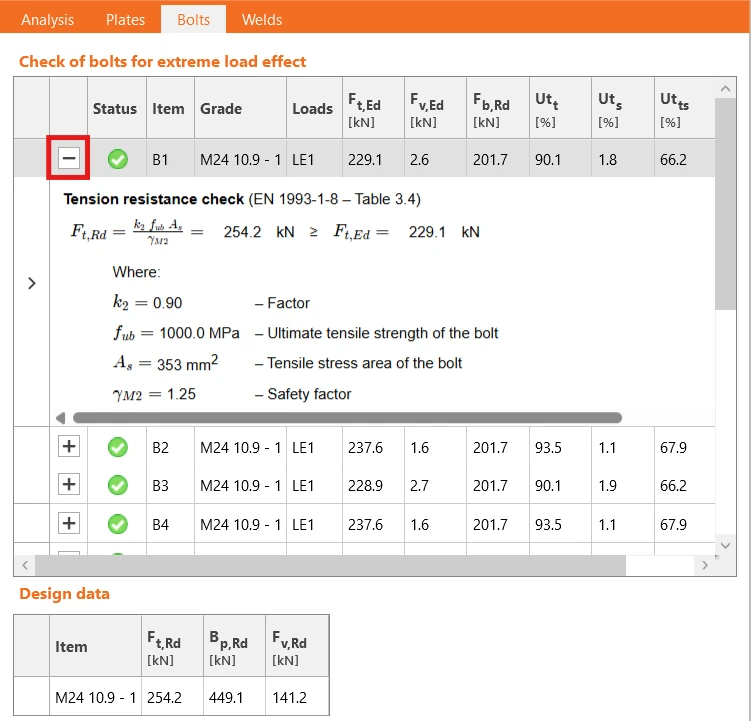
You can also look at the bolt check equations in the expanded menu.
6 Optimization

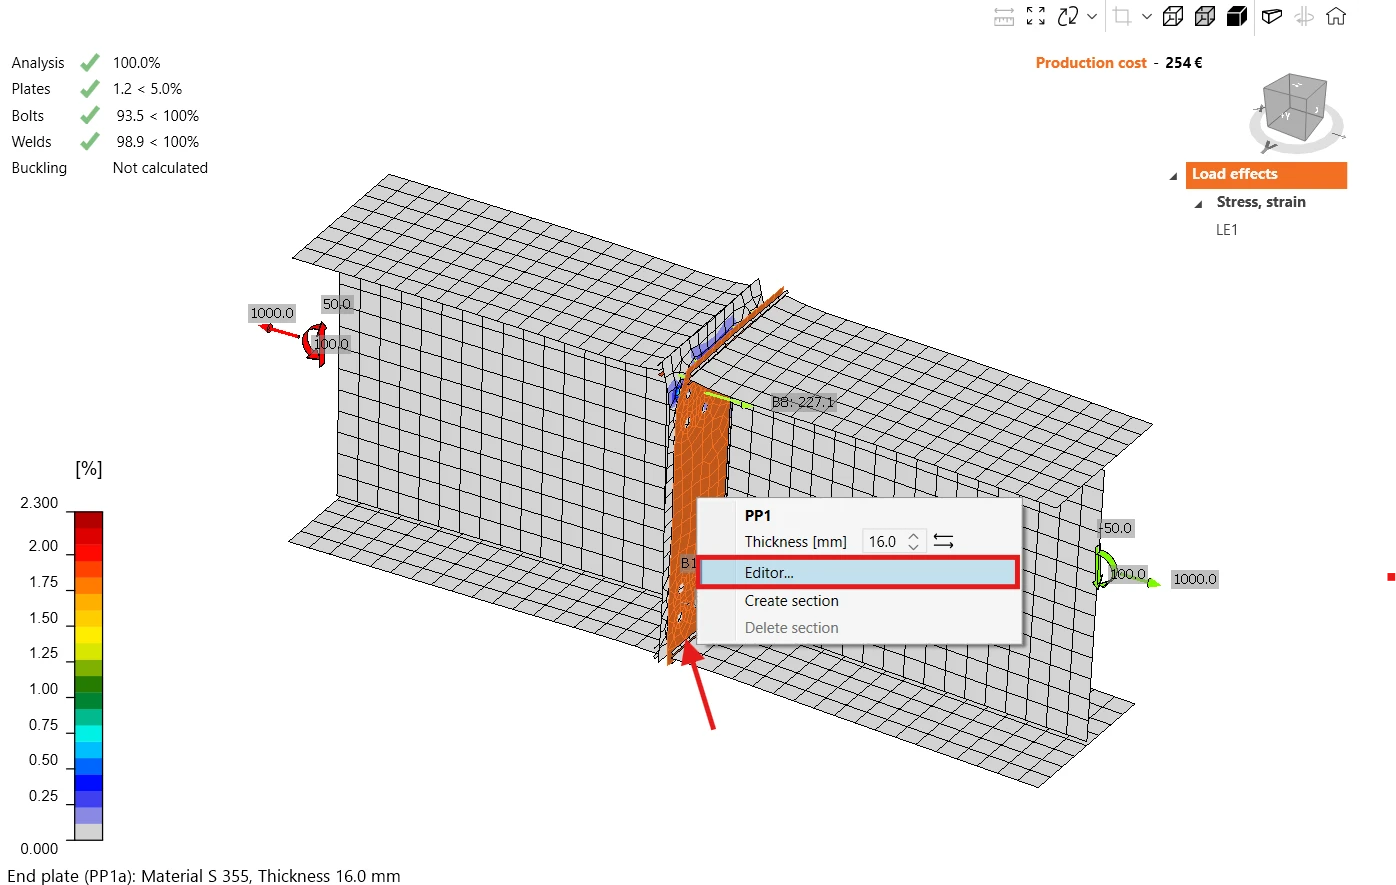
IDEA StatiCa Connection allows easy optimization of the design. You can remove the unnecessary bolts in the plate editor. Right-click on the connecting plate and open the Editor.
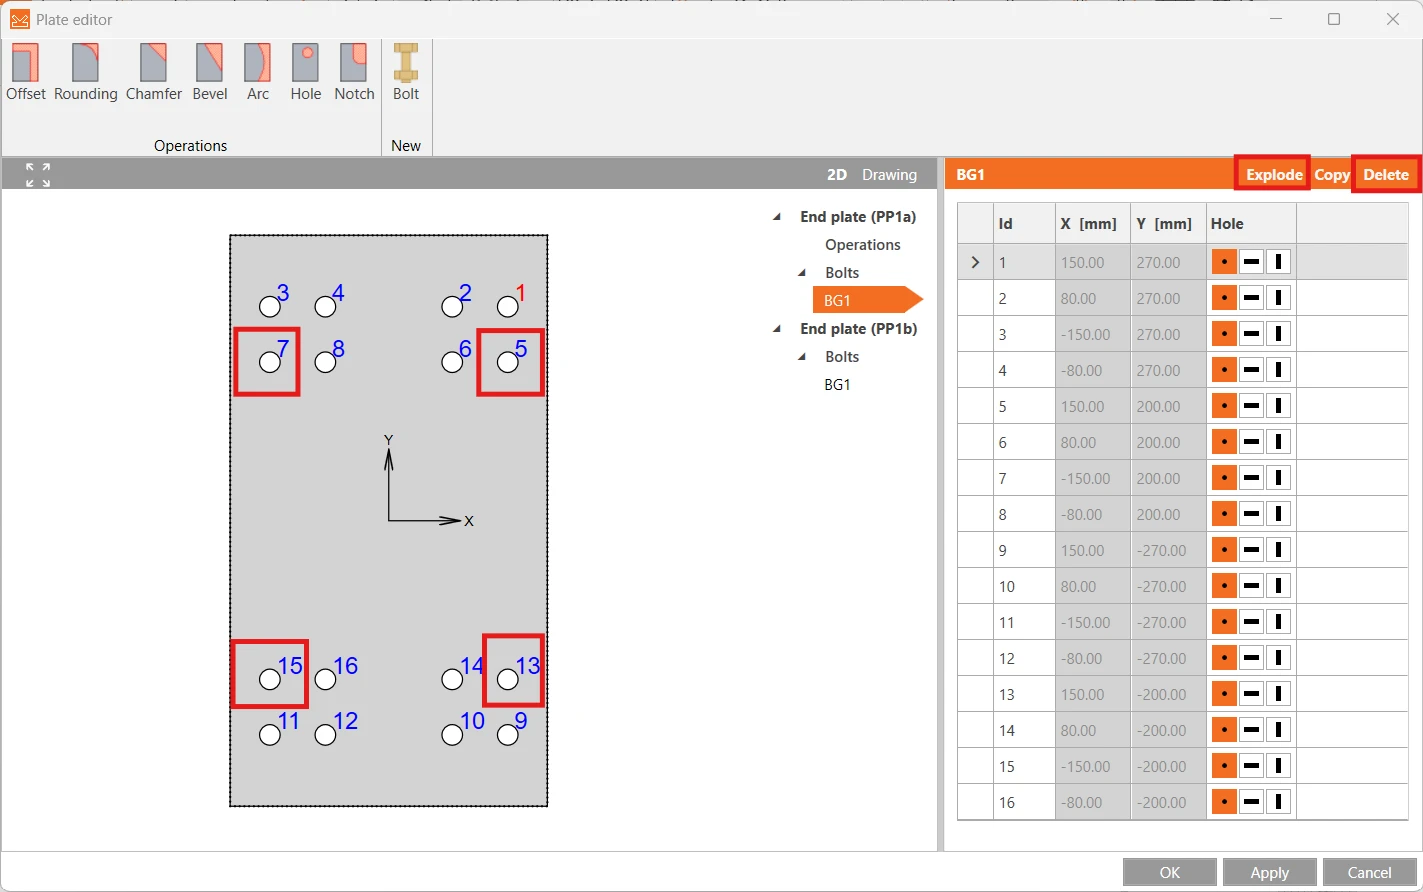
Click Explode above the bolts table and delete the unnecessary bolts 5, 7, 13, and 15.
Re-run the Calculation and check the updated results. The new design passed all the checks, and you saved some of the bolts.
7 Report

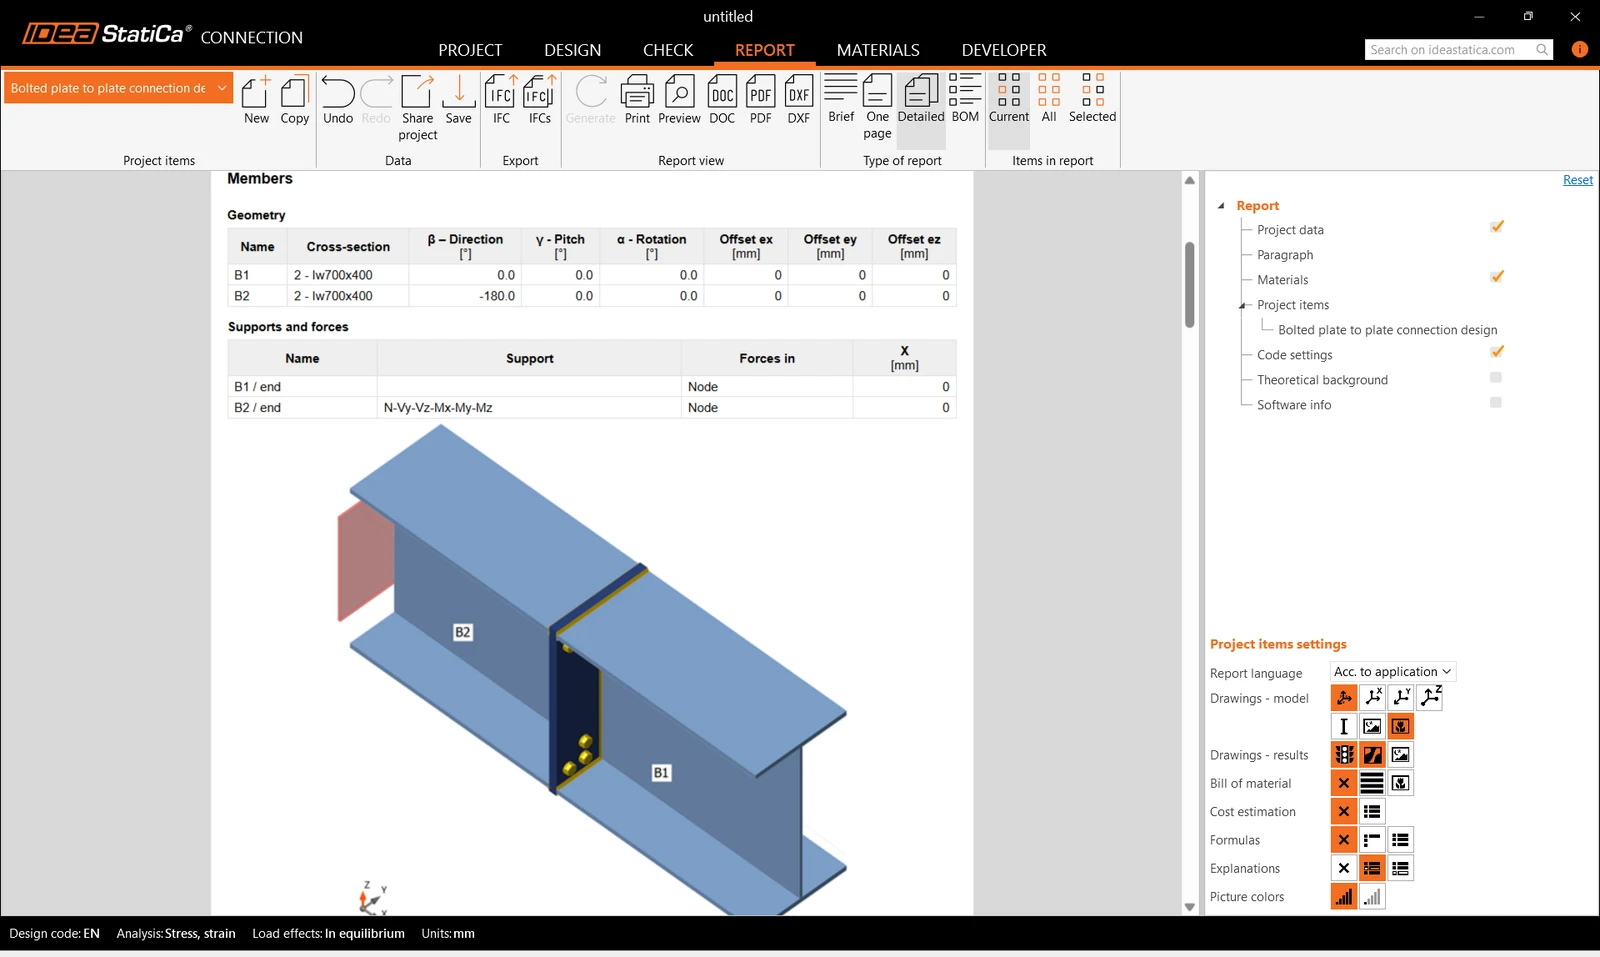
At last, you can review the Report. IDEA StatiCa offers a fully customizable report to print out or save in an editable format.
You have designed, optimized, and code-checked a bolted plate-to-plate connection according to Eurocode (EN).

Open in ViewerDownload

Want to improve your skills? Visit our Campus

Learn how to use IDEA StatiCa effectively with our self-paced e-learning courses

Start learning
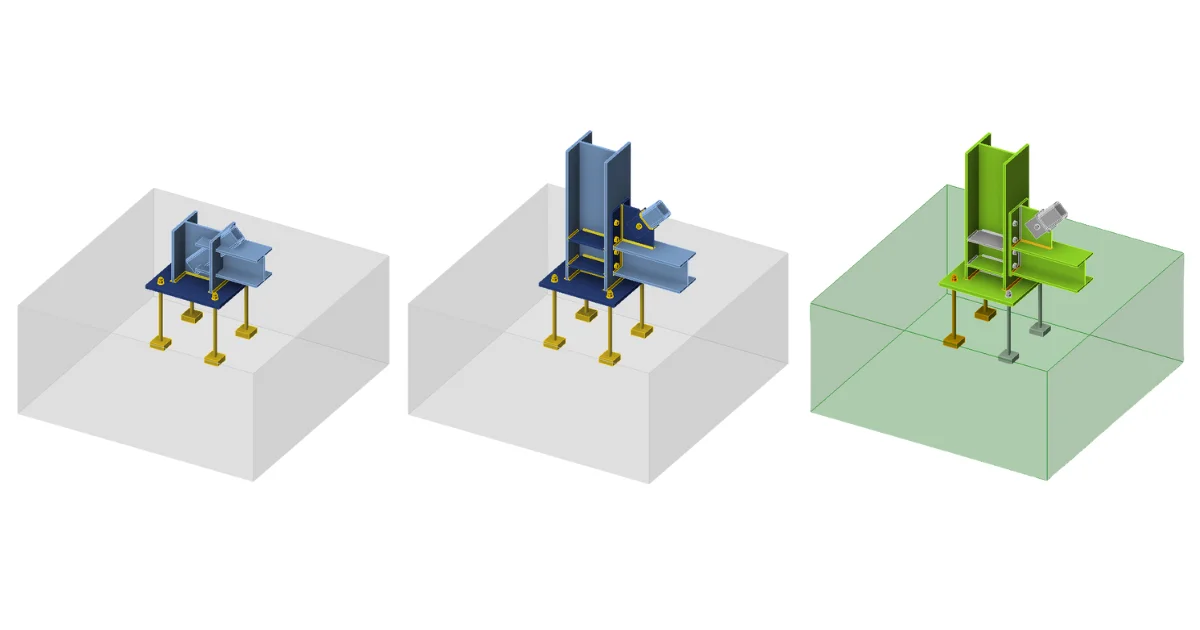
Structural design of footing with diagonal (EN)
  • Steel
  • EN (Eurocode)
  • Connection
  • Anchoring
  • Concrete block
  • Steel-to-concrete
  • +6
  • Steel
  • EN (Eurocode)
  • Connection
  • Anchoring
  • Concrete block
  • Steel-to-concrete

Tutorials

Structural design of footing with diagonal (EN)

Read more
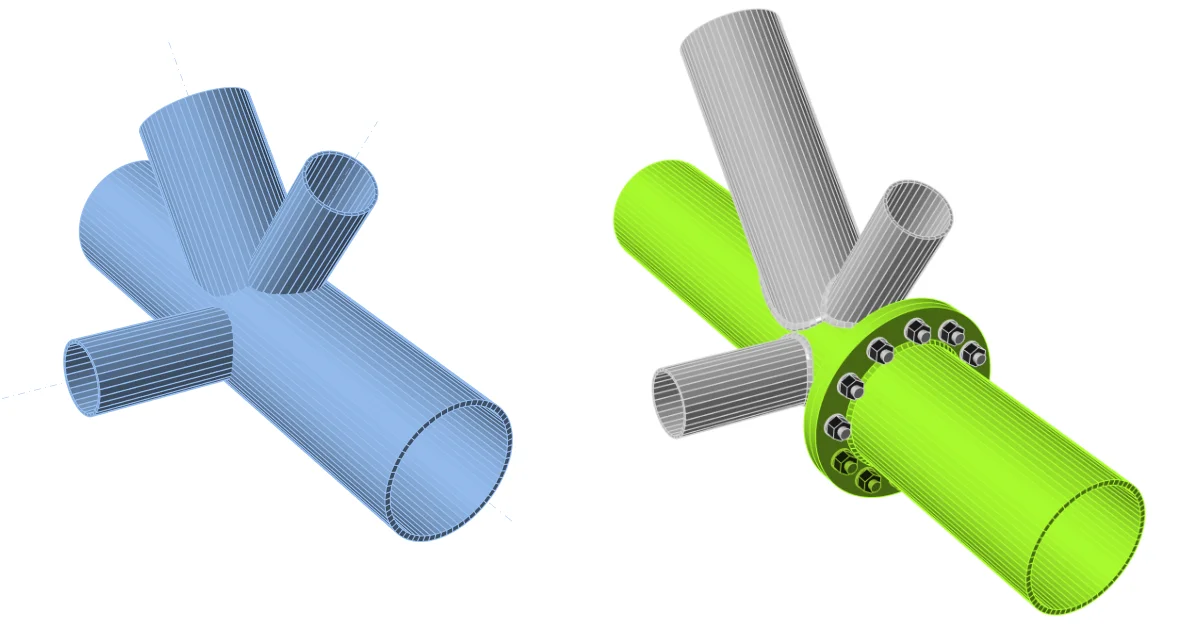
IDEA StatiCa Connection step-by-step tutorial for the structural design of steel connection of a tubular 3D frame.  Structural design of welded and bolted steel connections.
  • Steel
  • EN (Eurocode)
  • Connection
  • Tubes
  • +4
  • Steel
  • EN (Eurocode)
  • Connection
  • Tubes

Tutorials

Connection design of a tubular 3D frame (EN)

Read more
Workflows for preloaded bolts
  • Steel
  • SLS
  • Connection
  • Bolts
  • +4
  • Steel
  • SLS
  • Connection
  • Bolts

Webinar

Summer Series - Workflows for preloaded bolts

Read more
Design and code check of a joint from Jakarta velodrome
  • Steel
  • Modeling
  • Connection
  • Stiffness
  • +4
  • Steel
  • Modeling
  • Connection
  • Stiffness

Webinar

Design and code check of a joint from Jakarta velodrome

Read more