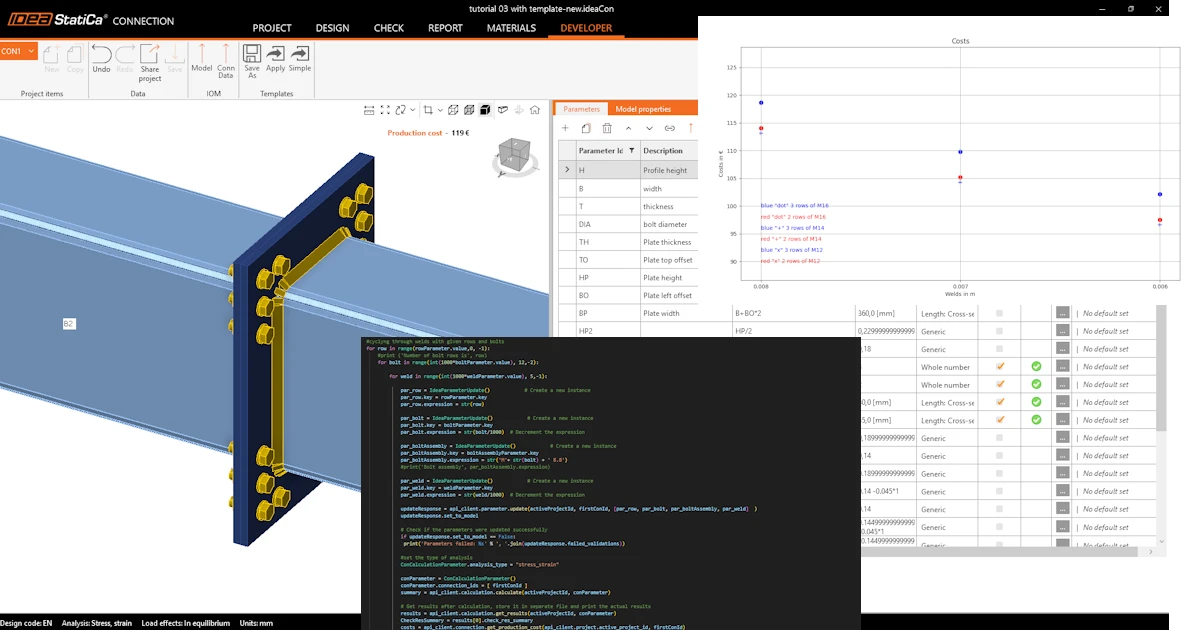


첫 번째 단계
API 및 환경 설정 방법을 안내하는 튜토리얼 API 시작하기 - 기초 01을 먼저 학습하시기 바랍니다.
Connection 파일
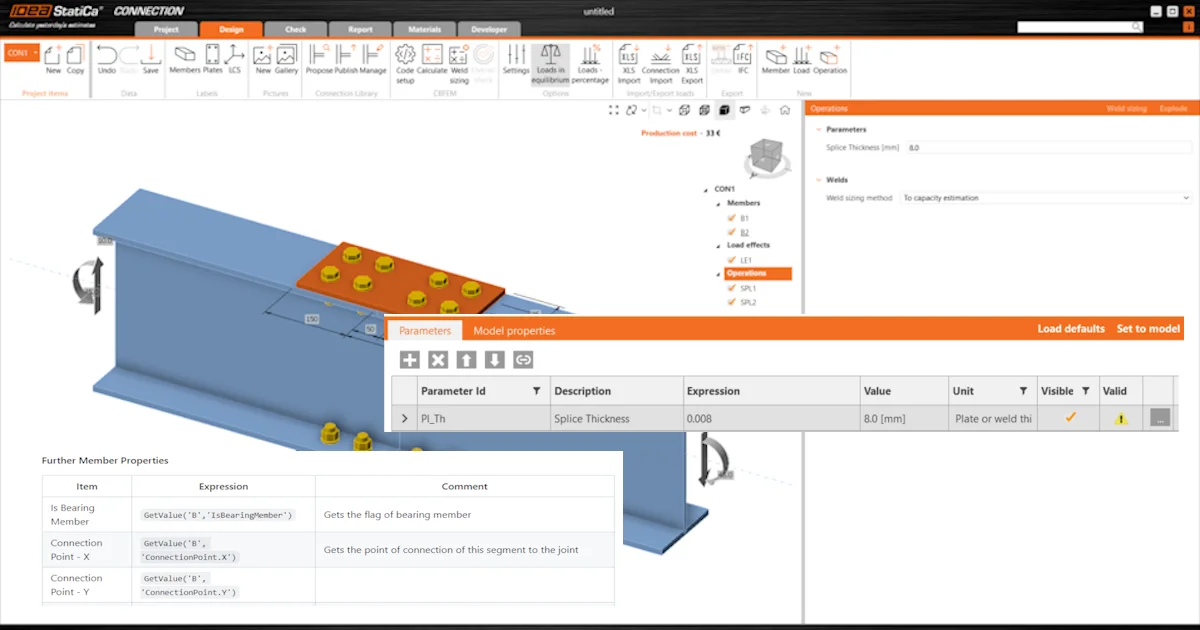
이 예제는 튜토리얼 API 시작하기 - 템플릿 가져오기 및 계산 실행 03에서 생성된 파일을 기반으로 합니다.
파일 tutorial 03 with template-new.ideaCon을 다운로드하십시오.
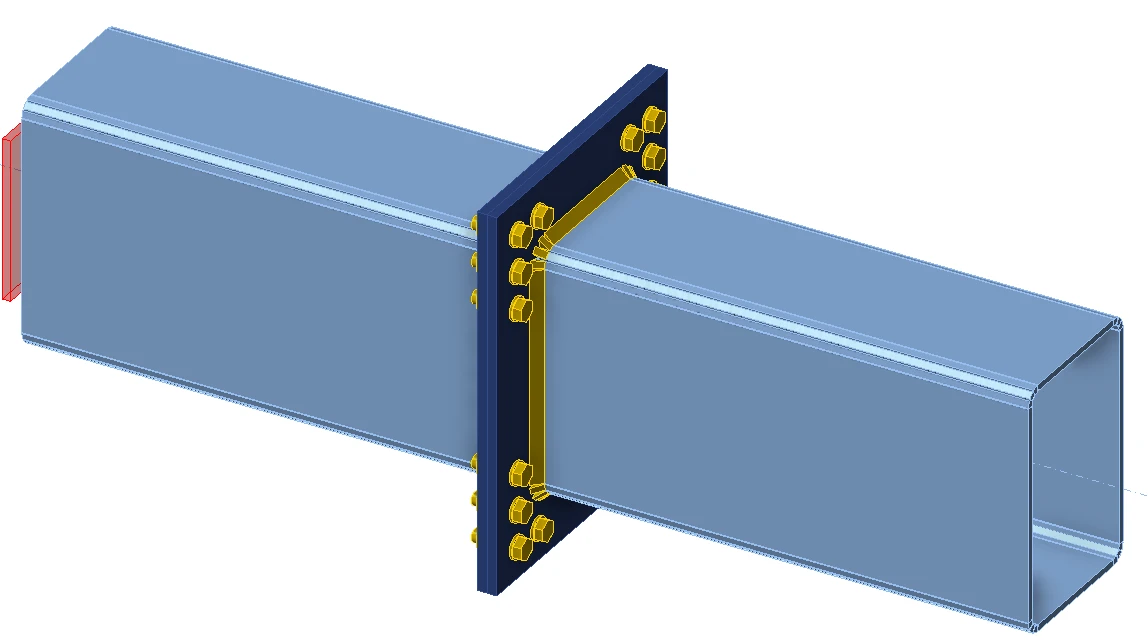
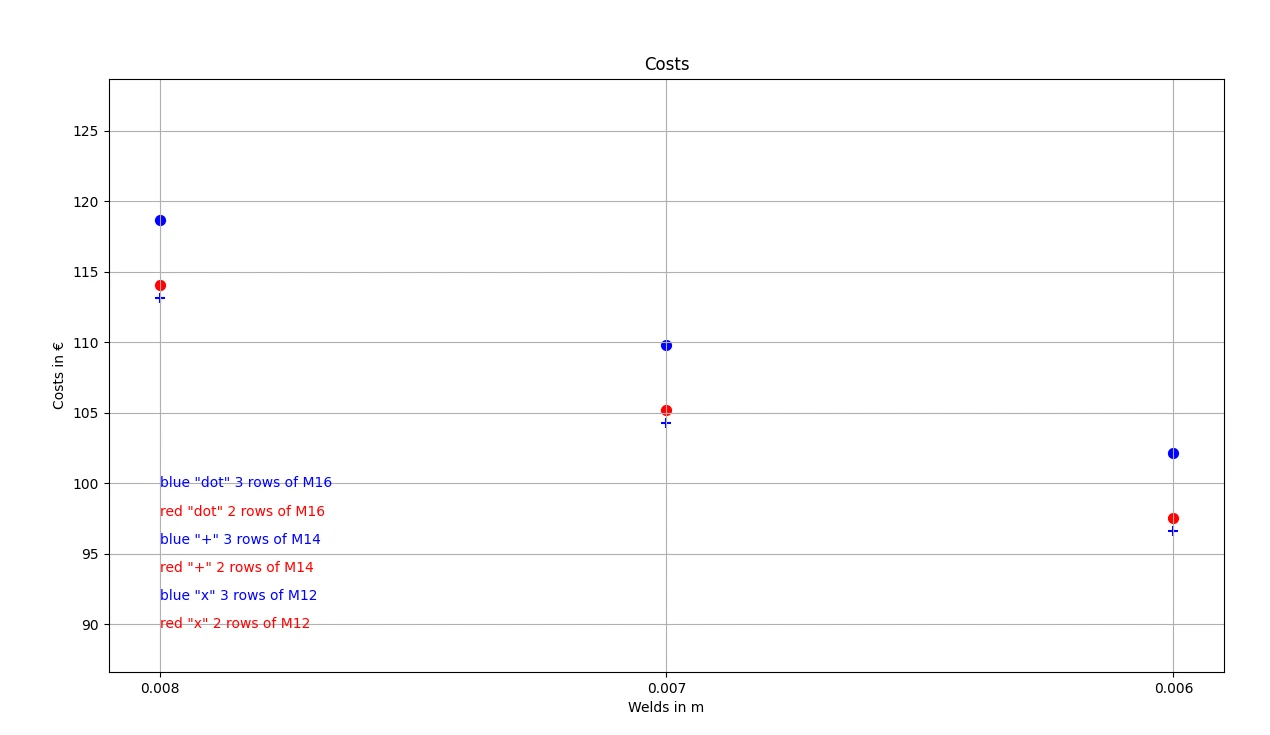
연결의 구성요소(용접, 직경, 볼트 수)를 최적화하고자 합니다. 최적화 결과는 접합부의 비용으로 나타나며, 그래프로 명확하게 표시됩니다.
Python 클라이언트
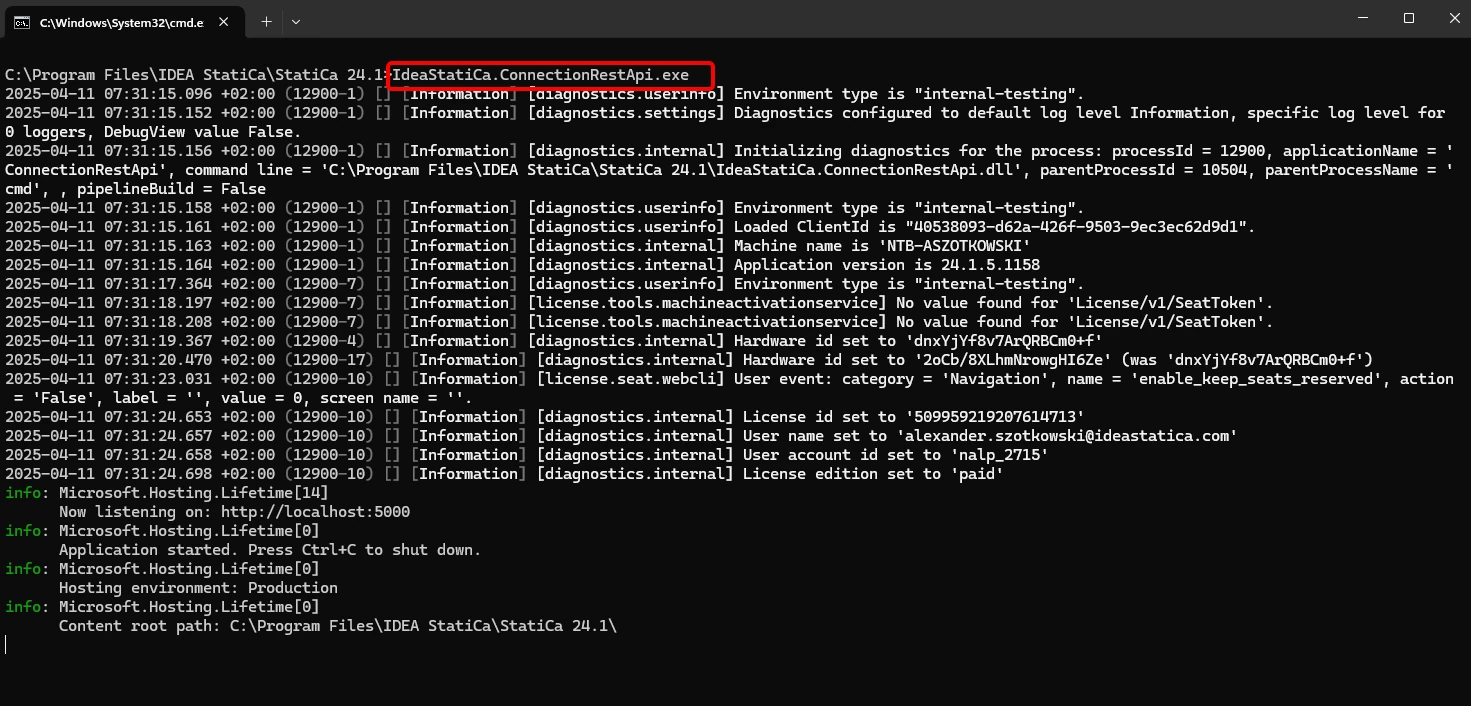
적절한 IDEA StatiCa 폴더 내에서 CMD로 "IdeaStatiCa.ConnectionRestApi.exe"를 실행하고 원하는 IDE 도구를 엽니다.
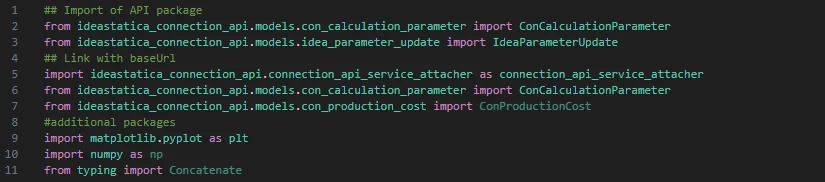
- 새 파일을 생성하고 계산 사용 및 localhost URL 연결을 가능하게 하는 패키지를 가져옵니다.
소스 코드:
## API 패키지 가져오기
from ideastatica_connection_api.models.con_calculation_parameter import ConCalculationParameter
## baseUrl과 연결
import ideastatica_connection_api.connection_api_service_attacher as connection_api_service_attacher
from ideastatica_connection_api.models.con_calculation_parameter import ConCalculationParameterfrom ideastatica_connection_api.models.con_production_cost import ConProductionCost
#추가 패키지
import matplotlib.pyplot as plt
import numpy as np
from typing import Concatenate
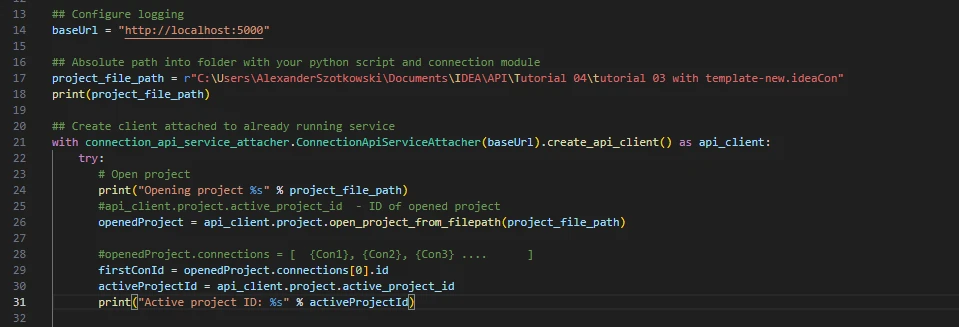
- 로컬호스트를 불러오는 변수 "baseUrl"을 통해 로깅을 구성합니다. 두 번째 단계에서는 IDEA StatiCa Connection 파일의 절대 경로를 연결합니다.
## 로깅 구성
baseUrl = "http://localhost:5000"
## Python 스크립트 및 연결 모듈이 있는 폴더의 절대 경로
project_file_path = r"C:\Users\AlexanderSzotkowski\Documents\IDEA\API\Tutorial 04\tutorial 03 with template -new.ideaCon"
print(project_file_path)
- 이미 실행 중인 서비스에 클라이언트를 연결합니다. try/except 블록을 사용합니다 - try 블록에서 오류가 발생하면 except 블록이 실행됩니다. 첫 번째 단계에서는 프로젝트를 열고 모든 IDEA StatiCa 프로젝트에 고유한 프로젝트 ID를 찾아야 합니다. 그런 다음 파일에 저장된 첫 번째 연결을 선택합니다.
# 이미 실행 중인 서비스에 연결된 클라이언트 생성
with connection_api_service_attacher.ConnectionApiServiceAttacher(baseUrl).create_api_client() as api_client:
try:
# 프로젝트 열기
print("Opening project %s" % project_file_path)
#api_client.project.active_project_id - 열린 프로젝트의 ID
openedProject = api_client.project.open_project_from_filepath(project_file_path)
#openedProject.connections = [ {Con1}, {Con2}, {Con3} .... ]
firstConId = openedProject.connections[0].id
activeProjectId = api_client.project.active_project_id
print("Active project ID: %s" % activeProjectId)
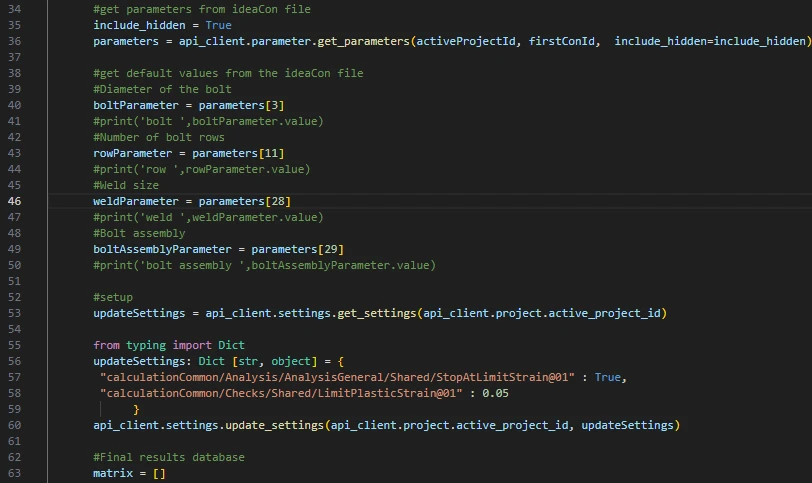
- ideaCon에서 필요한 모든 매개변수(볼트 수, 직경, 용접 크기, 볼트 어셈블리)를 가져옵니다.
#ideaCon 파일에서 매개변수 가져오기
include_hidden = True
parameters = api_client.parameter.get_parameters(activeProjectId, firstConId, include_hidden=include_hidden)
#ideaCon 파일에서 기본값 가져오기
#볼트 직경
boltParameter = parameters[3]
#print('bolt ',boltParameter.value)
#볼트 행 수
rowParameter = parameters[11]
#print('row ',rowParameter.value)
#용접 크기
weldParameter = parameters[28]
#print('weld ',weldParameter.value)
#볼트 어셈블리
boltAssemblyParameter = parameters[29]
#print('bolt assembly ',boltAssemblyParameter.value)
- 모든 부재(플레이트, 용접, 볼트)에 대해 계산이 100% 긍정적인 경우에만 결과를 얻고자 하므로, 한계 변형률에서 정지를 True로 설정해야 합니다. 결과는 matrix라는 목록에 저장되며, 이를 사용하여 그래프를 표시합니다.
#설정
updateSettings = api_client.settings.get_settings(api_client.project.active_project_id)
from typing import Dict
updateSettings: Dict [str, object] = {
"calculationCommon/Analysis/AnalysisGeneral/Shared/StopAtLimitStrain@01" : True,
"calculationCommon/Checks/Shared/LimitPlasticStrain@01" : 0.05
}
api_client.settings.update_settings(api_client.project.active_project_id, updateSettings)
#최종 결과 데이터베이스
matrix = []
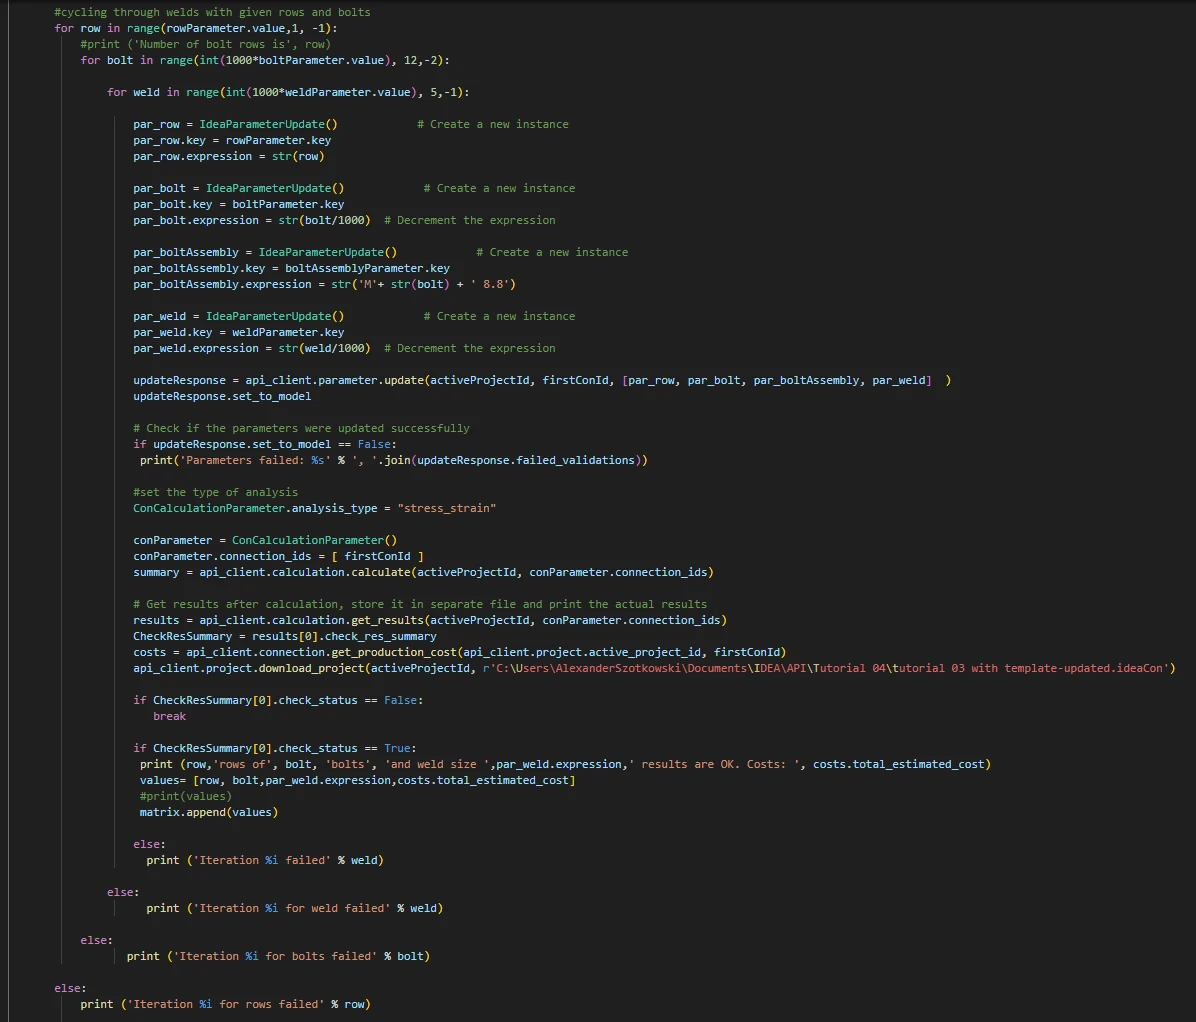
- 이제 용접(t = 8에서 5 mm), 볼트 직경(M16에서 M12), 행 수(3에서 1)를 변경하는 사이클을 시작합니다. 8, M16, 3은 ideaCon 파일에서 가져온 값입니다. 진행 중인 결과는 화면에 출력되고 결과 목록에도 추가됩니다.
#주어진 행 및 볼트로 용접 순환
for row in range(rowParameter.value,1, -1):
#print ('Number of bolt rows is', row)
for bolt in range(int(1000*boltParameter.value), 12,-2):
for weld in range(int(1000*weldParameter.value), 5,-1):
par_row = IdeaParameterUpdate() # 새 인스턴스 생성
par_row.key = rowParameter.key
par_row.expression = str(row)
par_bolt = IdeaParameterUpdate() # 새 인스턴스 생성
par_bolt.key = boltParameter.key
par_bolt.expression = str(bolt/1000) # 표현식 감소
par_boltAssembly = IdeaParameterUpdate() # 새 인스턴스 생성
par_boltAssembly.key = boltAssemblyParameter.key
par_boltAssembly.expression = str('M'+ str(bolt) + ' 8.8')
par_weld = IdeaParameterUpdate() # 새 인스턴스 생성
par_weld.key = weldParameter.key
par_weld.expression = str(weld/1000) # 표현식 감소
updateResponse = api_client.parameter.update(activeProjectId, firstConId, [par_row, par_bolt, par_boltAssembly, par_weld] )
updateResponse.set_to_model
# 매개변수가 성공적으로 업데이트되었는지 확인
if updateResponse.set_to_model == False:
print('Parameters failed: %s' % ', '.join(updateResponse.failed_validations))
#해석 유형 설정
ConCalculationParameter.analysis_type = "stress_strain"
conParameter = ConCalculationParameter()
conParameter.connection_ids = [ firstConId ]
summary = api_client.calculation.calculate(activeProjectId, conParameter.connection_ids)
# 계산 후 결과 가져오기, 별도 파일에 저장하고 실제 결과 출력
results = api_client.calculation.get_results(activeProjectId, conParameter.connection_ids)
CheckResSummary = results[0].check_res_summary
costs = api_client.connection.get_production_cost(api_client.project.active_project_id, firstConId)
api_client.project.download_project(activeProjectId, r'C:\Users\AlexanderSzotkowski\Documents\IDEA\API\Tutorial 04\tutorial 03 with template-updated.ideaCon')
if CheckResSummary[0].check_status == False:
break
if CheckResSummary[0].check_status == True:
print (row,'rows of', bolt, 'bolts', 'and weld size ',par_weld.expression,' results are OK. Costs: ', costs.total_estimated_cost)
values= [row, bolt,par_weld.expression,costs.total_estimated_cost]
#print(values)
matrix.append(values)
else:
print ('Iteration %i failed' % weld)
else:
print ('Iteration %i for weld failed' % weld)
else:
print ('Iteration %i for bolts failed' % bolt)
else:
print ('Iteration %i for rows failed' % row)
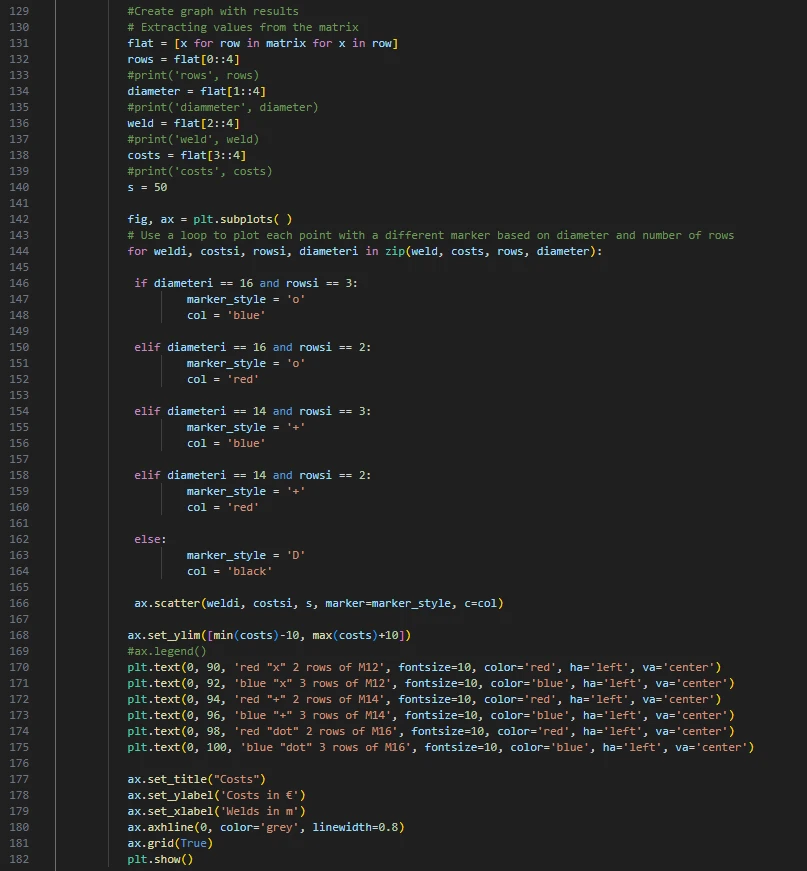
- 마지막 부분은 결과를 이용한 그래프 생성에 관한 것입니다.
#결과로 그래프 생성
# matrix에서 값 추출
flat = [x for row in matrix for x in row]
rows = flat[0::4]
#print('rows', rows)
diameter = flat[1::4]
#print('diammeter', diameter)
weld = flat[2::4]
#print('weld', weld)
costs = flat[3::4]
#print('costs', costs)
s = 50
fig, ax = plt.subplots( )
# 직경 및 행 수에 따라 각 점을 다른 마커로 표시하기 위해 루프 사용
for weldi, costsi, rowsi, diameteri in zip(weld, costs, rows, diameter):
if diameteri == 16 and rowsi == 3:
marker_style = 'o'
col = 'blue'
elif diameteri == 16 and rowsi == 2:
marker_style = 'o'
col = 'red'
elif diameteri == 14 and rowsi == 3:
marker_style = '+'
col = 'blue'
elif diameteri == 14 and rowsi == 2:
marker_style = '+'
col = 'red'
else:
marker_style = 'D'
col = 'black'
ax.scatter(weldi, costsi, s, marker=marker_style, c=col)
ax.set_ylim([min(costs)-10, max(costs)+10])
#ax.legend()
plt.text(0, 90, 'red "x" 2 rows of M12', fontsize=10, color='red', ha='left', va='center')
plt.text(0, 92, 'blue "x" 3 rows of M12', fontsize=10, color='blue', ha='left', va='center')
plt.text(0, 94, 'red "+" 2 rows of M14', fontsize=10, color='red', ha='left', va='center')
plt.text(0, 96, 'blue "+" 3 rows of M14', fontsize=10, color='blue', ha='left', va='center')
plt.text(0, 98, 'red "dot" 2 rows of M16', fontsize=10, color='red', ha='left', va='center')
plt.text(0, 100, 'blue "dot" 3 rows of M16', fontsize=10, color='blue', ha='left', va='center')
ax.set_title("Costs")
ax.set_ylabel('Costs in €')
ax.set_xlabel('Welds in m')
ax.axhline(0, color='grey', linewidth=0.8)
ax.grid(True)
plt.show()
보시다시피, 이 특정 경우에서 가장 경제적인 접합부는 6 mm 용접과 M14 볼트 3열로 구성된 것입니다.